Up next in 10

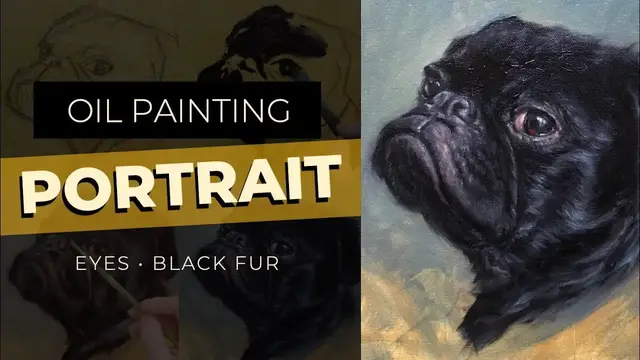
Oil Painting Portrait | A Dog With Black Fur Demonstration (PUG PORTRAIT)
Feb 14, 2023
Pet portrait painting a pug – it may not be easy to say three times fast, but it will be easy to sit back and watch me paint him. You’ll learn my approach to painting black fur, creating a focal point, my painting challenges with oil and how I decide when the painting is “done”.
Here is the link to the complementary blog post for this video: https://shelleyhannafineart.com/pet-portrait-painting-a-pug/
SUBSCRIBE: https://bit.ly/32eSmas
•••• TIMESTAMPS ••••
00:55 Underpainting speeds up
01:49 Midtones in underpainting
02:18 Adding "black" mixing burnt umber & ultramarine blue
02:52 Why I painted this pug
03:36 Building a base for highlights
05:05 Adding definition to the eye
06:16 Modeling the muzzle
08:38 Creating fur with old brushes
09:19 Starting detail work around nose and eyes
11:08 Highlights in eyes
12:53 Modeling around eyes, nose & muzzle
13:34 The cat sneezes
Show More Show Less View Video Transcript
0:00
Hey everyone, it's Shelley Hanna and I'm back with a new video. This time instead of
0:06
painting digitally, I am going back to my traditional roots and painting in oil
0:13
As you can see, I've already sketched in this drawing of this little pug here that I'm painting
0:20
today and I'm starting the video out in normal human speed. After about another minute or so
0:28
I'm going to start to speed up the video because this painting took me, I don't know, maybe over
0:35
three hours to paint total, maybe a little longer than that. If I had just the raw footage
0:44
it would probably be close to four hours with everything, including mixing paints and all that
0:49
stuff. And here we are speeding up a little bit. For this oil painting portrait of a dog I thought I'd just talk over the top and
1:02
have you watch me paint. The purpose of me making this video is also for me to
1:11
learn what I'm doing. A lot of times I don't really feel very confident in
1:16
painting mostly in oils because I hadn't haven't really painted in oils
1:21
that much just in the past couple of years. I painted in acrylics for many
1:27
many years and I was very very comfortable with that medium and so
1:32
painting in oils I you know I don't know all the technical aspects of the medium
1:38
As you can see I start out laying in my dark colors. That's one of the things I normally do
1:50
is start with all my dark areas first and I mixed my black with ultramarine blue and burnt umber
1:58
and if you paint it in oils you know that burnt umber dries pretty quickly and it's very very warm
2:06
right now and my burnt umber decided to dry extremely quickly and you can almost
2:13
see it drying on the canvas as I'm painting and as it dries it gets more and
2:18
more dull. The other thing I'm trying to figure out is how to set up my lighting
2:24
so that I'm not getting a lot of glare and of course you can see some glare
2:29
there right now but I'm going back in and I'm re-establishing my dark areas
2:35
because my burnt umber had dried and gotten so dull that I couldn't really
2:41
see anything anymore. I couldn't see my rich dark areas. So I'm basically painting
2:47
over that and reestablishing my dark areas. This little pug caught my eye
2:54
because I really liked his or her expression and I wanted to capture that
3:00
personality. I like doing portraits especially when there's a strong personality or you you've got some sort of presence with the animal and with
3:14
this one in particular I'm not showing the reference photo because the
3:18
reference photo has a very very bright red background and it's really
3:23
distracting. And the other reason why I'm not showing the photo is because I'm
3:30
I'm so obsessed with trying to match things when I'm showing you guys when I'm painting
3:37
that I'm not just kind of letting loose and having a little fun
3:41
So I'm giving myself a break. I'm not going to show the reference photo
3:46
I'm just going to show you the pug so that I can just paint him and not try to match him
3:53
And I think for me in particular, it's always a struggle to know how realistic I should go
4:01
or how loose I should keep things because I kind of have this idea in my mind that I
4:07
should be a big brush, loose, realistic painter. But in reality, I kind of like to get in to some of those details
4:17
And I think in the end, I end up somewhere in the middle where I have some more abstract
4:23
loose brushy areas at the end of this painting but I do get in there and start to fiddle around
4:32
with some fine areas especially around the eyes which is where I want the focal point to be
4:38
and later on in the painting I'm going to slow it down when we get to the eyes in particular so you
4:46
can see my normal painting speed I think sometimes when you watch these speed painting videos
4:53
it's hard to know how long it takes to actually do one of these paintings
4:59
I had to do a lot of quick cuts there because my head kept getting in the way. You can kind of see
5:07
it down there in the right corner, so I had to cut out my head a lot of times. One of the things
5:12
I'm learning about shooting these videos is where to position things, how to light things, and as I
5:20
was going to say you can see where my burnt umber has really dried into that canvas and I'm going to
5:26
have to go back in yet again and re-establish those dark areas. So that's one of the things that
5:33
I'm getting to know with oil paint is how much medium to use, how quick the paints dry. I know
5:41
that you need to have fat over lean so I'm always trying to start out with a less oily paint and
5:49
build my way up but I am working usually a la prima which means just all in one sitting wet and wet So I don have to worry about it as much But at the same time I don want to get too much medium down on my first pass
6:05
because then I'm not sure how much I put down. And then I feel like I have to add in too much oil later on
6:12
if I have to do this in more than one sitting. At this point in the painting, it's really starting to come together
6:19
You're starting to see the expression of the dog. you do see a lot of that burnt umber, the redness in the background which is fine. It's a nice
6:29
contrast to some of the lighter blue parts and when painting a black dog or a black animal
6:38
I think it's always a little bit challenging to know what color the highlights are but
6:45
if you just stop and look at the color instead of what you think the color is
6:51
you can match those colors pretty easily and for this pug in particular there was some it was a
6:57
high contrast photo so there were some very dark black colors and then this very shiny almost
7:04
whitish blue on top of the fur and I decided to not paint it as contrasty as what I was seeing
7:13
because I just thought it was too much and that's another reason why I'm not showing you the photo
7:40
And what a surprise
7:49
I'm having to go back in yet one more time to establish these dark areas
7:56
What I did this time was I just went ahead and started using the ivory black because
8:02
it's just going to hold that tone a little bit better than mixing my black
8:08
Clearly my burnt umber is on its last leg and I need a new tube or something
8:17
The burnt umber serves as a nice base. I think I'm glad that I used it because it's basically a red
8:22
And so I've got all those reddish tones underneath of there, which are really helping me to build out the facial features
8:32
and have some nice, interesting color plays going on. One of the things you can see there is that I am using terrible brushes in the beginning
8:44
and that was on purpose so that I wouldn't get too ahead of myself and try to get too
8:51
detailed ahead of time. So I've got these old brushes that are in terrible shape because I haven't taken very
8:57
good care of them and they're all splayed out but in some ways they're great for getting
9:03
started on a painting, especially with an animal or something furry, because you get all these weird
9:11
wispy brush marks. So, and here I am switching into a more refined thing. I really could not wait
9:20
to get in and start working on some of those details, because one of my things is I, like I
9:27
said before, I'm not as confident with oil painting, and there's this part of me that just wants to have
9:33
one part of the painting that looks really finished so that I feel like I have something
9:39
successful on the canvas and something to look at. And for this painting, I'm trying to be more
9:45
measured in my approach and I'm trying to do things the way I would teach them for somebody else
9:51
on the eyes here we've got what I'm doing is adding some cad red in there and then I go back
10:03
in and overlay with a black that has some medium in it and as you can see that's deepened it up
10:14
even more and I realized my blacks still are not deep enough so I went back in one more time
10:23
and you know this is part of learning as you're painting I'm learning as I'm going here normally
10:29
I'm very successful with painting black backgrounds but for some reason with this pug
10:35
I don't know what was going on it is super hot in this area right now and I think
10:41
the room temperature has a lot to do with what is going on here. I think some of the other
10:48
paintings that I've done have always been, it's been cooler. So the oil paint does not dry as fast
10:54
but what I tell you, it is just drying super fast. And then I'm, like I said before, I am
11:02
trying different things with the lighting. So that's why you're going to see the lighting
11:08
go back and forth. I switched out some lights so that's why it got a little bit
11:14
more blue. I'm trying to keep a neutral lighting color. Here you can see I'm painting the eyes and getting in with some of the detail
11:26
I started out with kind of too big of a brush and it got a little bit blobby in
11:32
there and now I'm going back in with this smaller brush and this brush is not
11:36
It's not a great brush either, but I like the long handle on it so I keep painting with it
11:42
And I think it's okay that it's not that great because I'm getting a more abstract stroke when I'm painting
11:55
Maybe in a couple weeks or so I get some new brushes and treat myself but for right now I
12:03
teaching myself a lesson that you got to take care of your brushes so that when you do a painting
12:09
video people won't make fun of your brushes. And if you want to make fun of my brushes feel free
12:15
to leave a comment below. What I'm going to be doing is going back and forth all over these
12:25
little areas and just kind of noodling around with things. I don't really stay in one place
12:32
and finish it off. I've done that with paintings before but on this painting I was really kind of
12:39
all over the place fiddling around with different areas you know just trying to
12:45
work my way around and figure out what I'm doing when I draw I like to do the scribble technique and there's a part of me that
12:58
really likes to almost scribble with paint as well so I think part of my
13:03
style is this a little bit of a scribbly style. I'd like to think that I could do those structured big brushstrokes, but I just
13:25
don't think that that's who I am. I like to noodle around. I don't know if you could hear that. That was my cat sneezing
13:40
It's funny that she sneezed right over when I was tickling the nose on this little pug
13:49
I don't think I mentioned the color palette I used. It's a pretty limited color palette
13:55
I did start off the canvas using an acrylic yellow ochre wash and a lot of times I'll
14:03
start my painting with acrylic underpainting even doing the value study underneath in
14:11
burnt umber and building that up first and maybe I'll go back to doing that again because
14:18
I feel pretty comfortable doing that and then for this painting I did use the burnt umber mixed with
14:27
Ultramarine Blue and that was an attempt to mix my black color and because my burnt umber is so dry
14:36
I was experiencing a lot of that dullness happening early on. I did thin it down with a little bit of
14:44
Gamsul so that's probably why it was drying so fast. Then I'm using Ivory Black for some of my
14:51
deepest colors. I'm using a cad red and that is around in the eye area and you'll see that also
15:00
a little bit in the muzzle area. Mixing that with some yellow ochre and sometimes with some burnt
15:07
umber. And then for my white I'm not using a regular titanium white. I'm using an M-gram
15:17
warm white. All my other painting colors are from Gamblin but and they're the
15:24
artist grade colors but the warm white is kind of nice because it keeps me from
15:30
getting too bright in my highlights too fast. What you're seeing right now is I
15:39
did go in and get a little bit of titanium to add in that super bright area
15:46
so that those would pop off a little bit more. And then I did also introduce a
15:54
color that I don't use very much and it's cobalt teal and I use that to mix in
16:00
with the warm white for some of the highlight colors. As promised earlier, I slowed this down to my normal speed of painting, which is super
16:25
slow I think. But what I'm doing is I'm taking a lot of time to look at my subject before I make a mark
16:34
I did cut out some of the areas where I've stopped to just look because 20 seconds of
16:42
my hand just not doing anything is a little bit weird. But I think it's important again for you guys to see how slow the process actually can be
16:53
I wish I could paint at bionic woman's speed because I get a lot more done, but I don't
17:00
think my brain could think that fast. Anyway, back to the colors. For my medium, I have a mixture that I found online for a slow dry medium
17:11
that I've been using. It's mostly linseed oil and it has a little bit of clove oil in it. And then I
17:21
did use the Gamblin solvent-free gel a little bit, not a whole lot, but I wanted to create a little
17:29
bit of body with the paint. I don't know that I actually achieved that but I did have quite a few
17:34
layers on there so it looks like a painting but I don't think that I'm seeing a real impasto type of
17:41
painting look there. I am planning to write a blog post that goes with this video where I'll
17:50
take some screenshots and maybe explain a little bit more in depth about what I doing and some of the materials I use So when I get that up in a few days I make sure to include a link down below
18:08
So if you want to check that out, you can head over to my website, shelleyhannafineart.com
18:14
and read a little bit more about it. this stage of the painting, it's really in the detail area. And this is where I start to wonder
18:29
okay, how far do I want to go with the high realism? And because I do like a more loose and
18:38
brushy look to my paintings and trying to decide between, oh, do I keep it loose and more unfinished
18:50
in areas or do I really go in there and sharpen things up? You know, it really varies from painting
18:58
to painting. I think when you're painting animals, it's good to keep parts of it very loose and for
19:05
For me, I just concentrate a little bit more on the eyes
19:34
I am going in and brightening up some of these highlight areas. They're much darker. What I'm
19:43
painting is much darker than what I see in the photo, but again the photo was way too high
19:49
contrast and I think it would have made this painting a little bit too chaotic. Also the
19:55
photography that you're seeing is making things look more contrasty than what the real painting is
20:04
I'm just going in and blending out some of these areas and you know re-establishing some of the
20:16
highlights making them a little bit lighter here I'm using a little bit larger brush because again
20:23
I don't want to get too fine and detailed in areas I don't want people looking in areas that
20:30
I don't want them really focusing on so I want to keep those kind of loose and
20:36
messy so that the eyes are the real focal point that's what my plan is when
20:44
I do portraits I make sure that the eye is the focus and then add in details
20:52
where I think it needs it but at this point I'm really wondering okay do I
20:58
start adding in little hairs and make things really refined or do I keep it as is and when
21:07
I start to go back and forth battling that I'll usually have to walk away from it maybe even for
21:14
a day and then decide. There I'm adding in even brighter highlights
21:39
This is still the warm white though. I'm not using the titanium on this but the camera is kind of reading it more as a bright white
21:48
It's more warm and soft and then you see that I thought that it's a little bit too bright
21:55
so I blend it. And then I go back in here because I'm like, I'm getting too detailed and so I need to mess this up a little bit
22:02
Because I don't want people to focus on that part of the face where those little brush marks are
22:11
So it's just a matter of making decisions about where you want the eye to go
22:17
But still having a structure to the face that is believable. And then once again I've changed the lighting so it's looking very blue here
22:31
I read an article about lighting when I took a break and so I readjusted my lights yet again
22:39
What you can see though is that the black areas are richer so that's a little more accurate
22:48
from what the last shot was. And then, you know, I'm just fussing around with this eye area
22:56
because I do want that to be the most noticed part of the painting
23:01
I also want to keep it painterly. I don't want it to get to the hyper-realism stage
23:11
I think it's really cool what people do with hyper-realism. It's just not what I do
23:18
here I'm just doing a sweep across the face so that you can see how loose my
23:27
brush marks really are nobody would ever see this this close-up and obviously
23:32
there's no varnish on here so some there's some dull areas in there that
23:36
will deepen up when I varnish it but I think overall this little pug turned out
23:43
pretty nice if you like this video hit like and subscribe below and head over
23:48
to shelleyhannafineart.com for more tutorials
#Arts & Entertainment
#Visual Art & Design
#Painting
#Hobbies & Leisure
#Pets