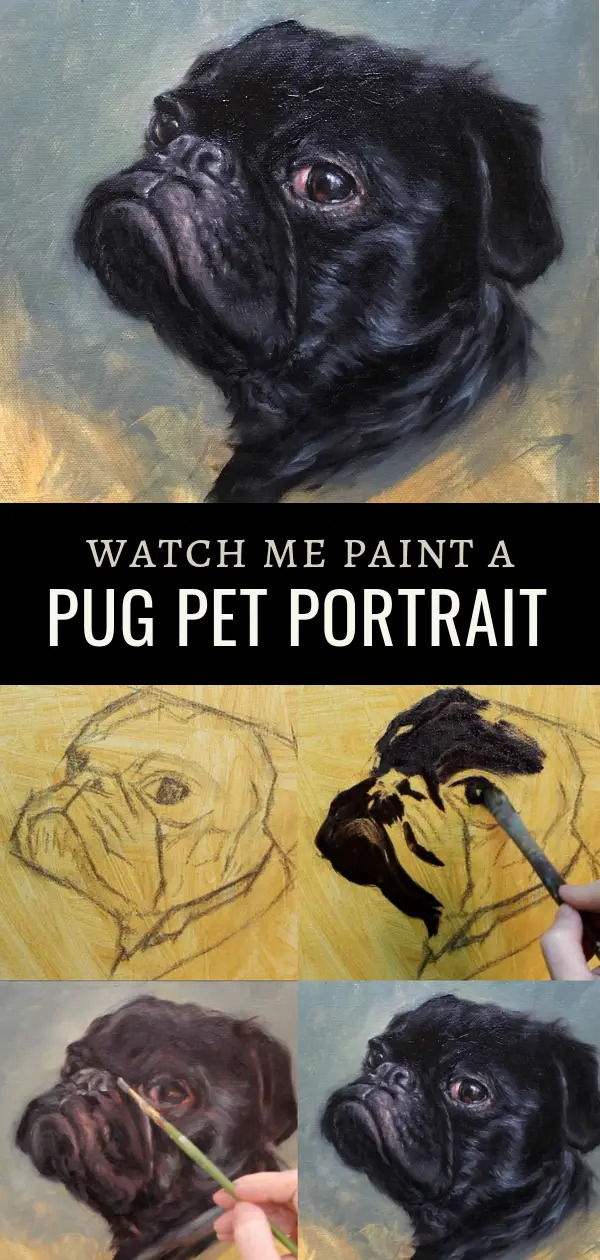
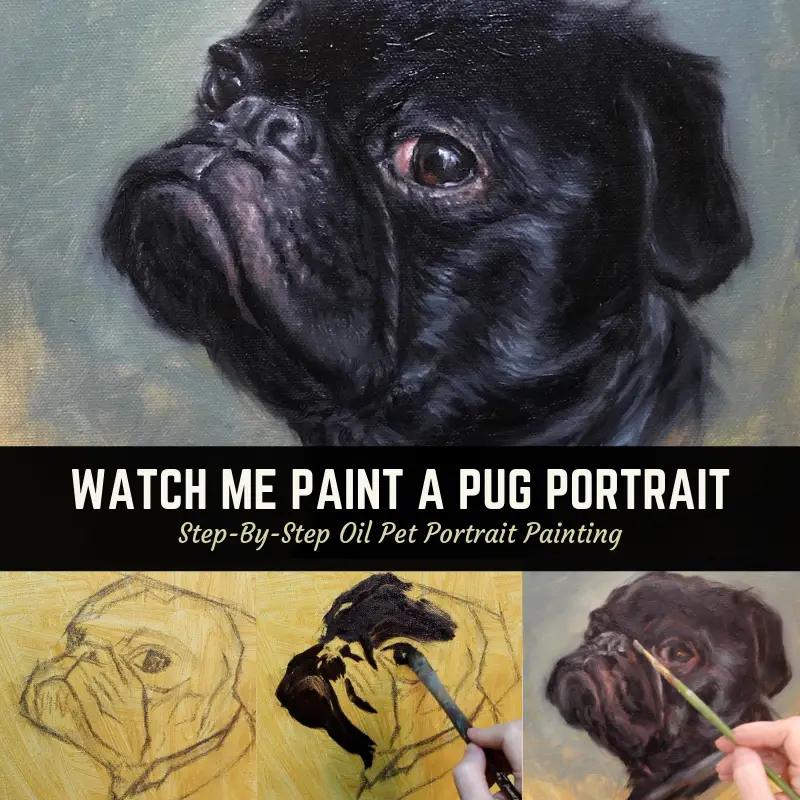
Pet portrait painting a pug – it may not be easy to say three times fast, but I’ll make it easy to go through each step. You’ll learn my approach to painting black fur, creating a focal point, my painting challenges in oil and how I decide when the painting is “done”.
All of the images from this article are screenshots from a video I did while painting this pug. The video should appear on the screen somewhere on this page, but you can always head over to my YouTube channel to see the full video.
Note: Some of the links in this article are affiliate links. I may receive a small commission if you use them to purchase items. By doing so, you are supporting a fellow artist. I’m so grateful for your support. For more of the supplies I use, visit my supply page here.
Pet Portrait Painting – Getting Started
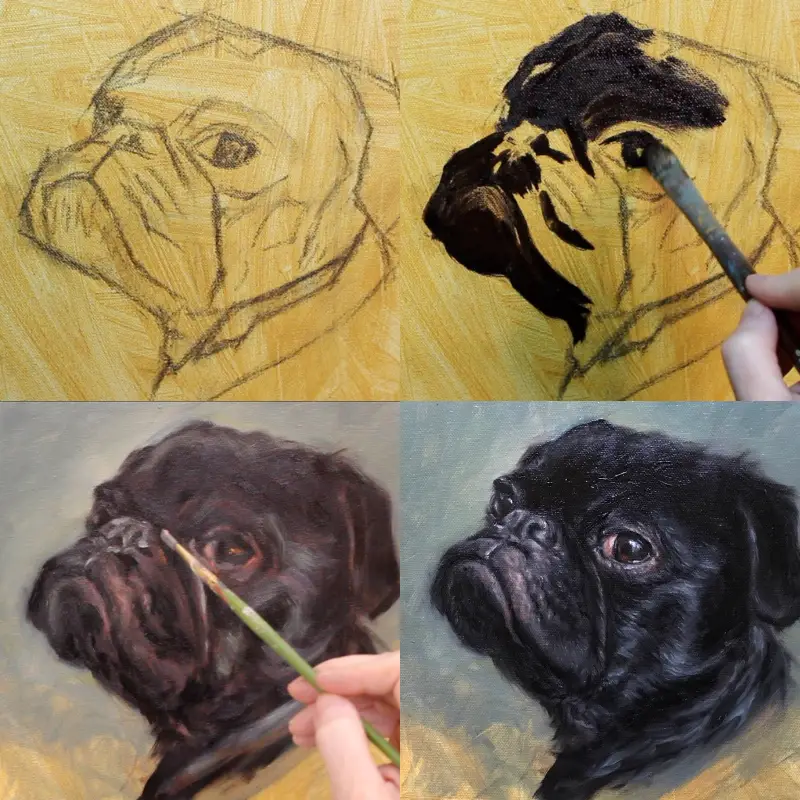
The first thing I did to start this pet portrait was put a yellow ochre wash in acrylic on a 12×12 canvas. I then sketched the pug using vine charcoal. You can use the sight-size method by getting a copy of your subject to the exact size you want to paint it on canvas. If you don’t have a copy to the exact size, you can draw a grid on your reference image and create a corresponding proportional grid on your canvas. I do this many times if I want to quickly get my proportions correct.
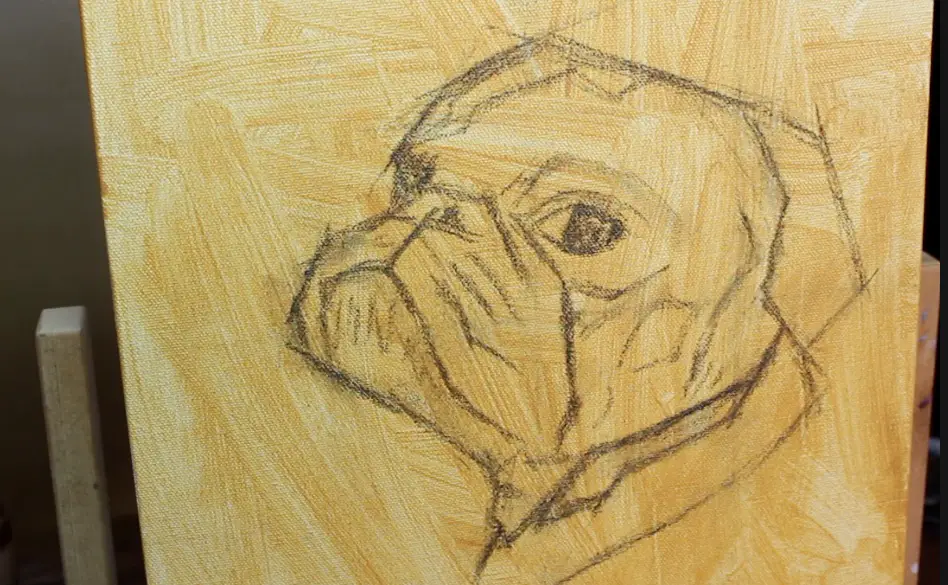
A freehand drawing will work as well, especially if you have the help of a handy proportional divider to check measurements. You can even skip the charcoal and go directly to painting if that is what you are comfortable with. However, if you are a beginner, I would advise taking the time to draw your image first.
I used to get really hung up about using any kind of technology to help me draw and transfer my images to canvas, but after watching several documentaries of how the old masters used mirrors and devices like the camera obscura to help them paint, I’ve started to let that judgment go. Life is too short.
Supplies For Painting A Pet Portrait
Check out my Supply List where Ihave everything linked in one place for your convenience. Below are the paints used in this pet portrait painting. I have an introductory set of paints from Gamblin and am happy with the results I get (it’s more cost-effective to buy the set rather than individual tubes). Ivory black and ultramarine blue on the left are considered to be cool blues. In fact, in the Zorn palette, ivory black is used as a blue.
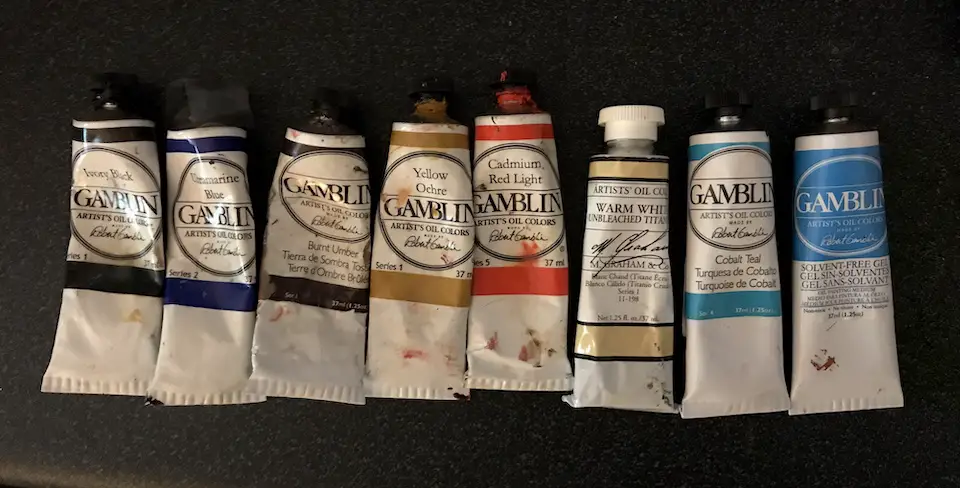
burnt umber, yellow ochre, and cad red light are all warm tones with burnt umber basically being a very dark red. The warm white I chose to use is from M. Graham. I decided to use this to keep my highlights from getting too bright too soon. I did use titanium white by Windsor Newton (not shown) at the very end for the brightest reflections in the eyes.
Cobalt teal by Gamblin was used to mix in with warm white for highlights on the fur. I also used Gamblin’s solvent-free gel to add body to the paint and Gamsol mineral spirits to thin it. Later on in the painting, I introduced a slow-dry medium. I found a recipe for that here.
Block In The Dark Areas
As always, I start this pet portrait painting by blocking in my dark areas. Since this is a black dog, there is a lot of area to cover. I mixed burnt umber with ultramarine blue and a little Gamsol to lay down the paint. Burnt umber and ultramarine blue can make a very nice black which was my intention. But it was very warm in my studio and my burnt umber started drying on me quickly. This caused some problems for me later in the painting which I go over in the video.
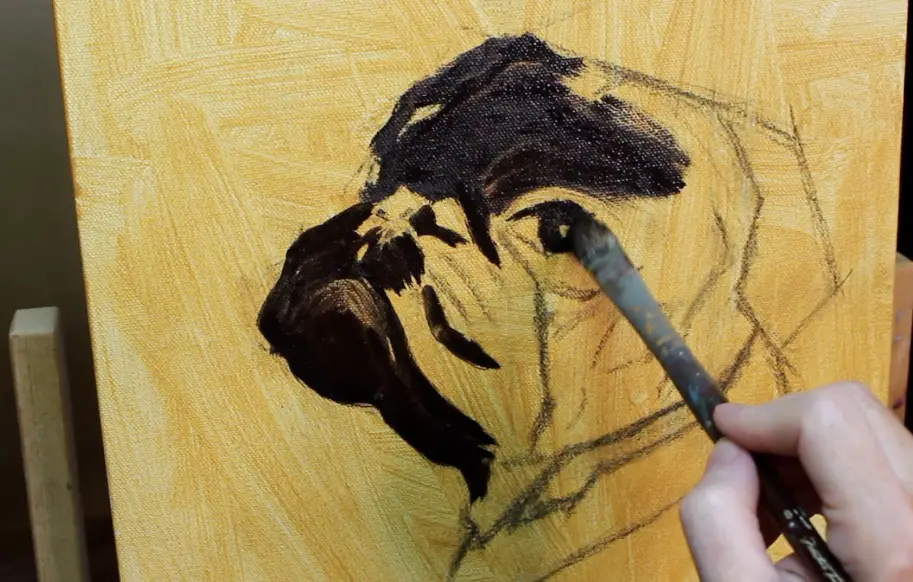
As you can see above, I used a medium-sized brush to get the paint down. I wasn’t being too careful at this point and did try to preserve the basic structure of the face so I could find my way around later on.
Using a paper towel to wipe away areas helps to create tonal variations.
Adding Medium Tones To the Pet Portrait Painting
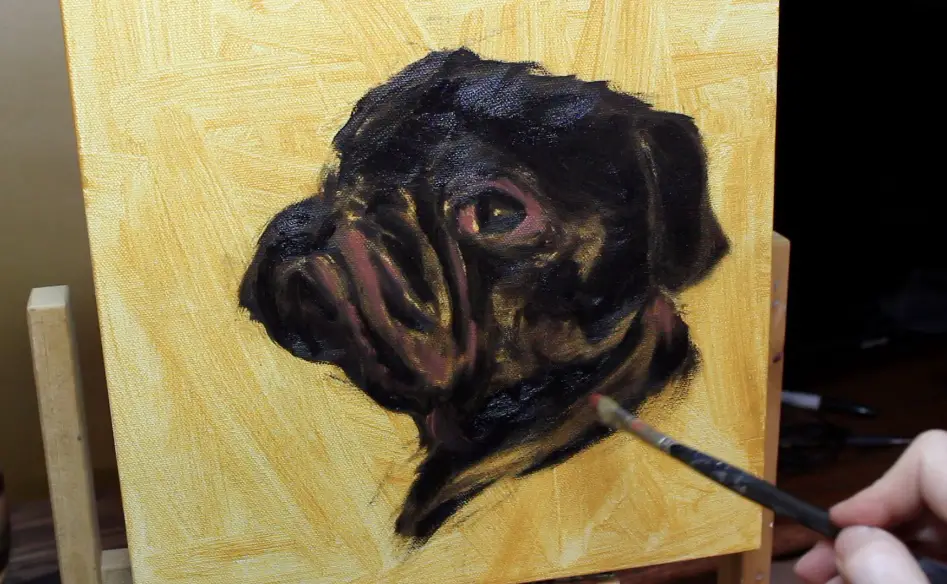
Below I’m starting to add in the fleshy red tones to the eye area and muzzle with cad red and a little yellow ochre. Eyes and noses in both people and pet portraits tend to have a lot of red because of the blood flow to those areas. This won’t be as apparent with some breeds of dogs.
Alizarin crimson is also a great color to use for blood-red tones, but I didn’t need it for this painting.
Below I started to use a mixture of cobalt teal, yellow ochre and warm white (sparingly) to start with the highlights on the fur. If you use too much white too soon, your dark areas can get foggy. If this happens, burnt umber can be used to help correct the problem or you can wipe the paint off.

Make sure to use different brushes for your light and dark colors. If your dark brushes get polluted with your light color, make sure to wipe them off and clean them. In the image above, it appears as though I may not be following my own advice as it looks like I’m laying down a highlight with a brush I used for my darks. Live an learn.
Using Older Brushes For Pet Portraits
You can’t see it very well in these screenshots, but in the video, I point out that at the beginning of the pet portrait I was using larger splayed-out brushes. I did this for a couple of reasons. The first was that I didn’t want to be tempted to make things look too perfect too soon. I have a tendency to jump into the details early on, and using a less than perfect brush kept me from doing that. The other reason is that the wild, untamed brushes make for some very interesting, wispy fur.
Building Form
In the image below, the form of the pet portrait is taking shape. This was achieved through multiple passes of dark and medium tones along with building the highlights gradually.
You can also see that there are many dull areas starting to show with red undertones. This is where my burnt umber has started to dry. When doing a pet portrait painting in oil that features dark fur, this can get very distracting and make it hard to see the darker values.
Re-establishing darks are important, so I made sure to take extra care to go in and strengthen my darkest values often.
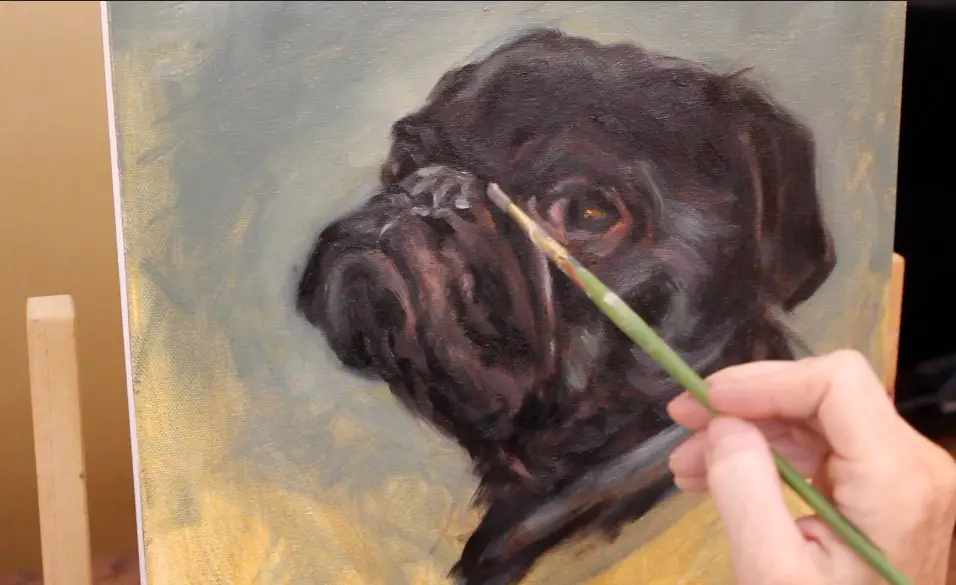
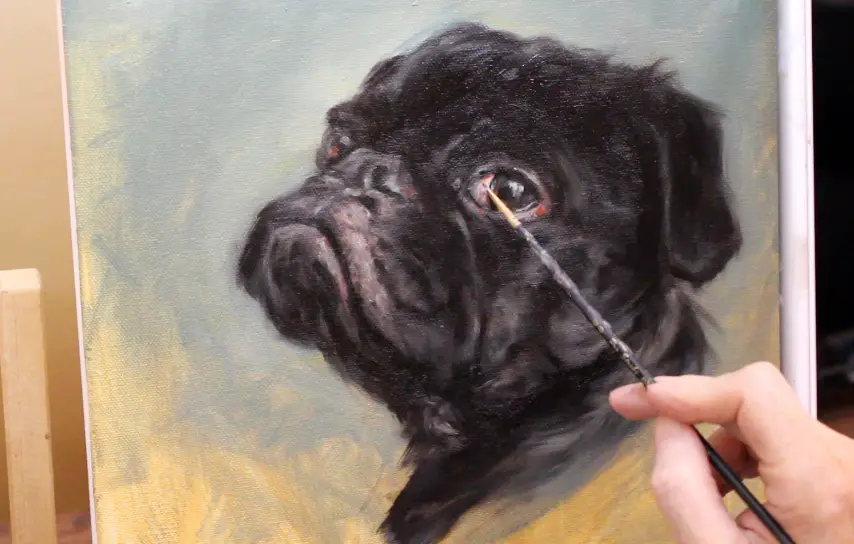
Creating A Focal Point In A Pet Portrait Painting
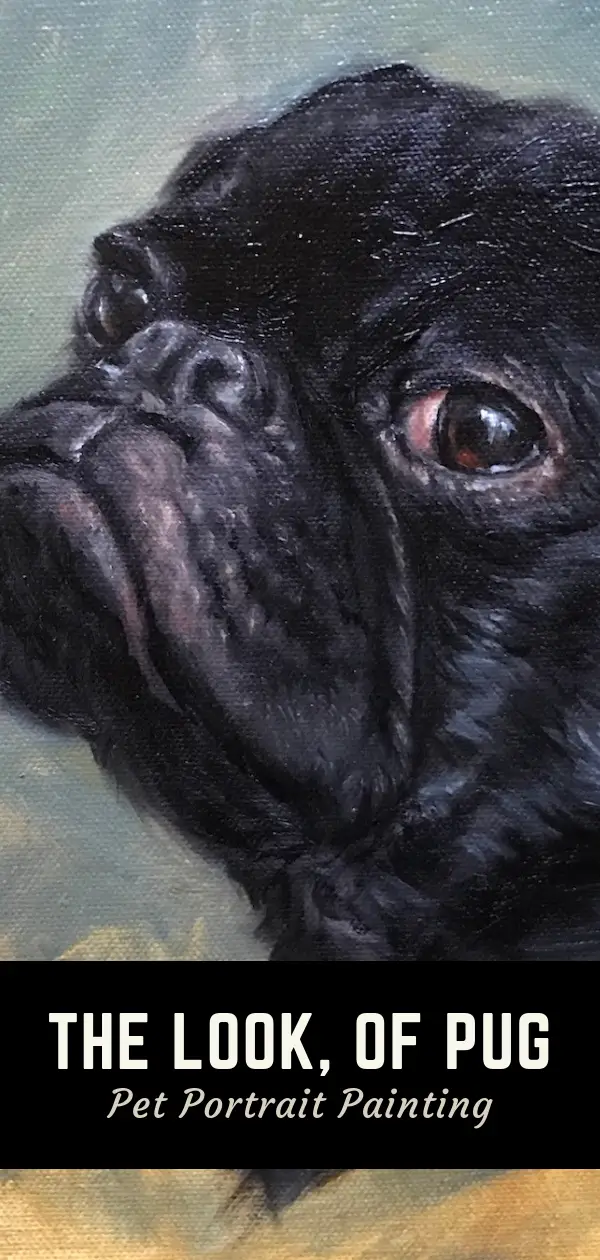
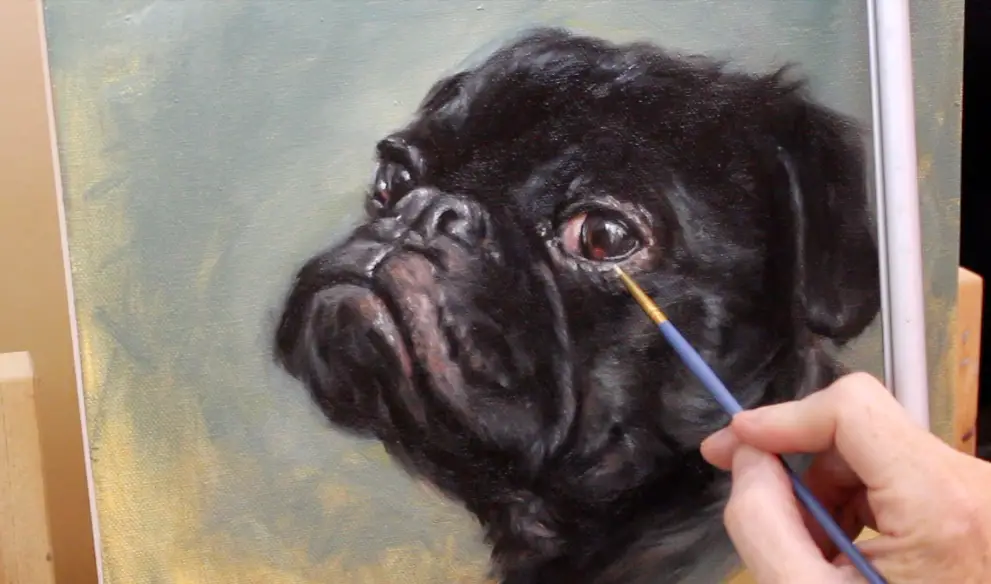
I was so happy to get to the part of the portrait painting where I could add in details. I was anxious to work on the eyes because they are my favorite facial feature to paint. The eyes in this pug portrait are very engaging and I wanted this to be where the viewer is drawn.
Because I’ve decided the eyes are the focal point, this is where the majority of the detail will be. Everything else will be painted in a sketchy fashion with the intent to keep moving the viewer’s gaze back to the subject’s eyes.
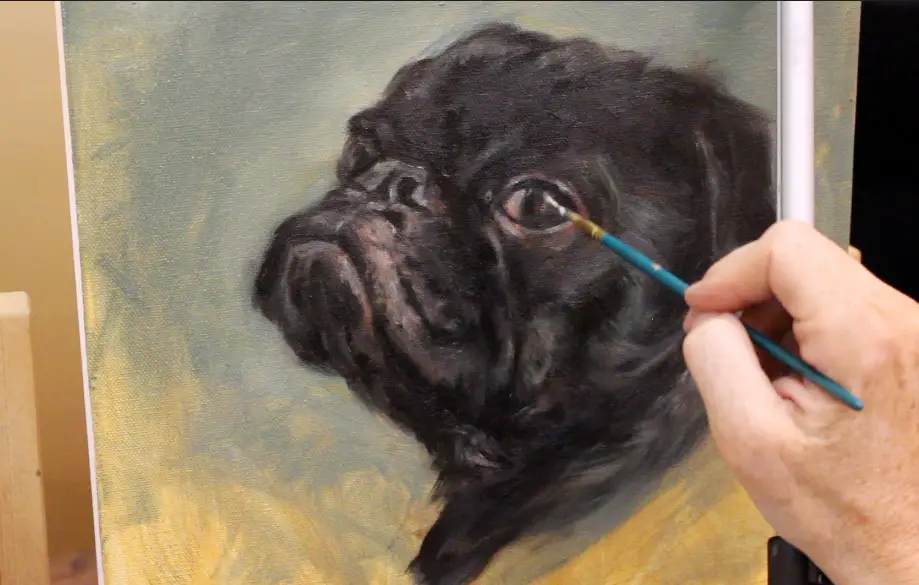
Above you can see that I’ve switched to a smaller brush, adding in the reflection. With reflections in eyes, start out with a greyish white before moving on to your bright highlights. When you look at reflections in eyes, there are all kinds of things going on in there. It’s basically like looking into a shiny bulb. Everything is curved and reflecting the surrounding area. This pug had a window reflection in his eye. I could have painted it in high detail but chose to keep it more abstract.
By the way, if you don’t have a mahl stick to steady your hand while you paint I highly recommend one. The stick I have isn’t fancy, but it does the trick. This is one like it on Amazon if you are looking.
Notes On Painting Eyes
One of the earliest memories I have as an artist was learning how to successfully draw an eye. When you learn how to do that you feel like you have some sort of superpower.
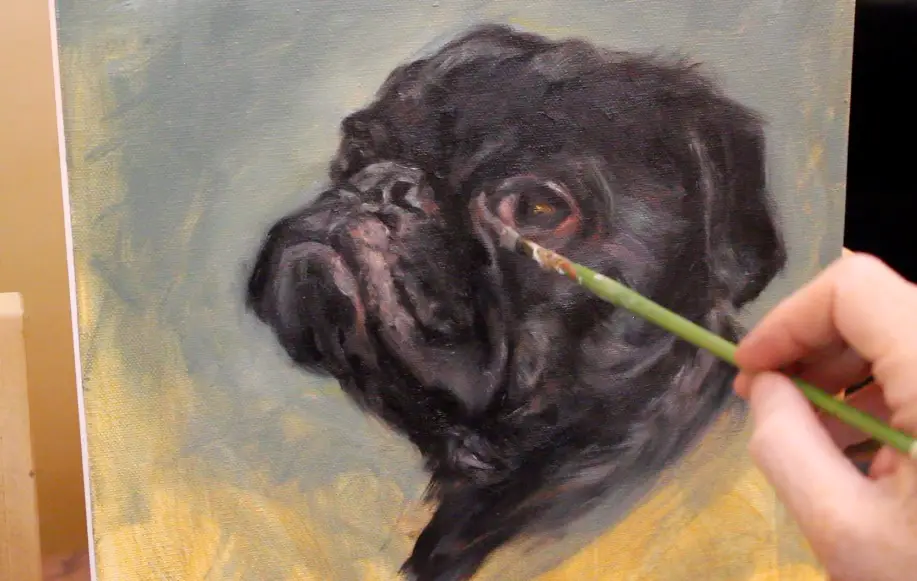
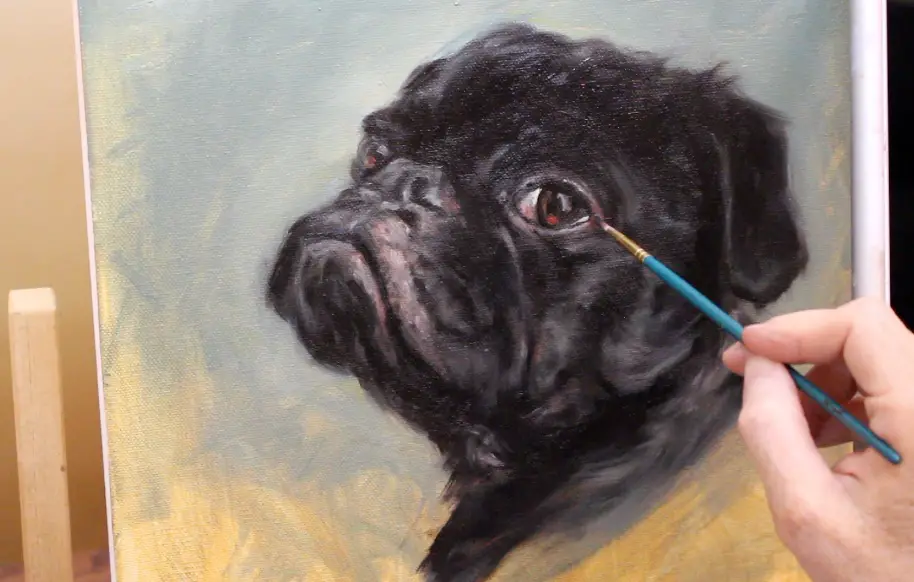
Nearly everyone can draw a basic oval shape and add the circles for the iris and pupil. What you need to know is that most of the time, a light source is coming from above and creating a shadow under the lid of the eye. So making the top part of the eye darker is really important.
The next thing to be aware of is that the whites of the eyes are never really white. Most of the time they are a darker grey which means there are blue tones in them, especially near the top, bottom and sides which creates the spherical shape.
There are also creamy yellows and sometimes blood reds in the whites of the eyes and the skin surrounding the eye.
An easy approach is to paint the outside of the iris, the shadow under the eyelid and the pupil a dark color first. Then add a swatch of color in between the outside of the iris and the pupil, blending just a little bit. In this case, I used cad red, yellow ochre and burnt umber for the iris. After that, work on the white of the eye making sure to not make it pure white. Then place highlights on top of the pupil and waterline to bring the eyes to life. Watch the video to see how I painted this pug’s eyes.
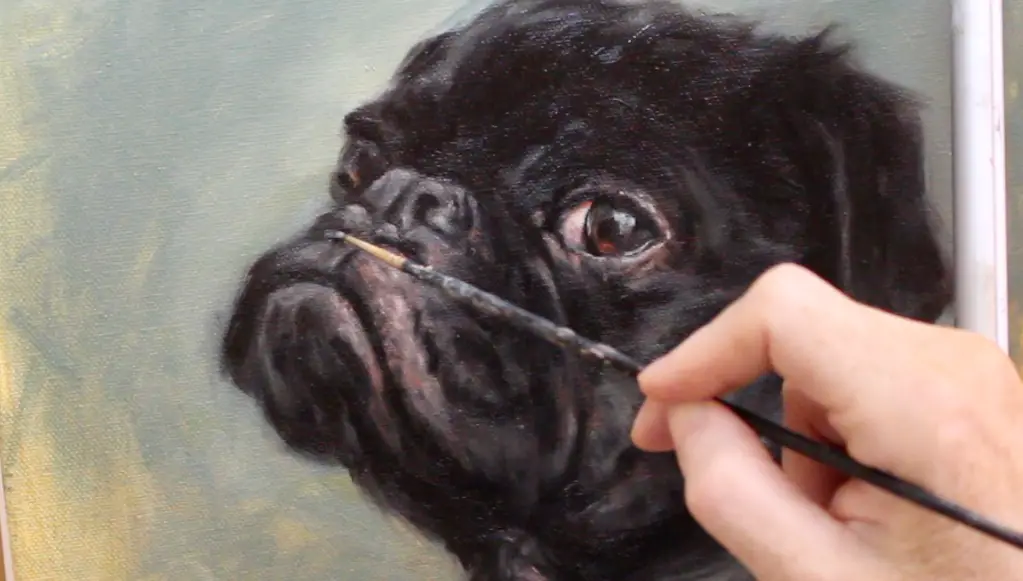
Creating The Nose And Muzzle
It’s really amazing what you can get away with by using just a few brush strokes. The nose and muzzle on this dog portrait are blocked in with black, a few strokes of dark grey and highlights on top. If you watch the video, you will see that I go over this area in several passes, building up the highlights.
I keep my brush marks very loose and step back from the painting often to make sure overall the image “reads” as a nose and muzzle.
The muzzle also required a few passes of varying shades of reddish-grey tones. Using cad red and yellow ochre was key to achieving the fleshy look in this area.
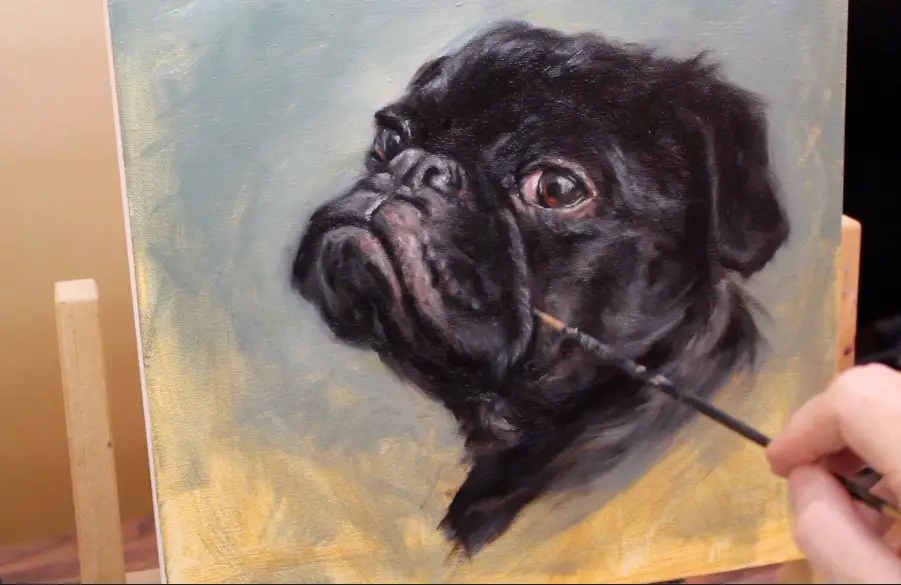
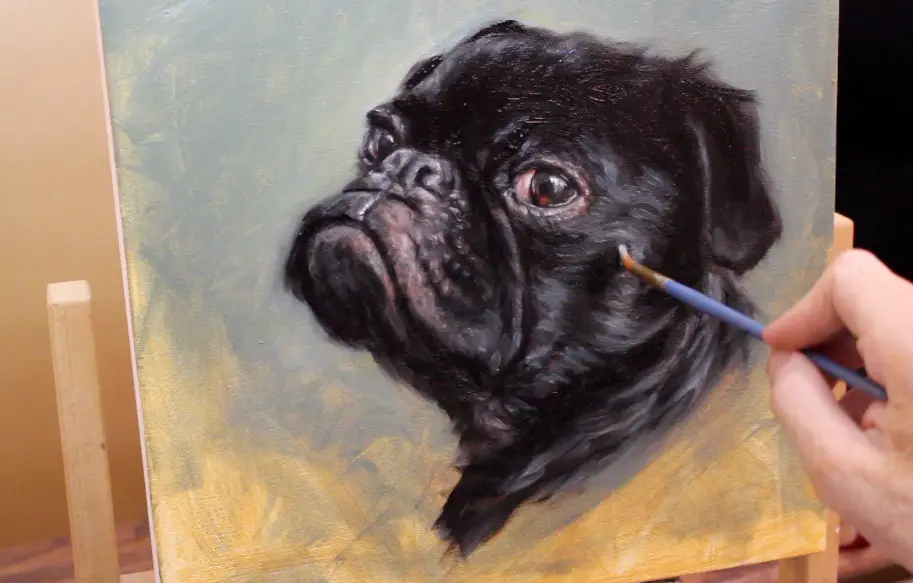
How Far To Go With Fur Details In A Pet Portrait
There is no right or wrong way when it comes to how detailed you want to get with painting fur. My perfectionistic side wants me to paint every single hair and achieve a hyper-realistic look. But my painterly side wants to create an illusion.
Above you can see where I’m starting to add in some fur details. The brush I am using is quite small, but it is also a beaten up brush so it will not allow me to create a perfect stroke.
My goal is always to have my painting look “real” from a distance, but somewhat messy up close. This can be tricky as an artist because all you are seeing as you paint is a mess. Taking breaks and standing back from the work is important if this is the effect you are wanting to achieve. I’ve also found that taking photos on my phone and looking at my painting very tiny helps me to see where my values are too light or too dark.
The human brain is very efficient at filling in information, so you don’t need to paint every single hair on a dog’s head for it to look real. Think of all those tests on Facebook where it only shows part of a letter claiming that whoever can read the word is a genius. Well, guess what? We are all geniuses.
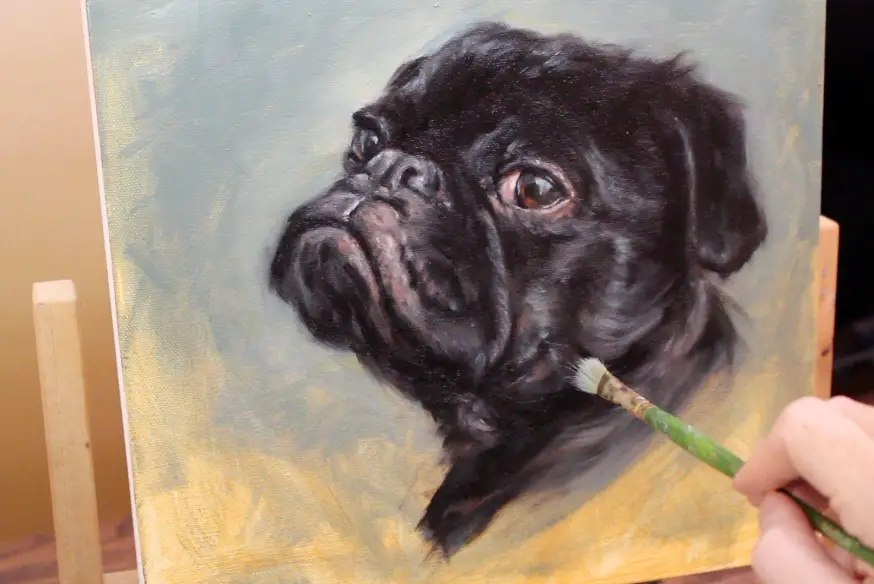
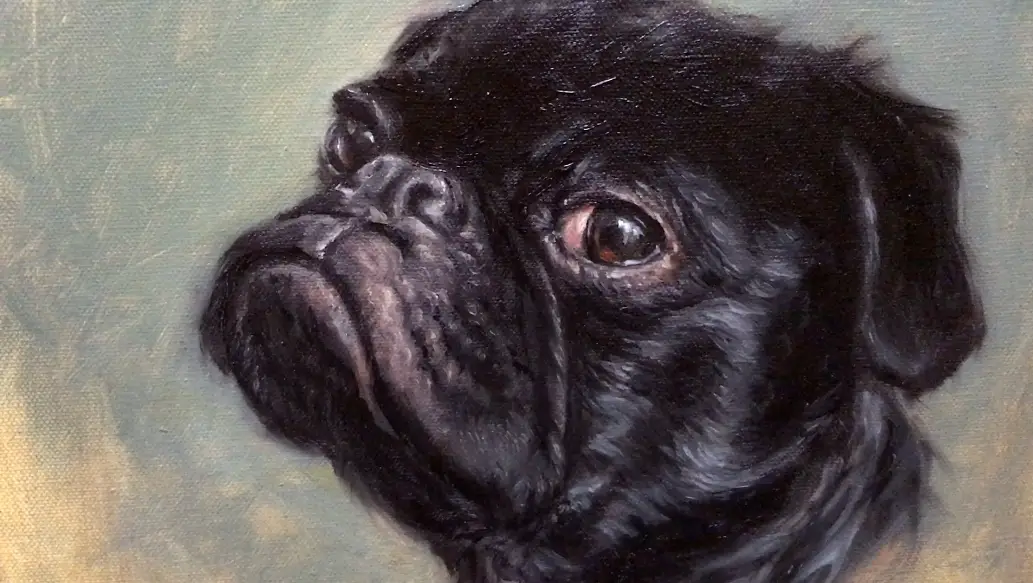
Adding The Final Touches To The Pet Portrait Painting
When I start to debate in my mind whether to add individual hairs and perfectly blended highlights, that is a sign that I’m nearing the end of the painting and need to walk away for a few hours or a few days.
Many times these steps aren’t necessary and after being away from the painting, fresh eyes reveal that the work is either done or needs only a couple minor adjustments.
As far as this little black pug is concerned, the verdict is still out. I’m reserving the right to make small changes in a few days, but for now, I think he’s looking pretty good. He’s got just the right messiness going on. When I squint my eyes the overall values are good. I may add a highlight here or there and tone down other parts, but most people would never be able to tell the difference.
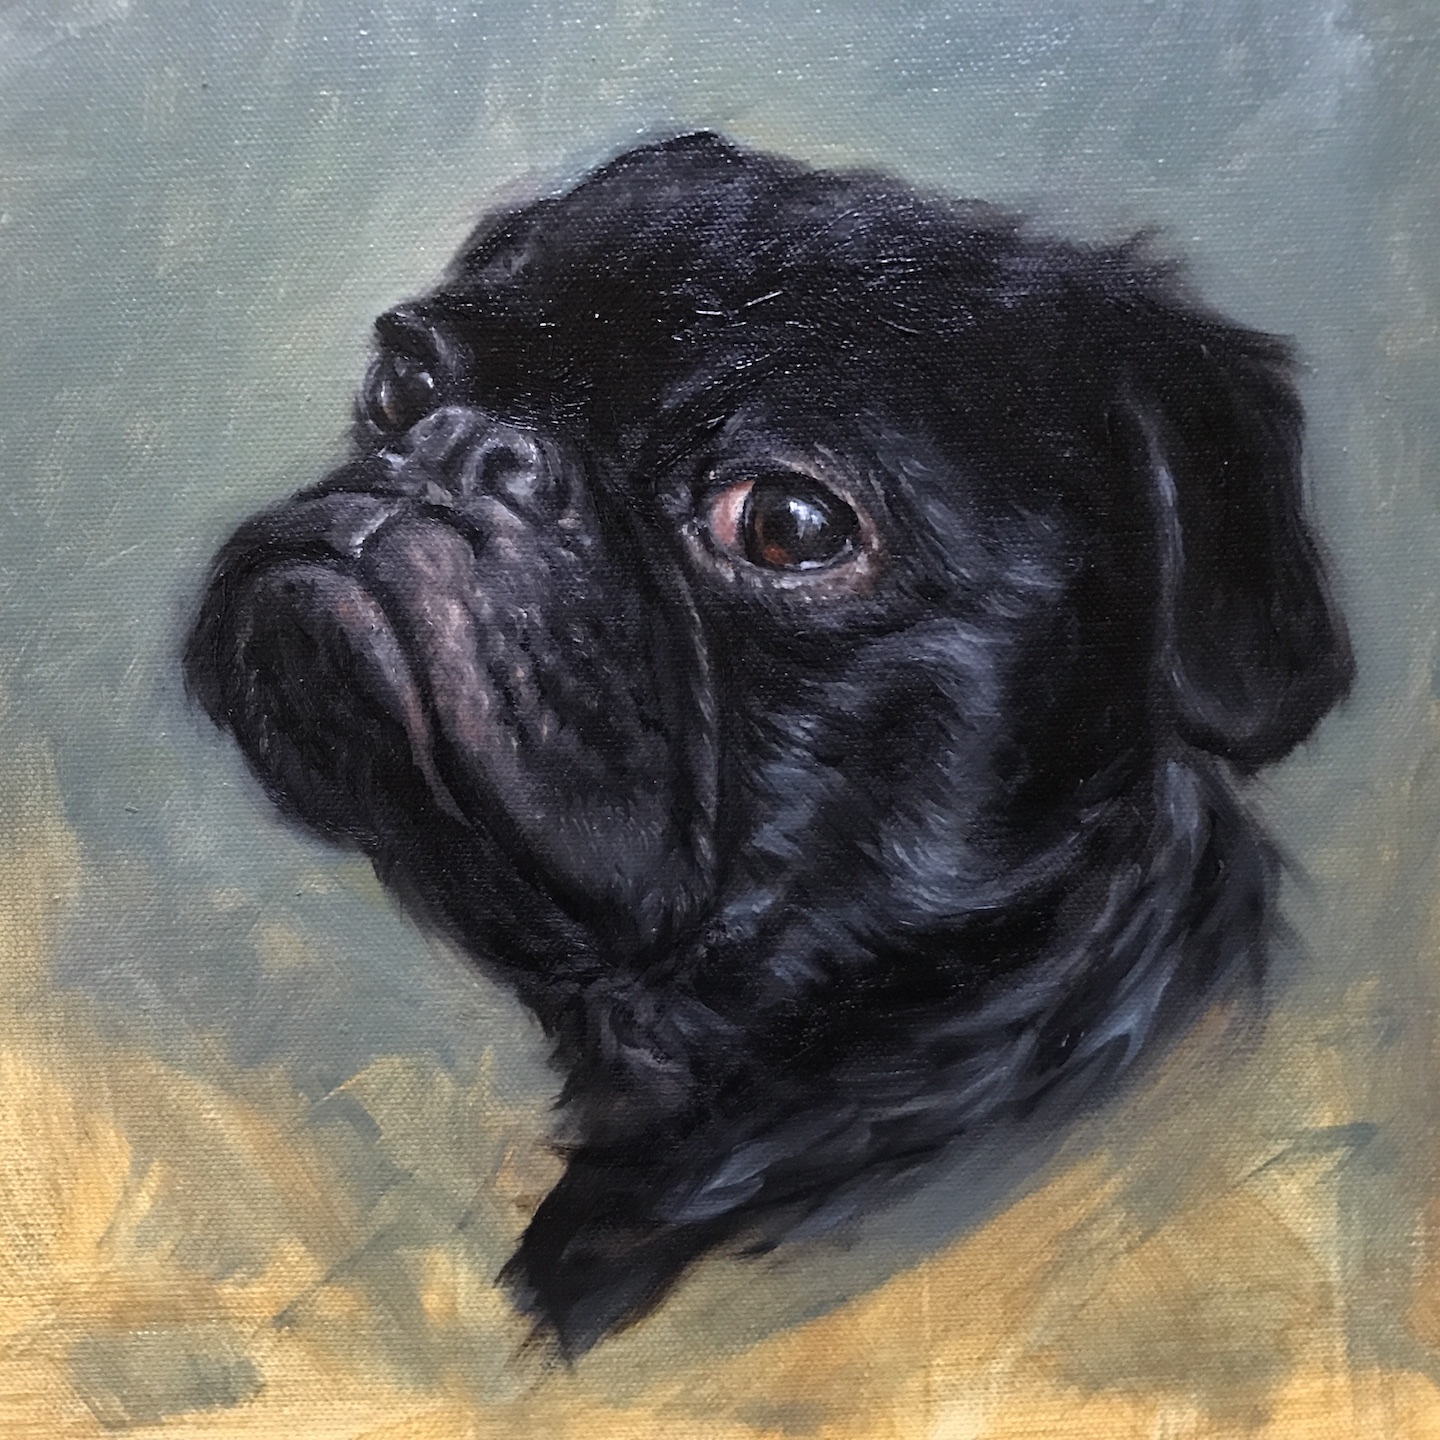
Above is the final screenshot of the video which most accurately reflects the color of the painting. The photo below shows the dimensions of the portrait on canvas, which is 12″x12″.
I still have some adjusting to do with my lighting situation, but I can only do one thing at a time. The only thing that is missing from the portrait is a signature. That is next on my list.
Thank you for stopping by!
I hope you enjoyed this article. If you are interested in more posts like this, below are my other popular painting tutorials. Simply click on a title below to view the article:
The #1 Way To Improve Your Painting – Values in Art
7 Portrait Painting Tips For Traditional And Digital Painters
How To Paint A Dog Portrait Step-By-Step In Oil
Tips For Painting Silver Objects
How To Paint A Cat On The iPad Pro – Digital Painting Tutorial Featuring Tippy
8 Tips for Painting Black Fur
How To Paint A Cat In Oil Step-By-Step With Jorge & Nacho
Painting A Cat In Oil Featuring Prescott, A Gorgeous Maine Coon Cat
How To Paint A Sphynx Cat In Oil Step-by-Step