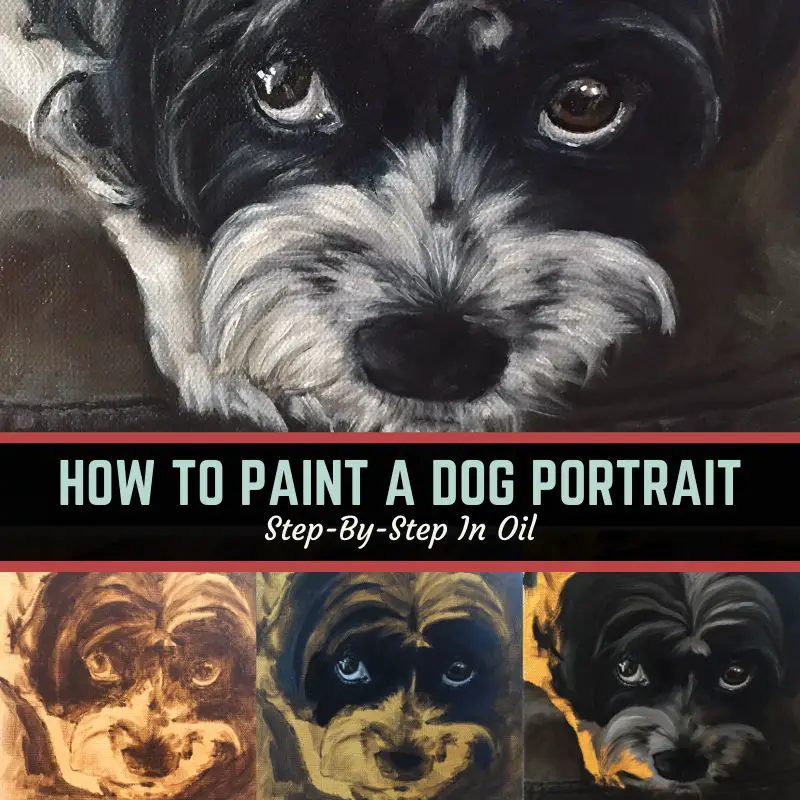
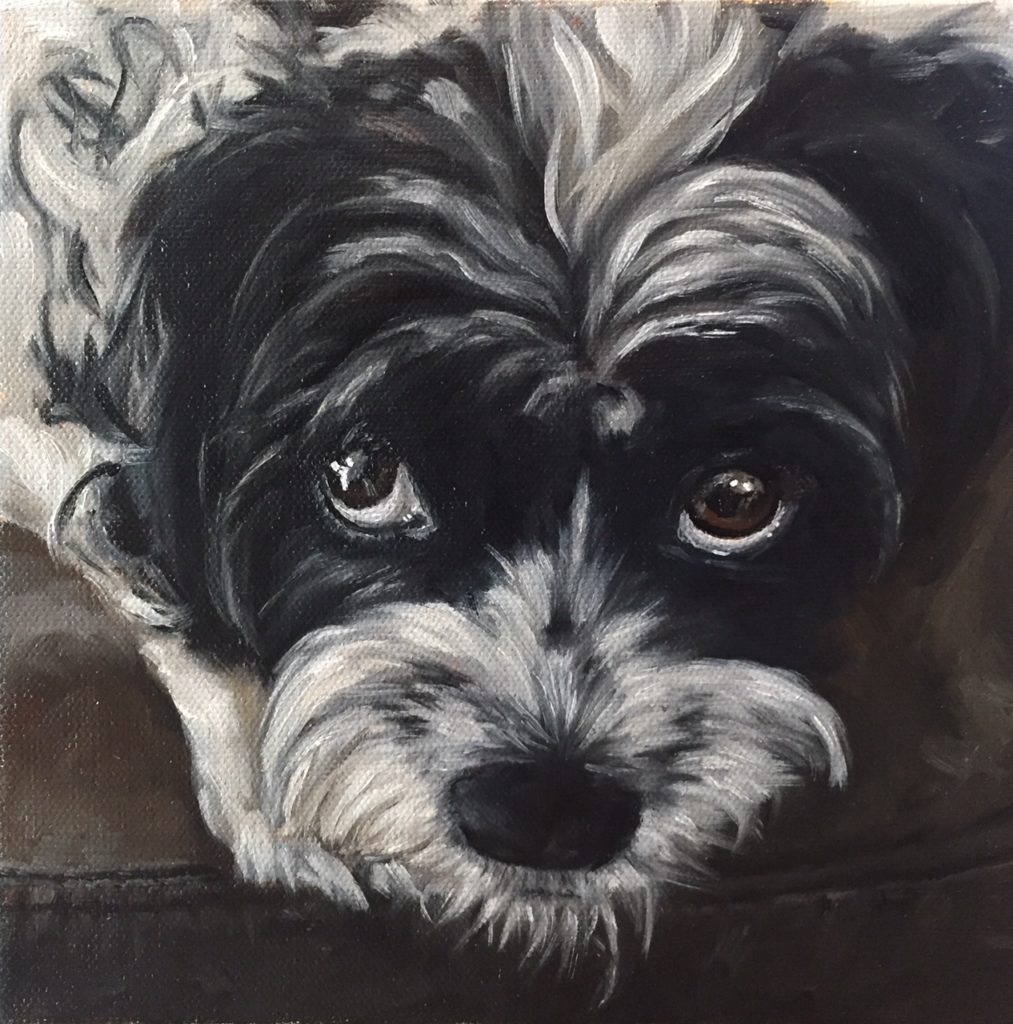
Learn how to paint a dog portrait in this simple 8 step guide. I’ll cover the entire process from the sketch to the finishing touches. I recently did a portrait of an adorable dog named Chewy and decided this was a great opportunity to show how to paint a dog portrait step-by-step in oil.
Before I started the painting I got a print of the image I worked from that was the same size as the canvas I painted on. In this instance, my canvas was 8″x8″, so that is the size I made my reference photo which you can see in step 7.
Note: Some of the links in this article are affiliate links. I may receive a small commission if you use them to purchase items. By doing so, you are supporting a fellow artist. I’m so grateful for your support.
Step 1 – Sketch The Dog Onto The Canvas
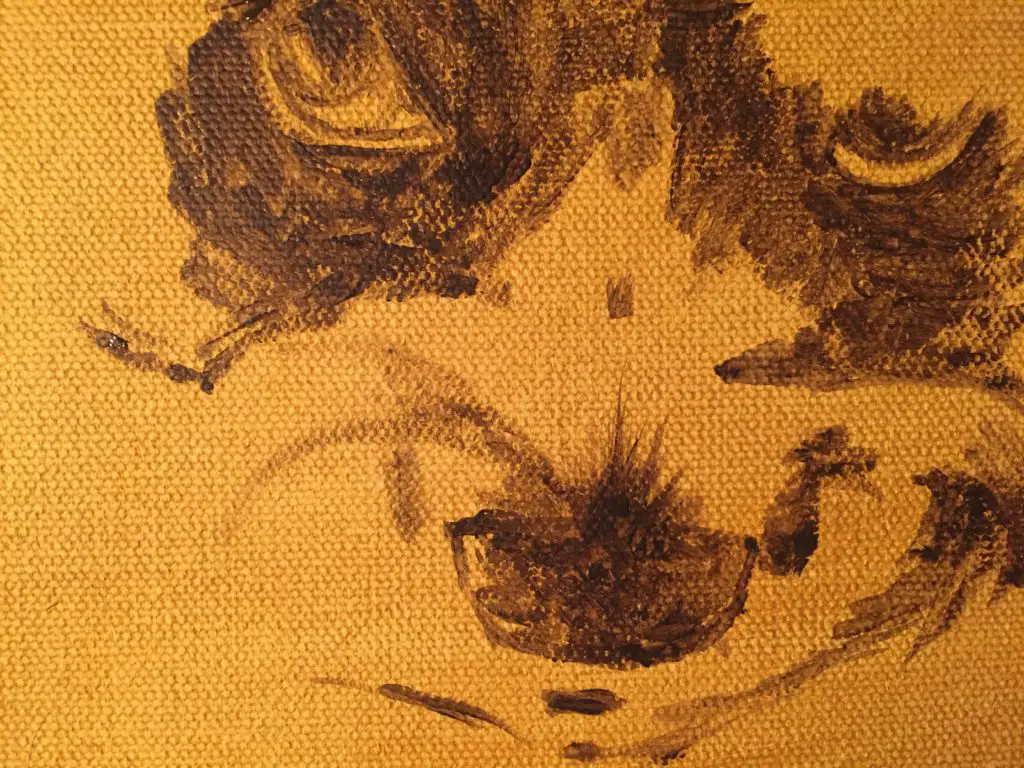
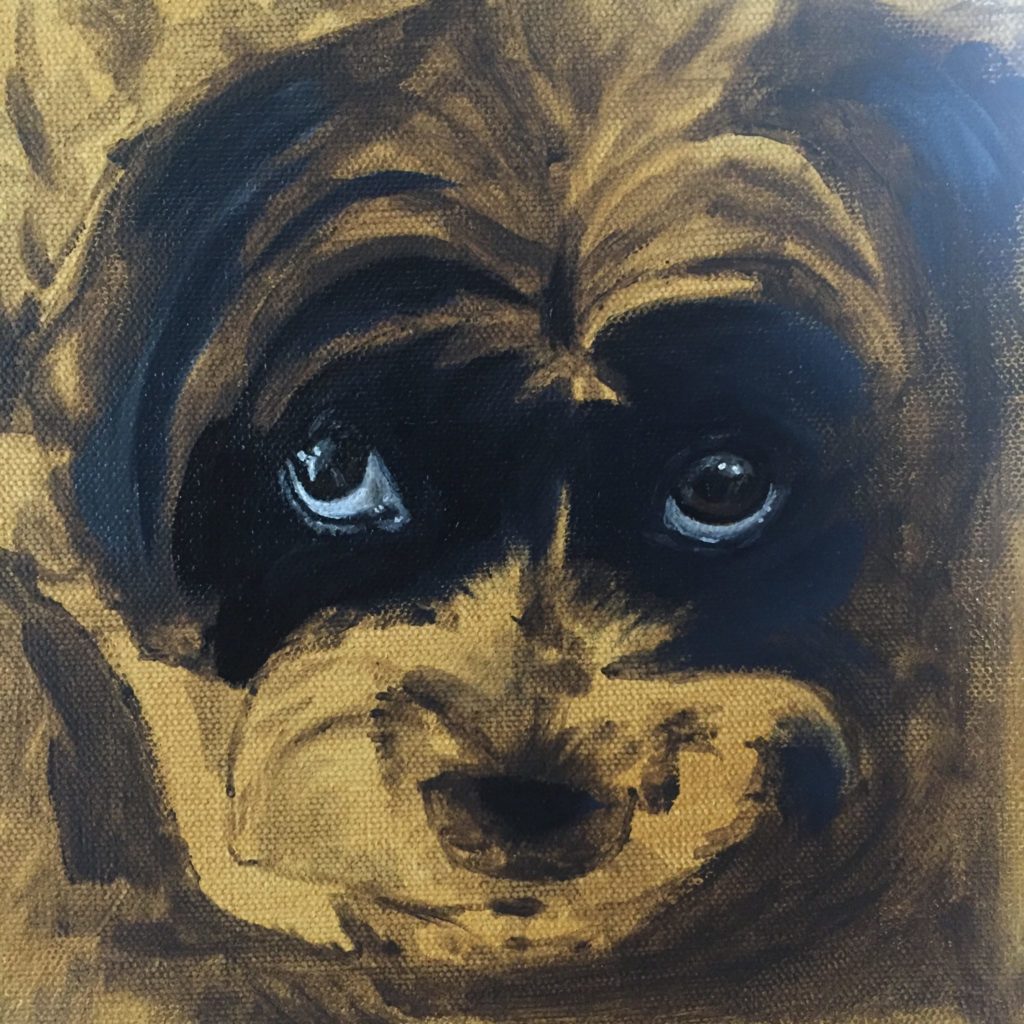
Below is a closeup of the sketch I started for this painting. First, I toned the canvas with acrylic yellow ochre. I skipped doing a charcoal drawing and went straight to sketching with acrylic raw umber thinned down with water. You can also tone the canvas and do your sketch with oil paints.
If you are new to painting a portrait of a dog, I would definitely sketch in the initial stage with vine charcoal, which is very easy to wipe off.
I used a proportional divider to help me measure key landmarks for the eyes and nose. A proportional divider is an excellent tool for beginning artists.
Step 2 – Create An Under-painting Of The Dog Portrait
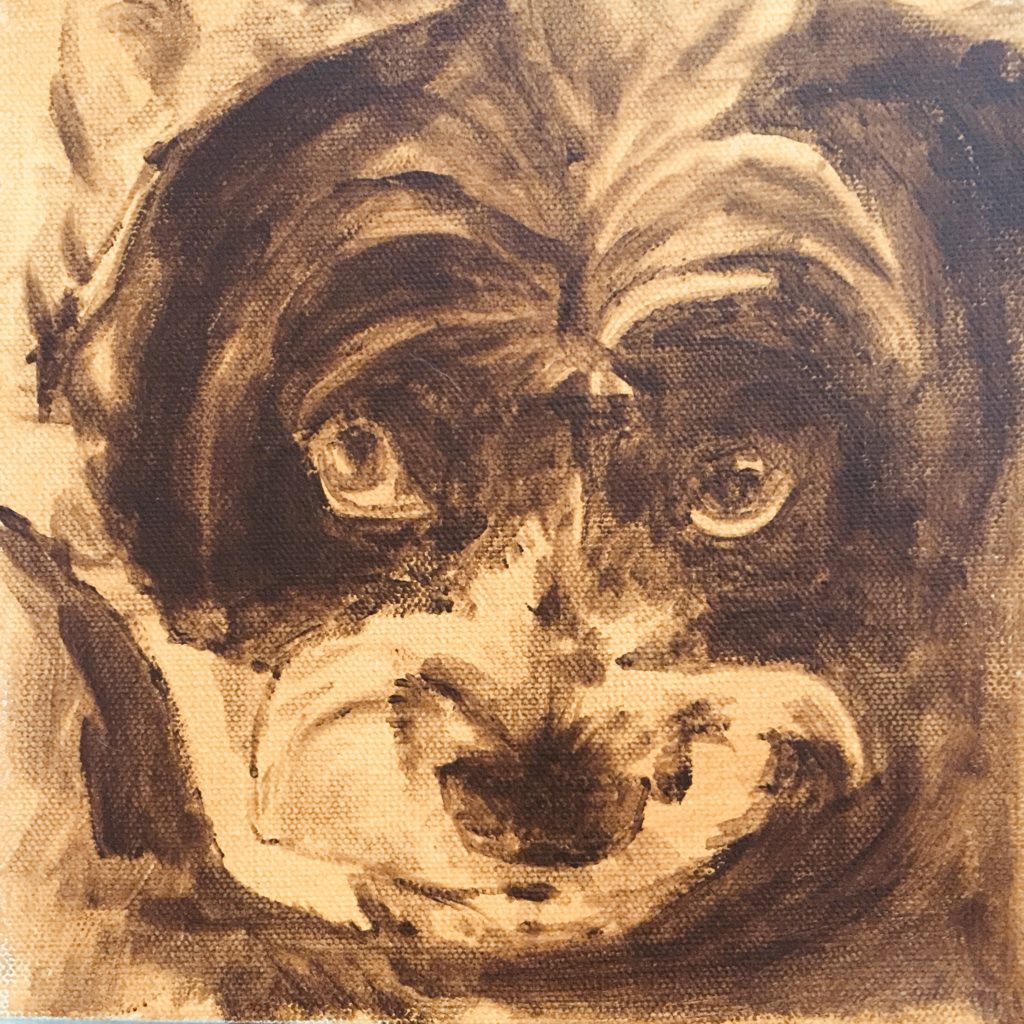
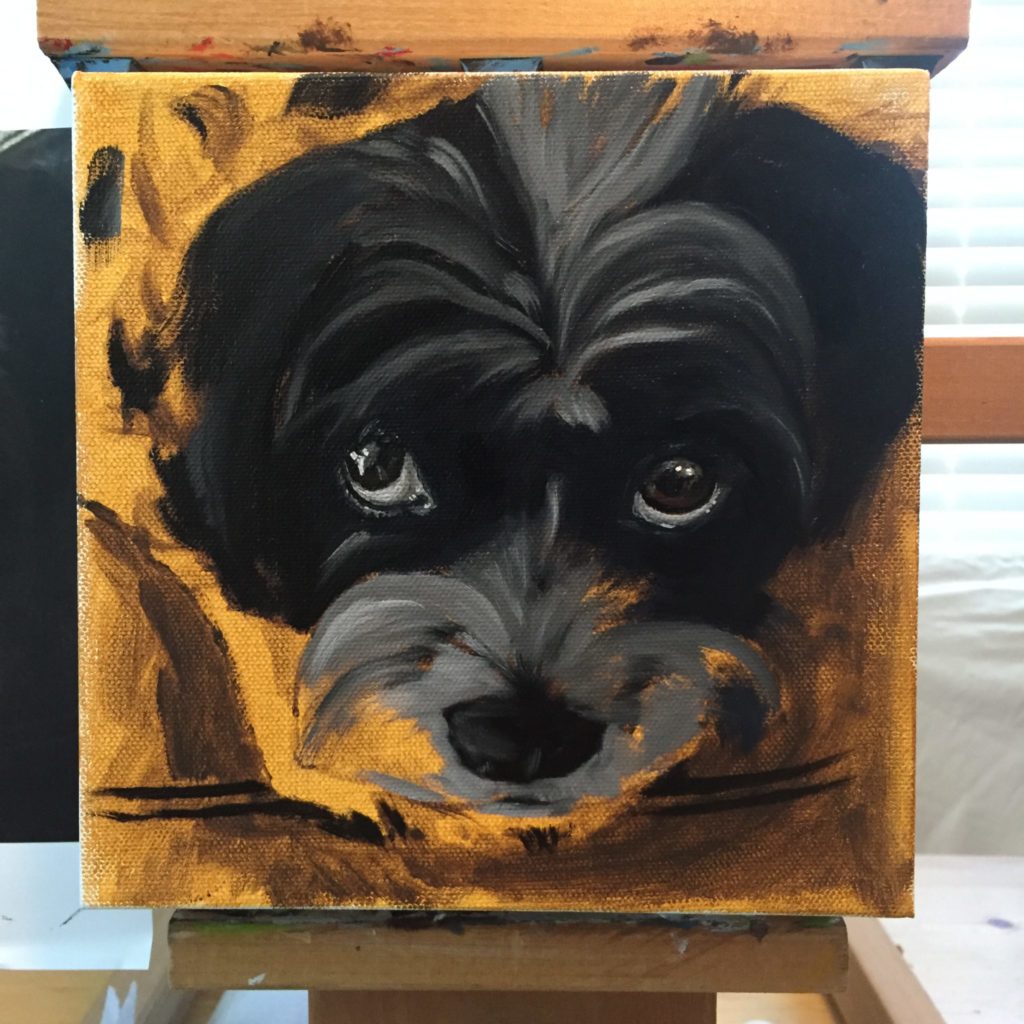
Here I have the under-painting of the dog portrait roughed in which helps me establish values. It’s not looking pretty, but it doesn’t need to at this point. I’m checking my drawing against the photo for differences and make adjustments along the way.
The canvas looks much lighter in the image above compared to the previous image due to changes in lighting.
Step 3 – Block In Dark Areas Of The Dog Portrait
The Dark Areas And A Detour
Step 3 is where I began using oil paint. You can paint oil over acrylics, but never the other way around. If you think of acrylic paint as “water” and oil paint as “oil”, oil floats on top of the water. If you put acrylic on top of oil, your painting will crack when it dries because oil dries slowly while acrylic dries fast. You want the fast drying paints to go on first in very thin layers t to avoid cracks.
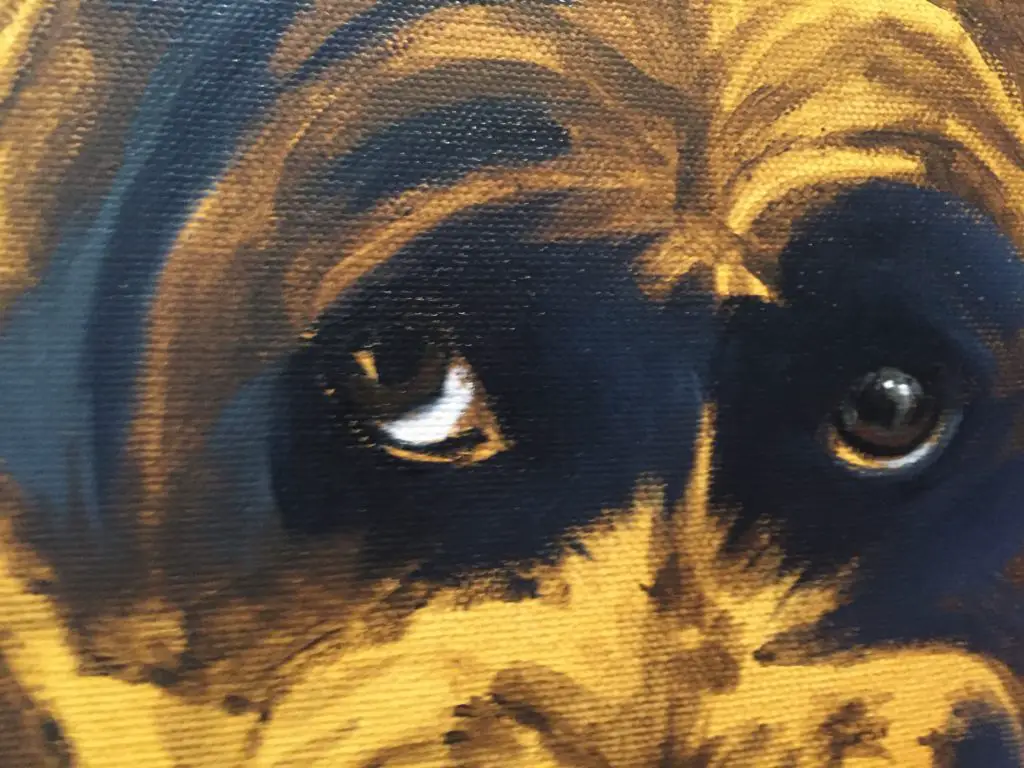
I usually block in the dark areas first. However, I have a problem when it comes to painting portraits. A detour is usually taken as I get impatient and have to paint in the eyes as soon as possible.
Eyes are magical to me in paintings and when they are painted, they make me feel like the subject has joined me in the studio. In this painting and many of my other dog portraits, the eyes end up following me wherever I go. It’s cool and a bit creepy at the same time.
Step 4 – Paint The Eyes Simply
Since I skipped ahead in my own process, I will quickly review how I got the eyes to look so real.
- First, I painted the pupil and outside of the iris with ivory black. You can make black with ultramarine blue and burnt umber if you don’t want to use black out of the tube.
- Then I painted the inside of the iris with burnt umber mixed with a tiny bit of cad red to make a brown color.
- For the “whites” of the eyes, I mixed titanium white with black to make a grey tone. The eyes are spheres and are shaded near the edges. Most eyes are a combination of many colors that are reflected back into the eye. You can add a tiny bit of yellow and violet colors to make the eyes more lively.
- Around the outside of the eye I again mixed titanium white with more black to create a darker grey tone. Notice the eye on the left is higher in value than the eye on the right. The main light source in the photo was off to the left hand side.
- For the highlights, start with a dark shade of grey and lay it over the top of the eye (think of it like a glass marble). Then add in brighter highlights on top of that darker shade. This will give a glassy look to the eyes in the dog portrait.
Step 5 – Start Layering In Values To Create Fur Texture
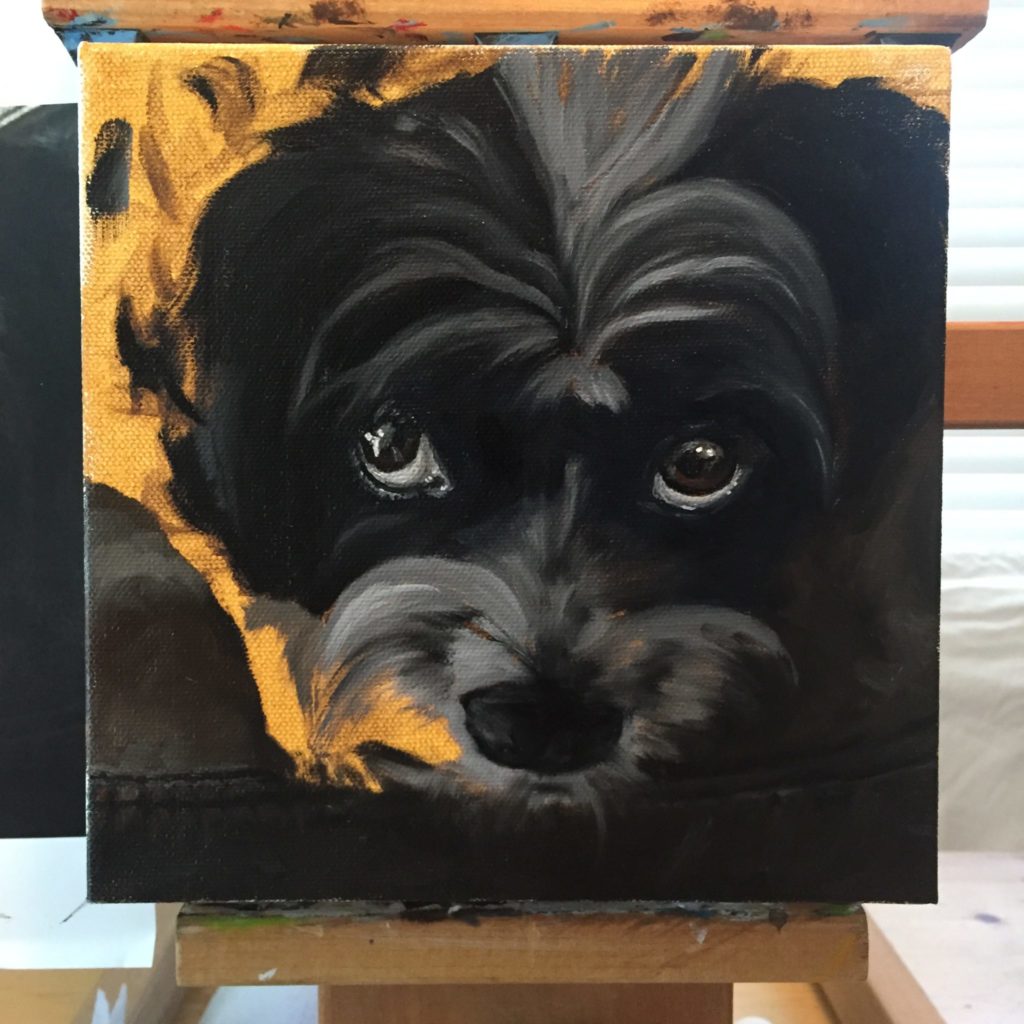
Now that I’ve gotten past my obsession to paint the eyes, I’ve continued on blocking in the dark areas of fur around the face. Blocking in the dark areas helps to see the form and values correctly. This is a rule of thumb I follow most of the time. However, there are always exceptions to the rule. For now, we’ll just stick with “dark to light” to keep things simple.
Be Careful When Introducing White
In this step I get started with white, but I’m taking care to limit it as much as possible. Always go for the darker values first and then build-up to the lighter values.
Once white gets on the canvas, it can potentially “fog up” all of your other colors if it gets mixed in. It’s hard to “defog” when white ends up everywhere.
Getting too light too quickly is one of the biggest mistakes beginning artists make. Using a greyscale and value finder can be really helpful for determining values during this phase. I talk about this more in my portrait painting of a pug. For this dog portrait, I started with very dark greys and worked my way up in layers.
Step 6 – Paint In The Background Areas
Before I got too carried away with painting in this dog’s lighter fur, I needed to get the leather sofa cushion painted so his white fur can go over the top of it.
Ideally, I would have painted this while doing my dark colors, but I tend to jump around the canvas. This is painted very simply with burnt umber, black and a little bit of titanium white. You can add in other colors to make the leather have a richer feel. The burnt umber is basically a very dark red and the black is a very dark blue, so I had all I needed to paint the leather.
For the detail of the stitching, all I did was paint a very dark grey in the highlight areas. The key for the leather cushion was to visually suggest the stitching rather than paint each stitch.
Step 7 – Continue Adding Medium And Light Fur Values
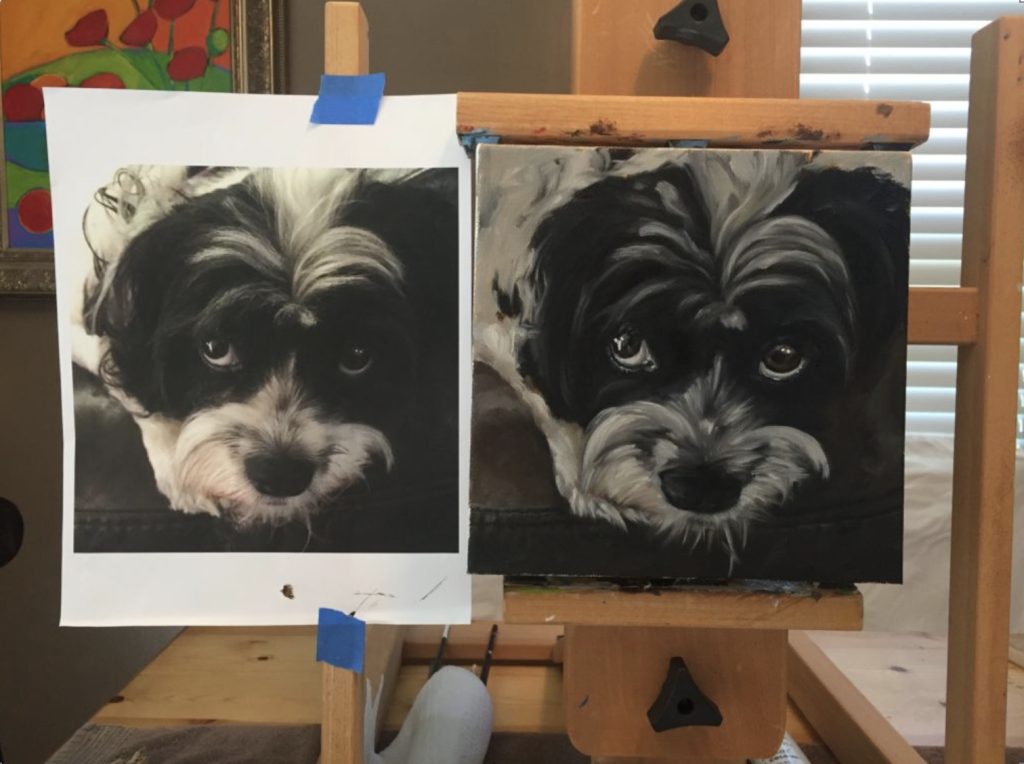
Below you can see I’ve blocked in the dark and medium values of the light-colored fur. After those values are established, I go back in with highlights. This is where the fur really starts to look realistic.
In the photo above, you can see how I had my easel set up with the reference photo taped up right beside the painting. This allows me to use the sight-size method to check for differences and double-check measurements.
The photo should be on a sturdy surface to prevent distortion. Mine isn’t on a sturdy surface, so you can see my reference photo looks a little distorted compared to my painting. I also brightened up the eye on the right which I normally wouldn’t do, but it didn’t look right in the painting so I changed it.
Step 8 – Add Finishing Touches
Below is the finished dog portrait. If you look closely, you can see that I kept the fur around the edges very abstract and only added sharper details in the eyes. This can be a strategic way to create a focal point in your work.
When painting realistic dog portraits, you don’t have to go for hyper-realism unless you want to. If you look at the fur on top of his head, I have just a few brighter highlights to create the detailed texture.
Another Finished Dog Portrait Using A Limited Palette
What was nice about painting this dog portrait was that I could use a very limited palette. White, black, ultramarine blue and burnt umber were used for the majority of the painting. I also used a small amount of yellow ochre and cad red light in his eyes. By keeping the palette limited, it made the process more manageable.
More Painting Tutorials:
If you enjoyed this tutorial want to learn more about how to paint a dog portrait, I have many more here on my website. Check out the links below.
How To Paint A Pet Portrait – Limited Palette, Unlimited Possibilities
How To Paint White Fur – Painting A White German Shepherd Step-By-Step
How To Paint A Cat On The iPad Pro – Digital Painting Tutorial
Painting A Cat In Oil Featuring Prescott, A Gorgeous Maine Coon

