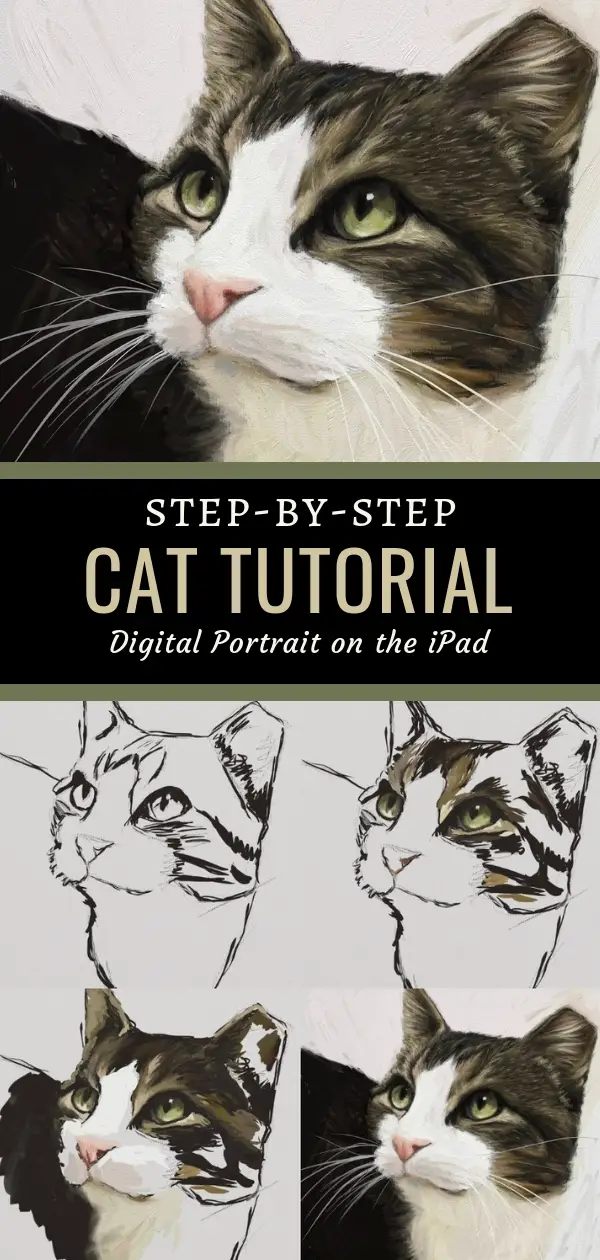
Learn how to paint a cat following along with this painting tutorial on the iPad Pro. Whether you are a traditional or digital artist, this approach will help you develop your skills and get results. As with any tool in the artist’s toolbox, it takes practice and patience to achieve a quality piece of fine art. Artists are visual learners and seeing the process step-by-step can help you understand how to create portraits of your own.
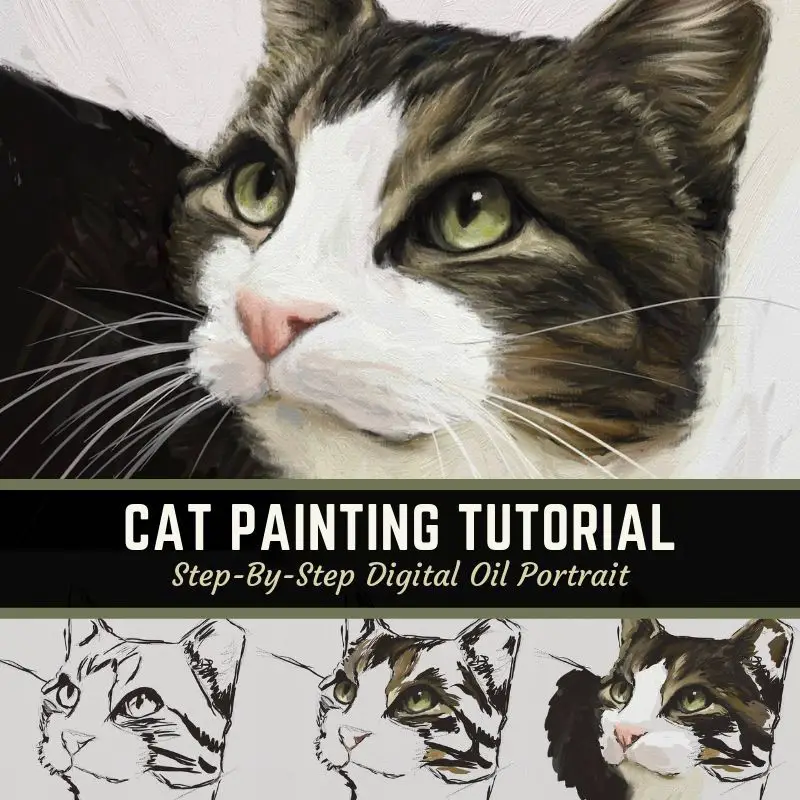
This portrait features a very special cat named Tippy. He was a feral cat (thus the tipped ear) who decided he liked humans and living indoors. I met him at a local pet store where the lovely women of Diva Cat Rescue had him up for adoption. He was such a handsome boy I had to paint his portrait to help get him and the organization get a little attention. The good news is that he did eventually find his forever home. If you live in the Kansas City area and are looking for a cat, please reach out to them on Facebook
The digital painting program I recommend to paint a cat
Digital oil painting has become increasingly popular for fine artists in recent years. There are many programs to choose from including Photoshop, Procreate and ArtRage. I’ve used all three and they are all fantastic. Through my professional career in advertising, I used Photoshop just about every day but never liked the results I got doing fine art painting.
The same goes for Procreate. I couldn’t get the feel of real oil painting – not until I tried out ArtRage on my iPad Pro. I was able to paint just like I do on canvas and get the look and feel I wanted the first time I tried it. So that’s why I’m recommending it in this tutorial on how to paint a cat, but feel free to use what works for you.

ArtRage for the iPad is only around $5. The desktop version starts at only $30, so if you have a computer drawing tablet or are good at handling brush tools with your mouse, you can paint that way as well. You can always upgrade to the full version of ArtRage later.
** Traditional painters **
Don’t have an iPad Pro or computer to paint with? No worries! You can paint along using traditional paint and canvas. My approach with this tutorial on how to paint a cat is the same as my approach on canvas. I’ll add comments regarding traditional painting along the way. You can purchase renewed iPad Pros off of Amazon for a lower cost. I got my iPhone that way and so far it works perfectly.
iPad Painting Tutorial on YouTube
If you’d prefer to see how I paint a cat via video, check out my new YouTube iPad painting tutorial. You’ll get to see a little speed painting of how I did this on the iPad. This is a brand new channel, so your views, likes and subscribes count BIG TIME. I’d love to hear from you if you like the video.
Digital Painting Settings
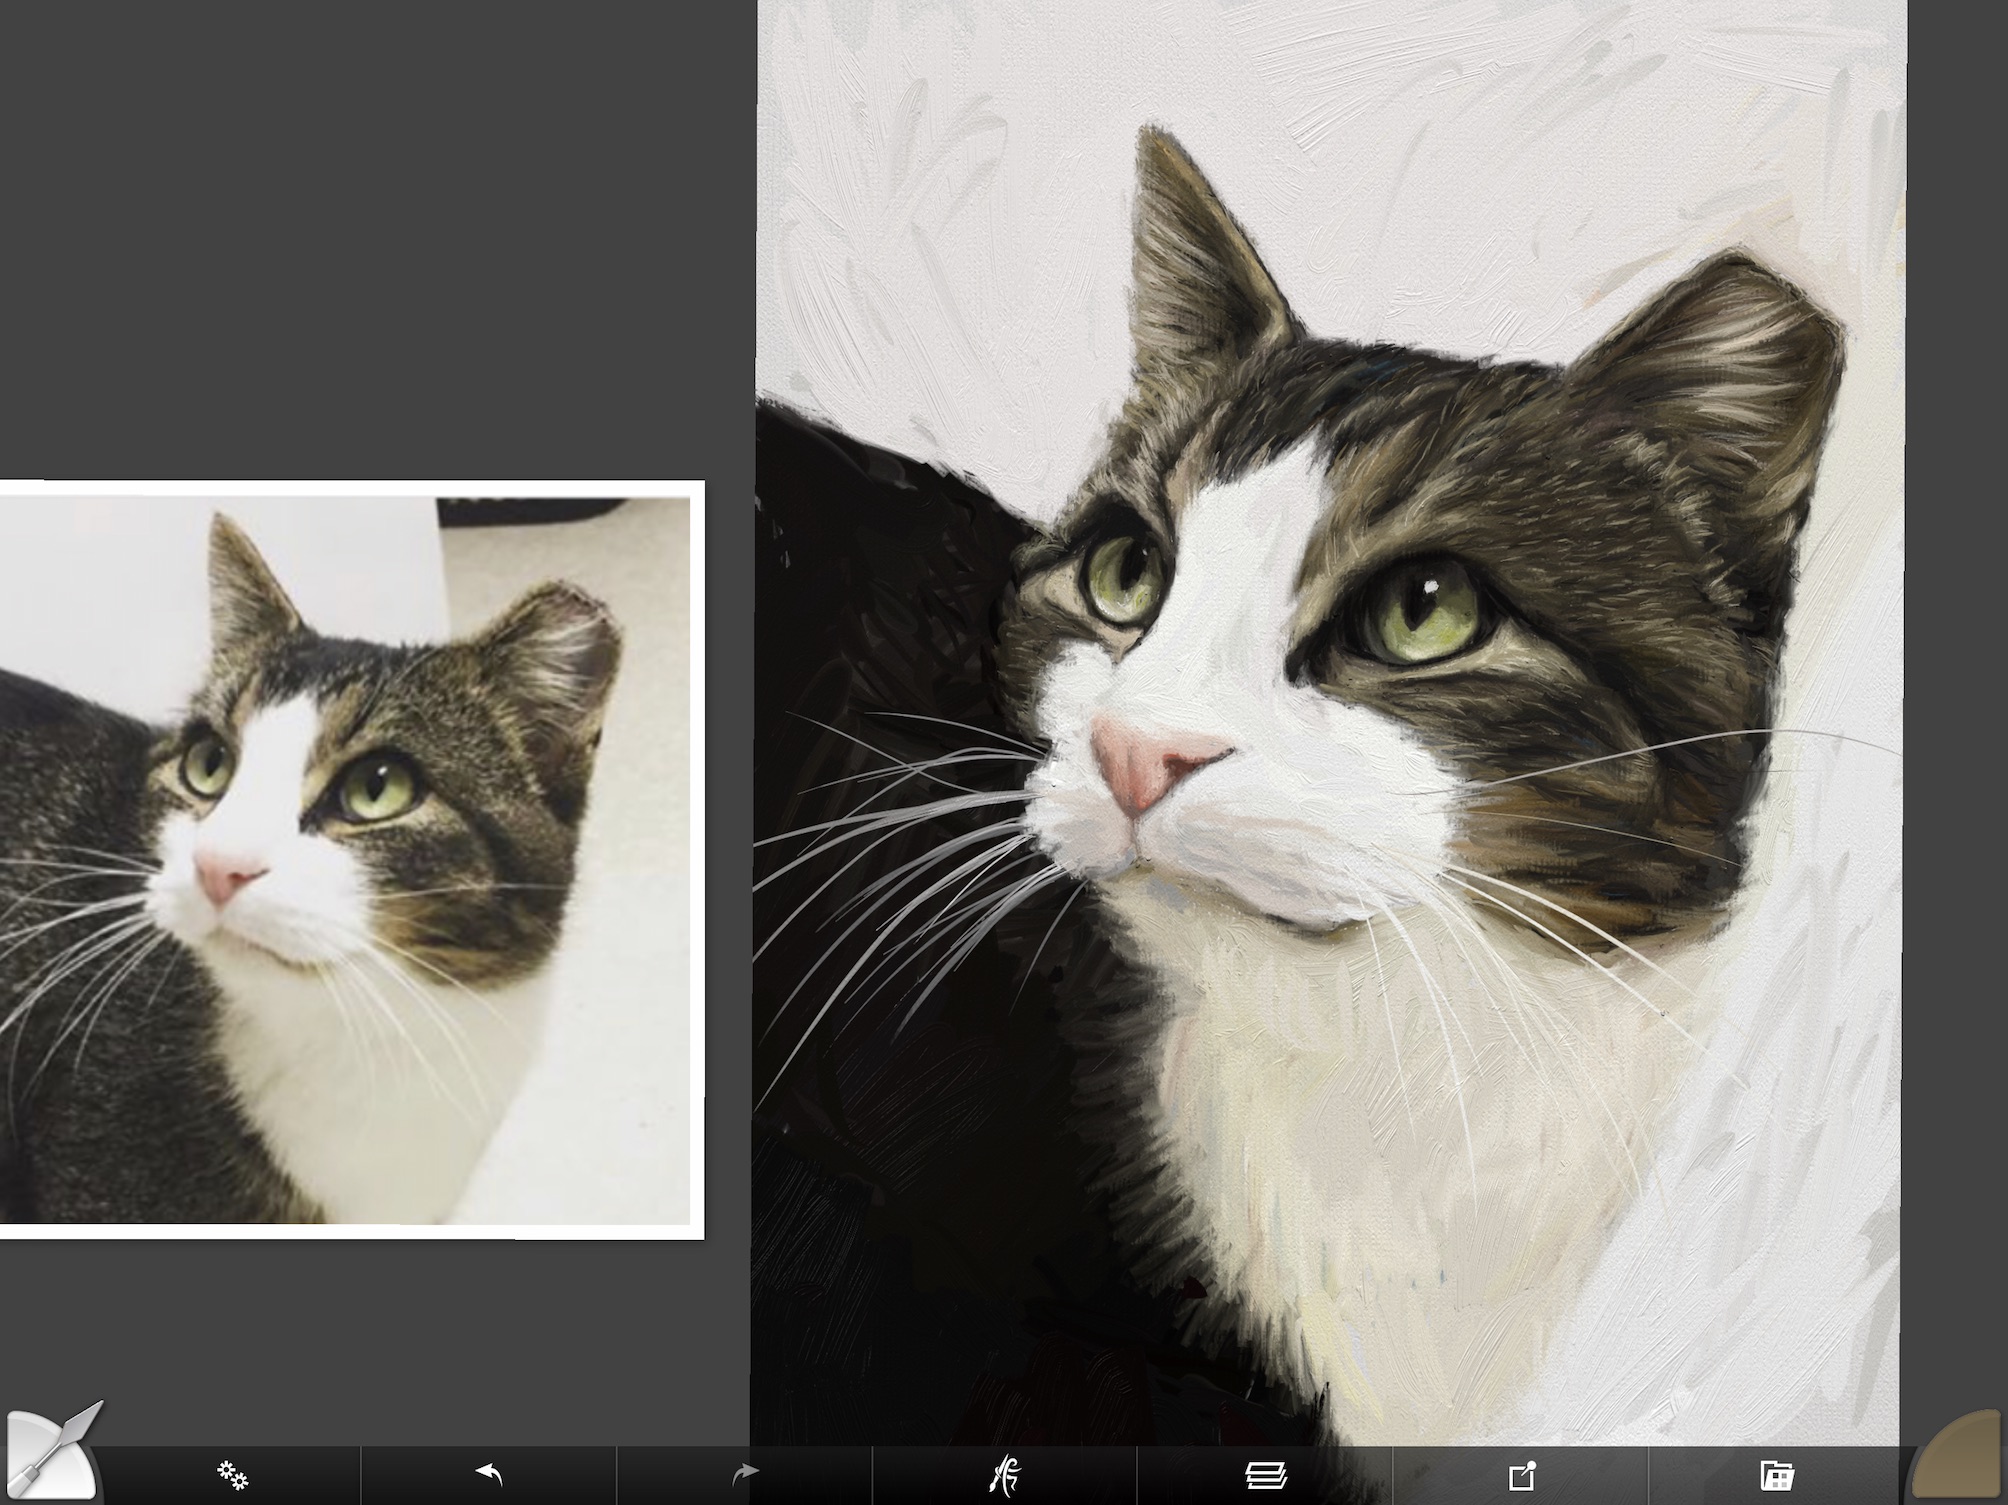
Before we get started, here are the canvas settings I used in ArtRage. The width was set to 1536 and the height to 2048 which is an odd size. I made this painting smaller so it had a smaller file size. If you want an 8×10 canvas, the width should be 2400 and the height 3000.
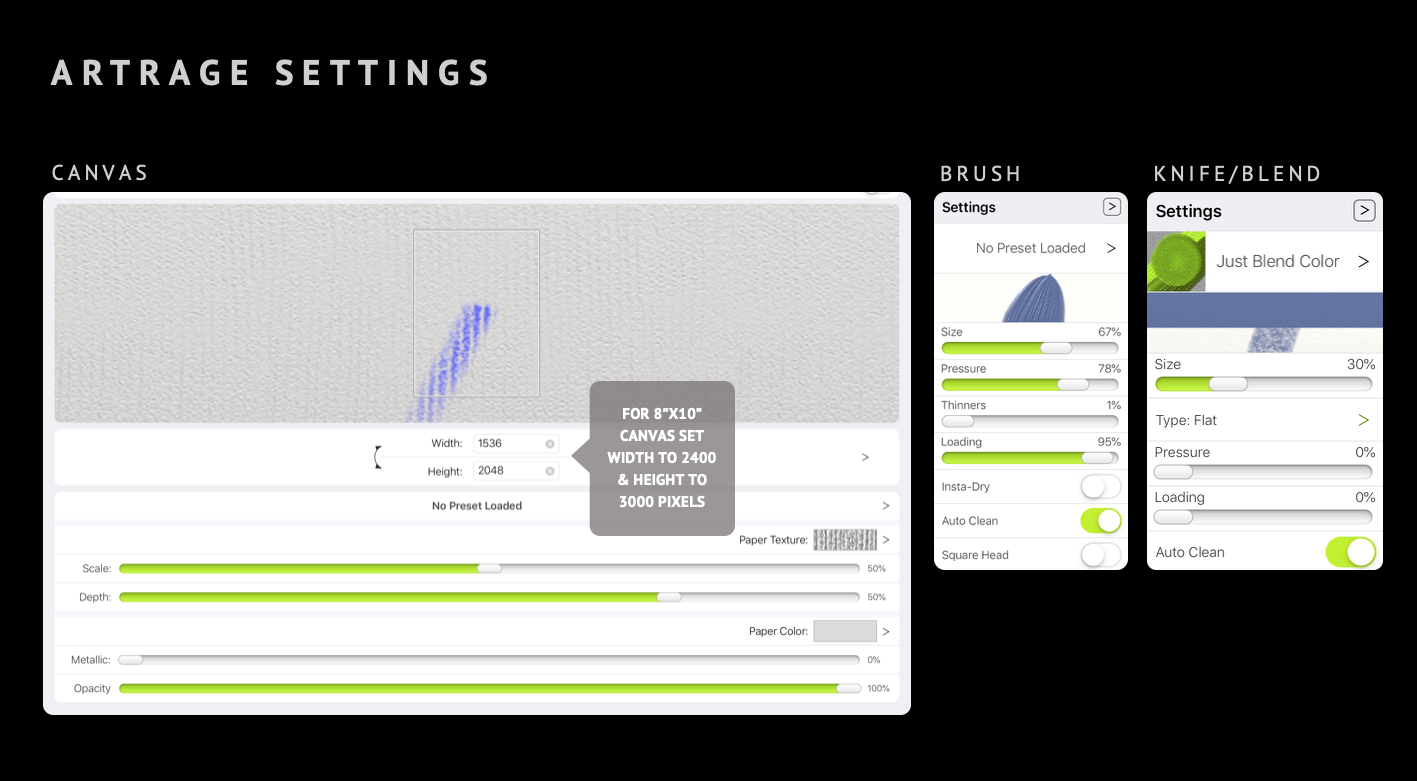
The brush tool starts with the glossy oil paintbrush, but when I increase the pressure and loading it changes to “No Preset”. I don’t use any thinners as I’m not a fan of the transparent look. I also make sure my brush is fully loaded so there is a lot of paint to push around. Occasionally I’ll use the square head but mostly stick to the rounded brush.
The knife tool is always set to “Just Blend Color” for blending.
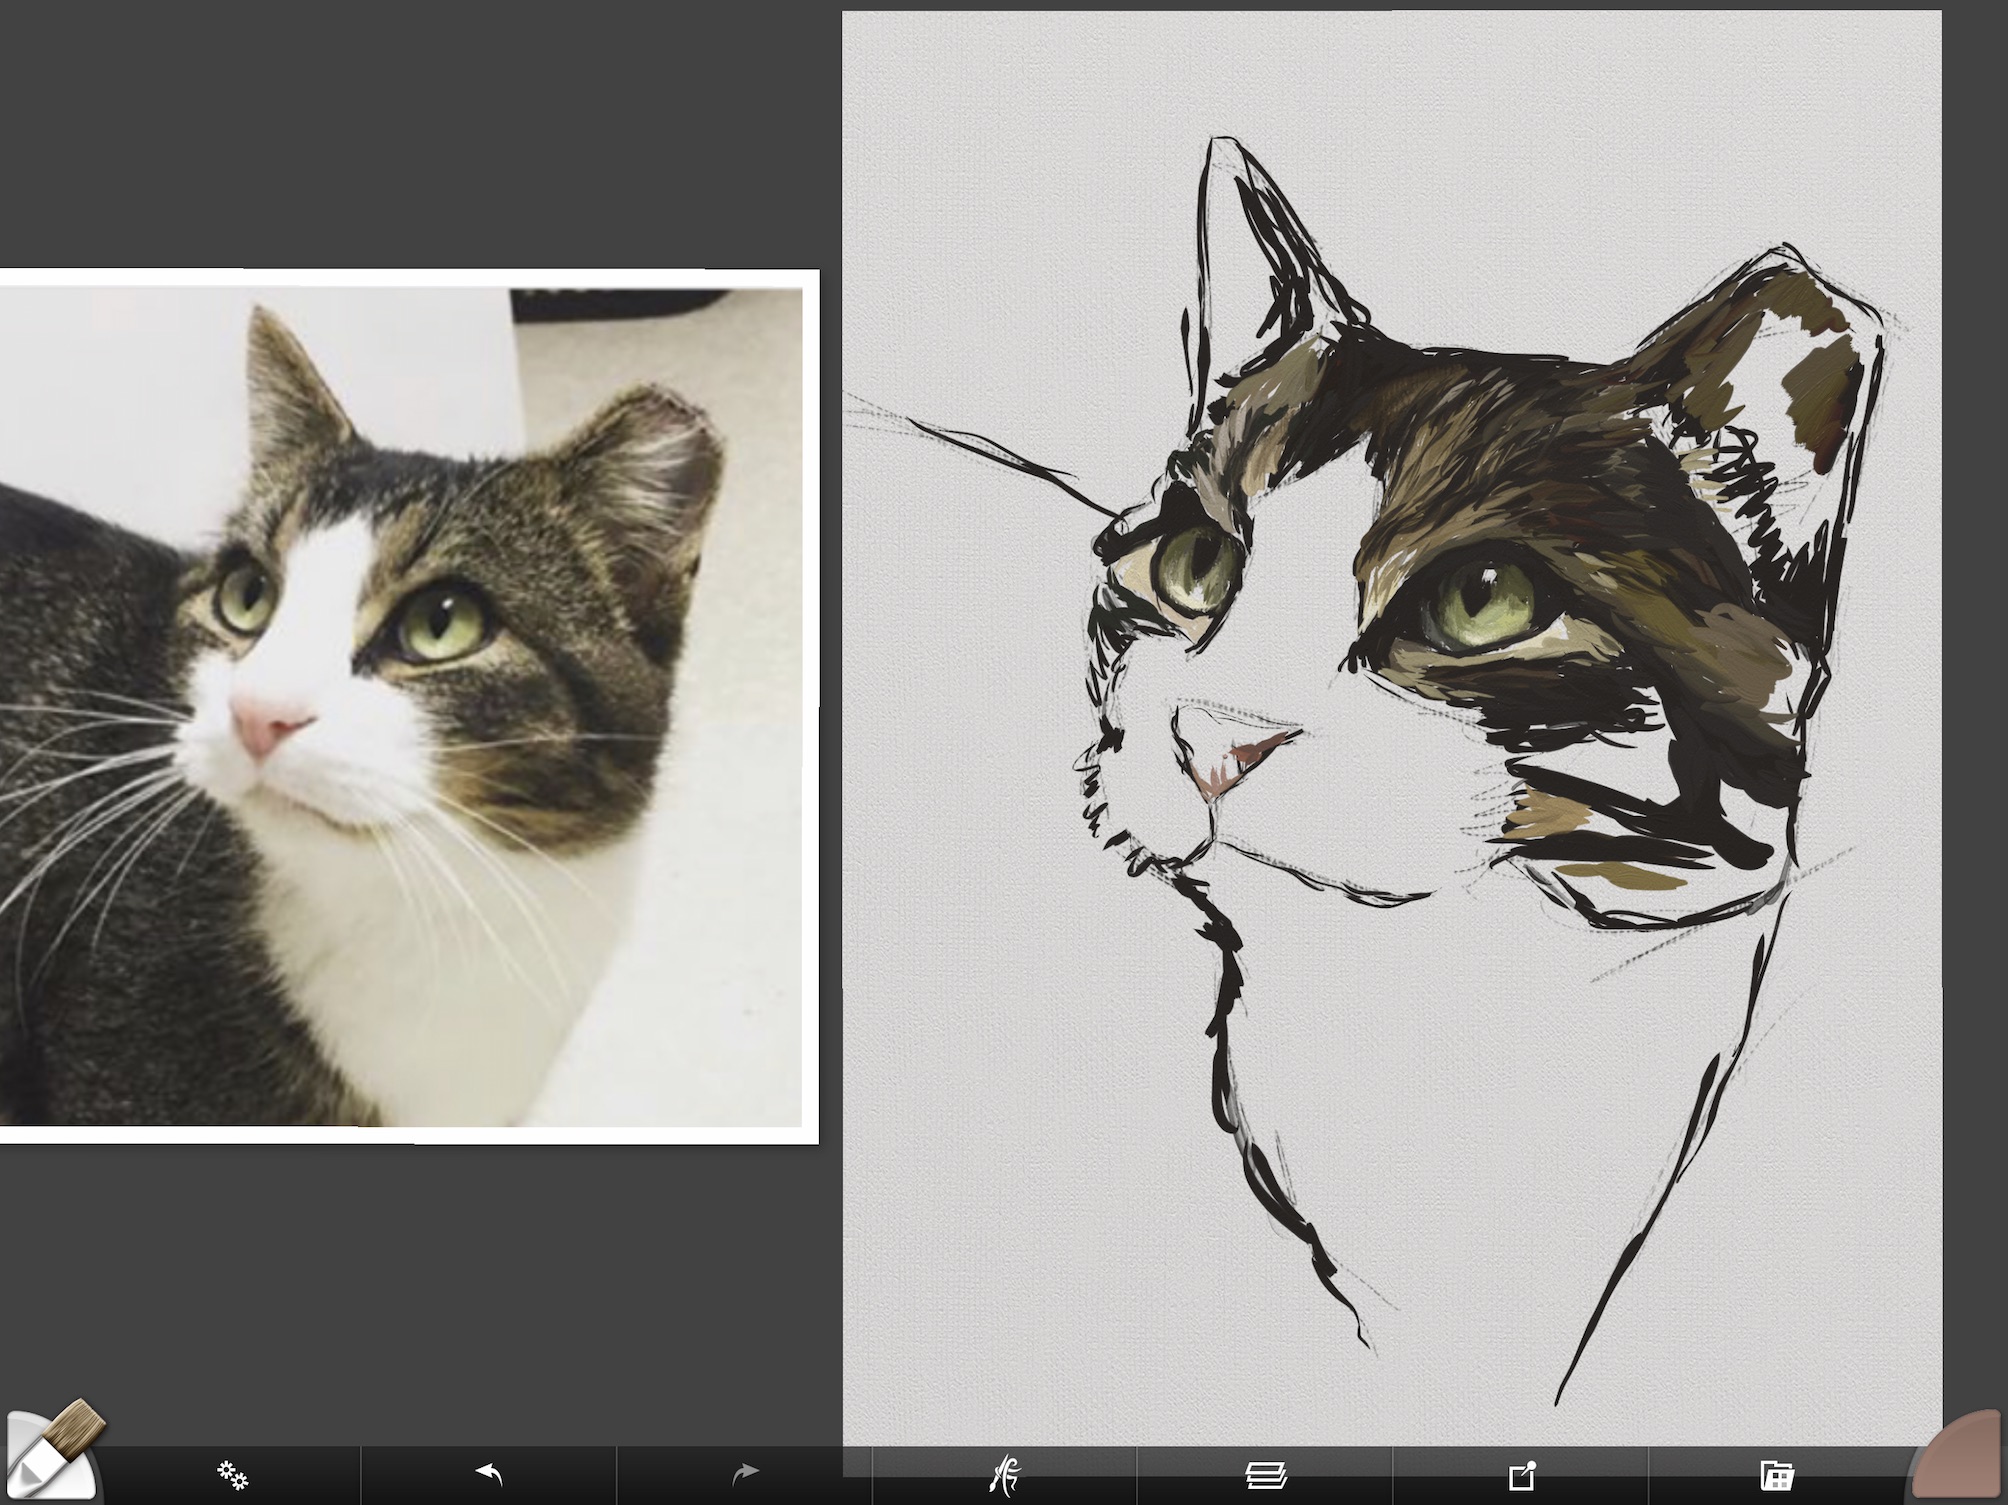
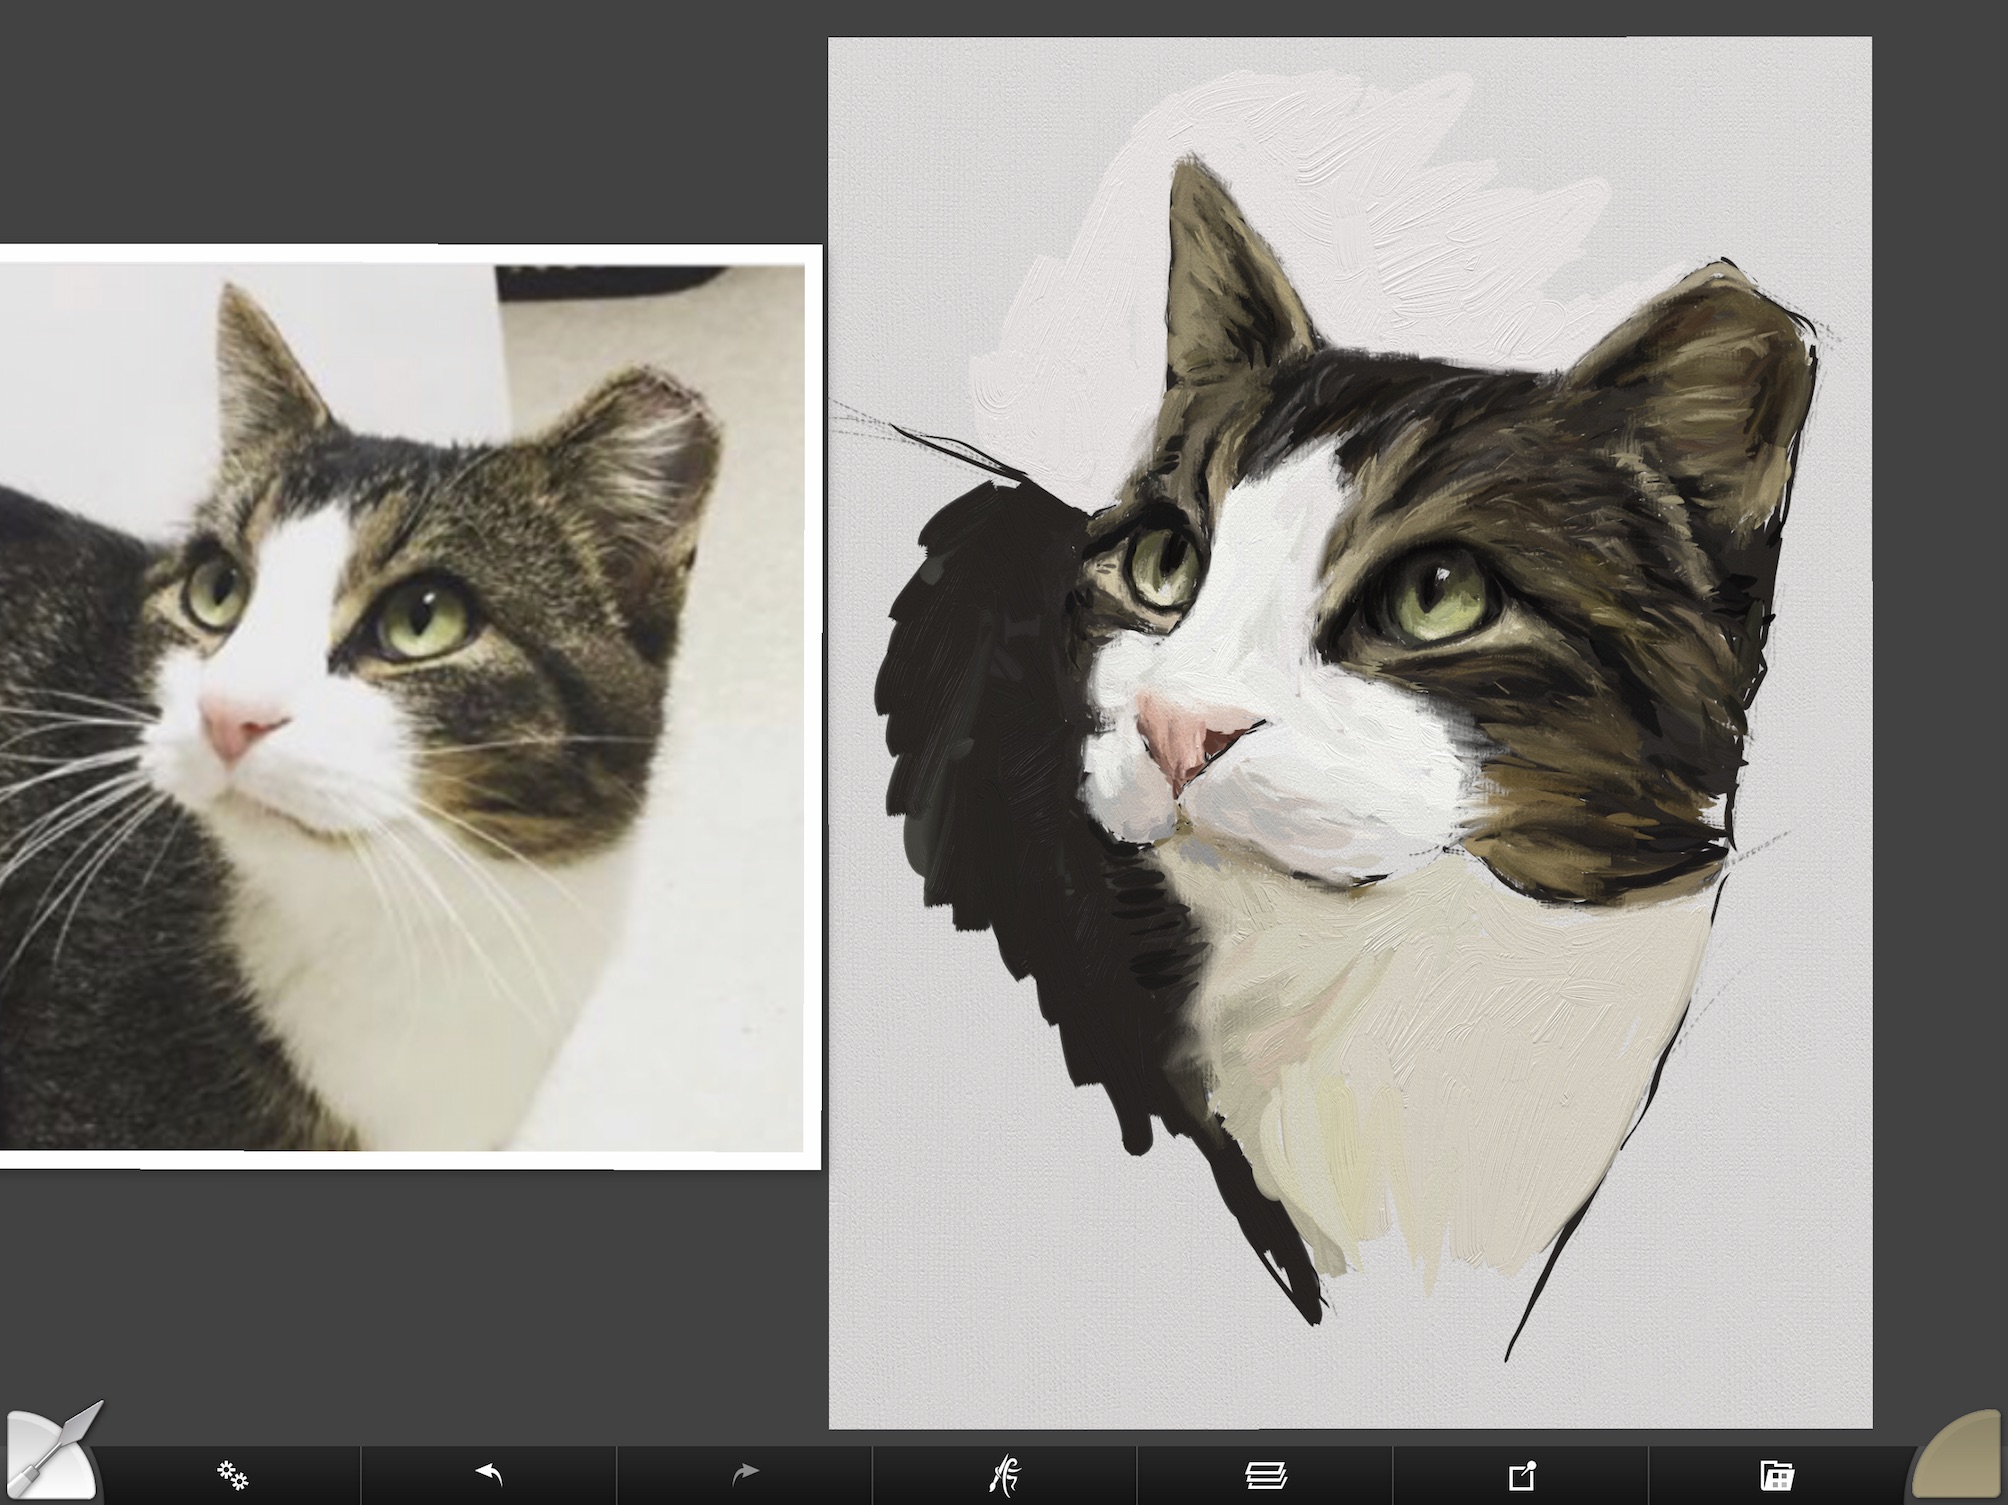
Step 1: Paint in your dark areas first when you paint a cat
If you’ve seen any of my other digital painting tutorials, you’ll know that I always say to start painting in your dark areas first. The same goes for oil painting. If you paint traditionally, check out my tutorial on Jorge & Nacho here.
Below you see that I’m using dark paint over a very loose sketch of the reference photo. If you want to see step-by-step how to draw using the sight-size method, check out this tutorial on painting a portrait. Otherwise, freehand your sketch or trace it in the program.
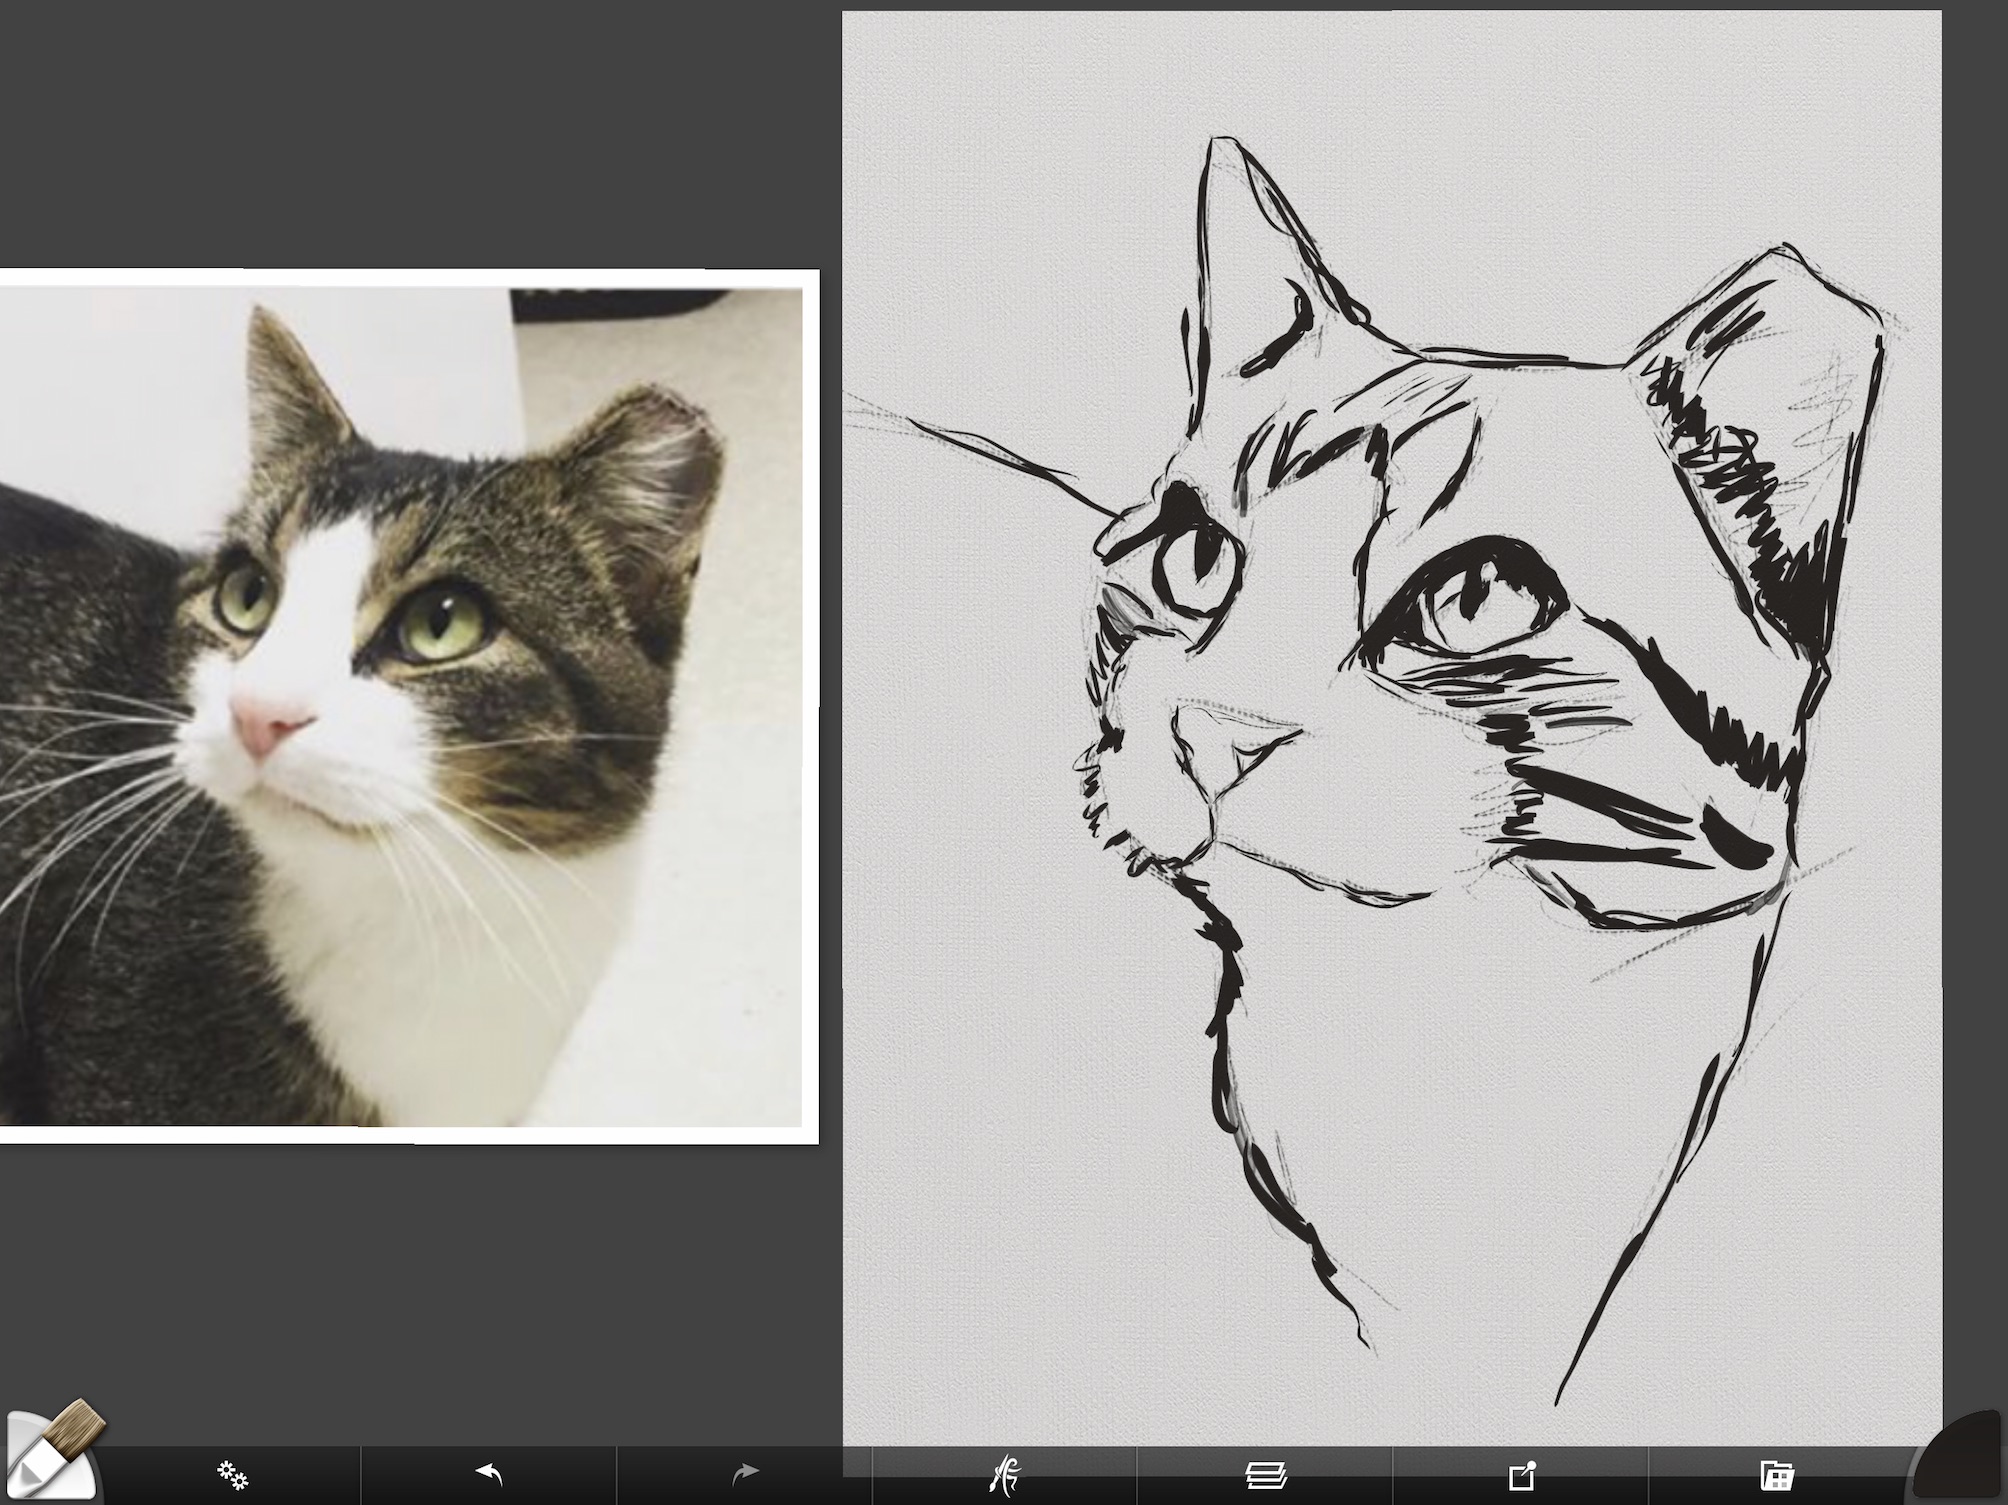
While painting you will be correcting your drawing as you go, so I wouldn’t get too tight on your sketch. Just make sure your proportions are correct. Using a proportional divider, the sight-size method or your thumb on the end of a pencil to transfer the measure from the reference to the artboard will work too.
With the desktop program in ArtRage, you can add a grid to your reference and canvas to draw. I’ve started using the ArtRage program to add a grid to my reference photo and then draw a proportional grid on my physical canvas for traditional work. There are SO MANY ways to get started and all of them are right as long as it keeps you moving forward and making art.
On canvas, I use vine charcoal to sketch with and follow with burnt umber to paint in the dark areas. When you get your darks painted in first, it helps you to see proportions and will be a good starting point for establishing your lighter values.
Step 2: Paint a cat’s eyes
I’m a sucker for eyes so I always paint them in right away. I get a nervous feeling if the eyes aren’t looking good early in the painting because they are so important to me in my finished work. As you can see below, I simply blocked in a dark green value at the top of the eye, a medium green value in the middle and light green at the bottom. The lid of the eye creates a shadow at the top, so when drawing or painting eyes, most of the time you will need darker values at the top.
Using a gray scale and value finder is especially helpful if you are painting traditionally. I use one all the time and even after years of doing art, I can still get my values too light. The human brain thinks the world is brighter and more colorful than it is, so it’s not our fault. We just like bright, shiny things.

I didn’t blend the eyes too much at this point, but when I do blend in ArtRage I use the “just blend color” knife sparingly. When you paint a cat traditionally you can use any soft, clean brush with a very light touch to blend things out. I’ve even used makeup brushes to get a soft blend. BUT, to achieve a more painterly look don’t over blend. Lay down as many of your colors as you can without blending and then go back in and blend if you need to.
The masters and blending
Some of the most famous painters of realism didn’t blend that much. John Singer Sargent is one of them. He took the time to match values and put the color in the right place. If you view his work from a distance, it looks almost like a photo. However, when you get up close it looks like a mess.
Letting go of perfection and being OK with a little mess is my biggest struggle in painting and something that can paralyze me. I’ve had a huge creative block recently because of that. I’ll be breaking out some paints and forcing myself to make a mess to snap myself out of it. Fingers crossed it works.
Step 3: Start roughing in mid-tones
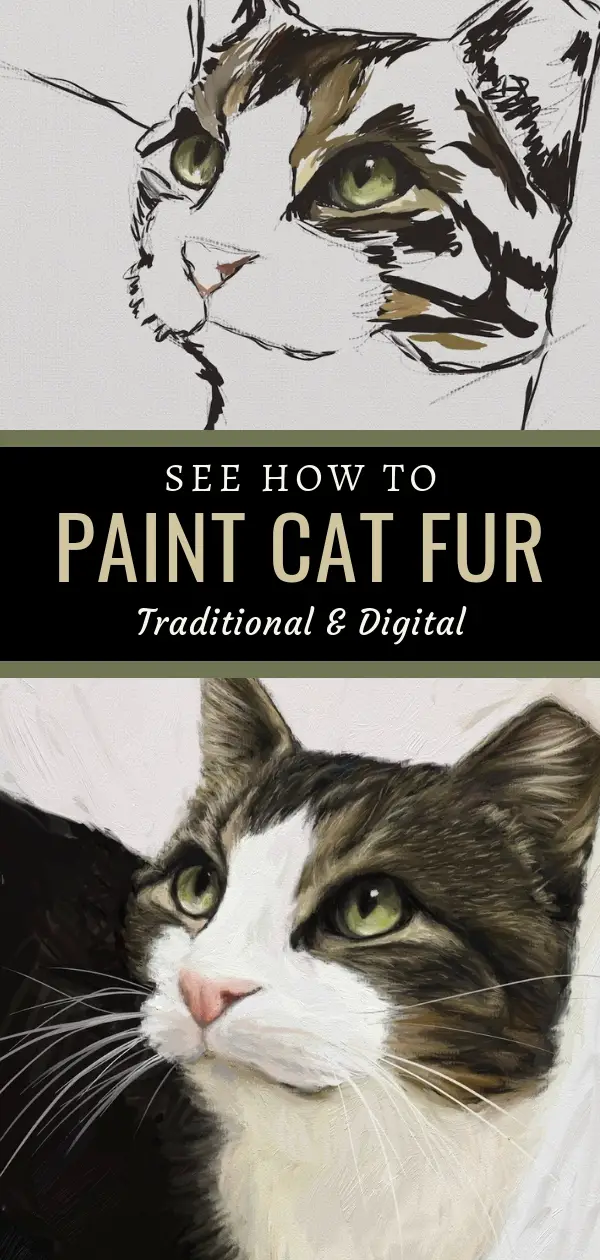
After roughing in the eyes I quickly moved on to laying in various mid-tones. With this cat, his fur is dark with medium-toned tips called ticking. This was more of a challenge to paint than I expected. What I ended up doing was paint everything darker so I could add more detailed highlights later.
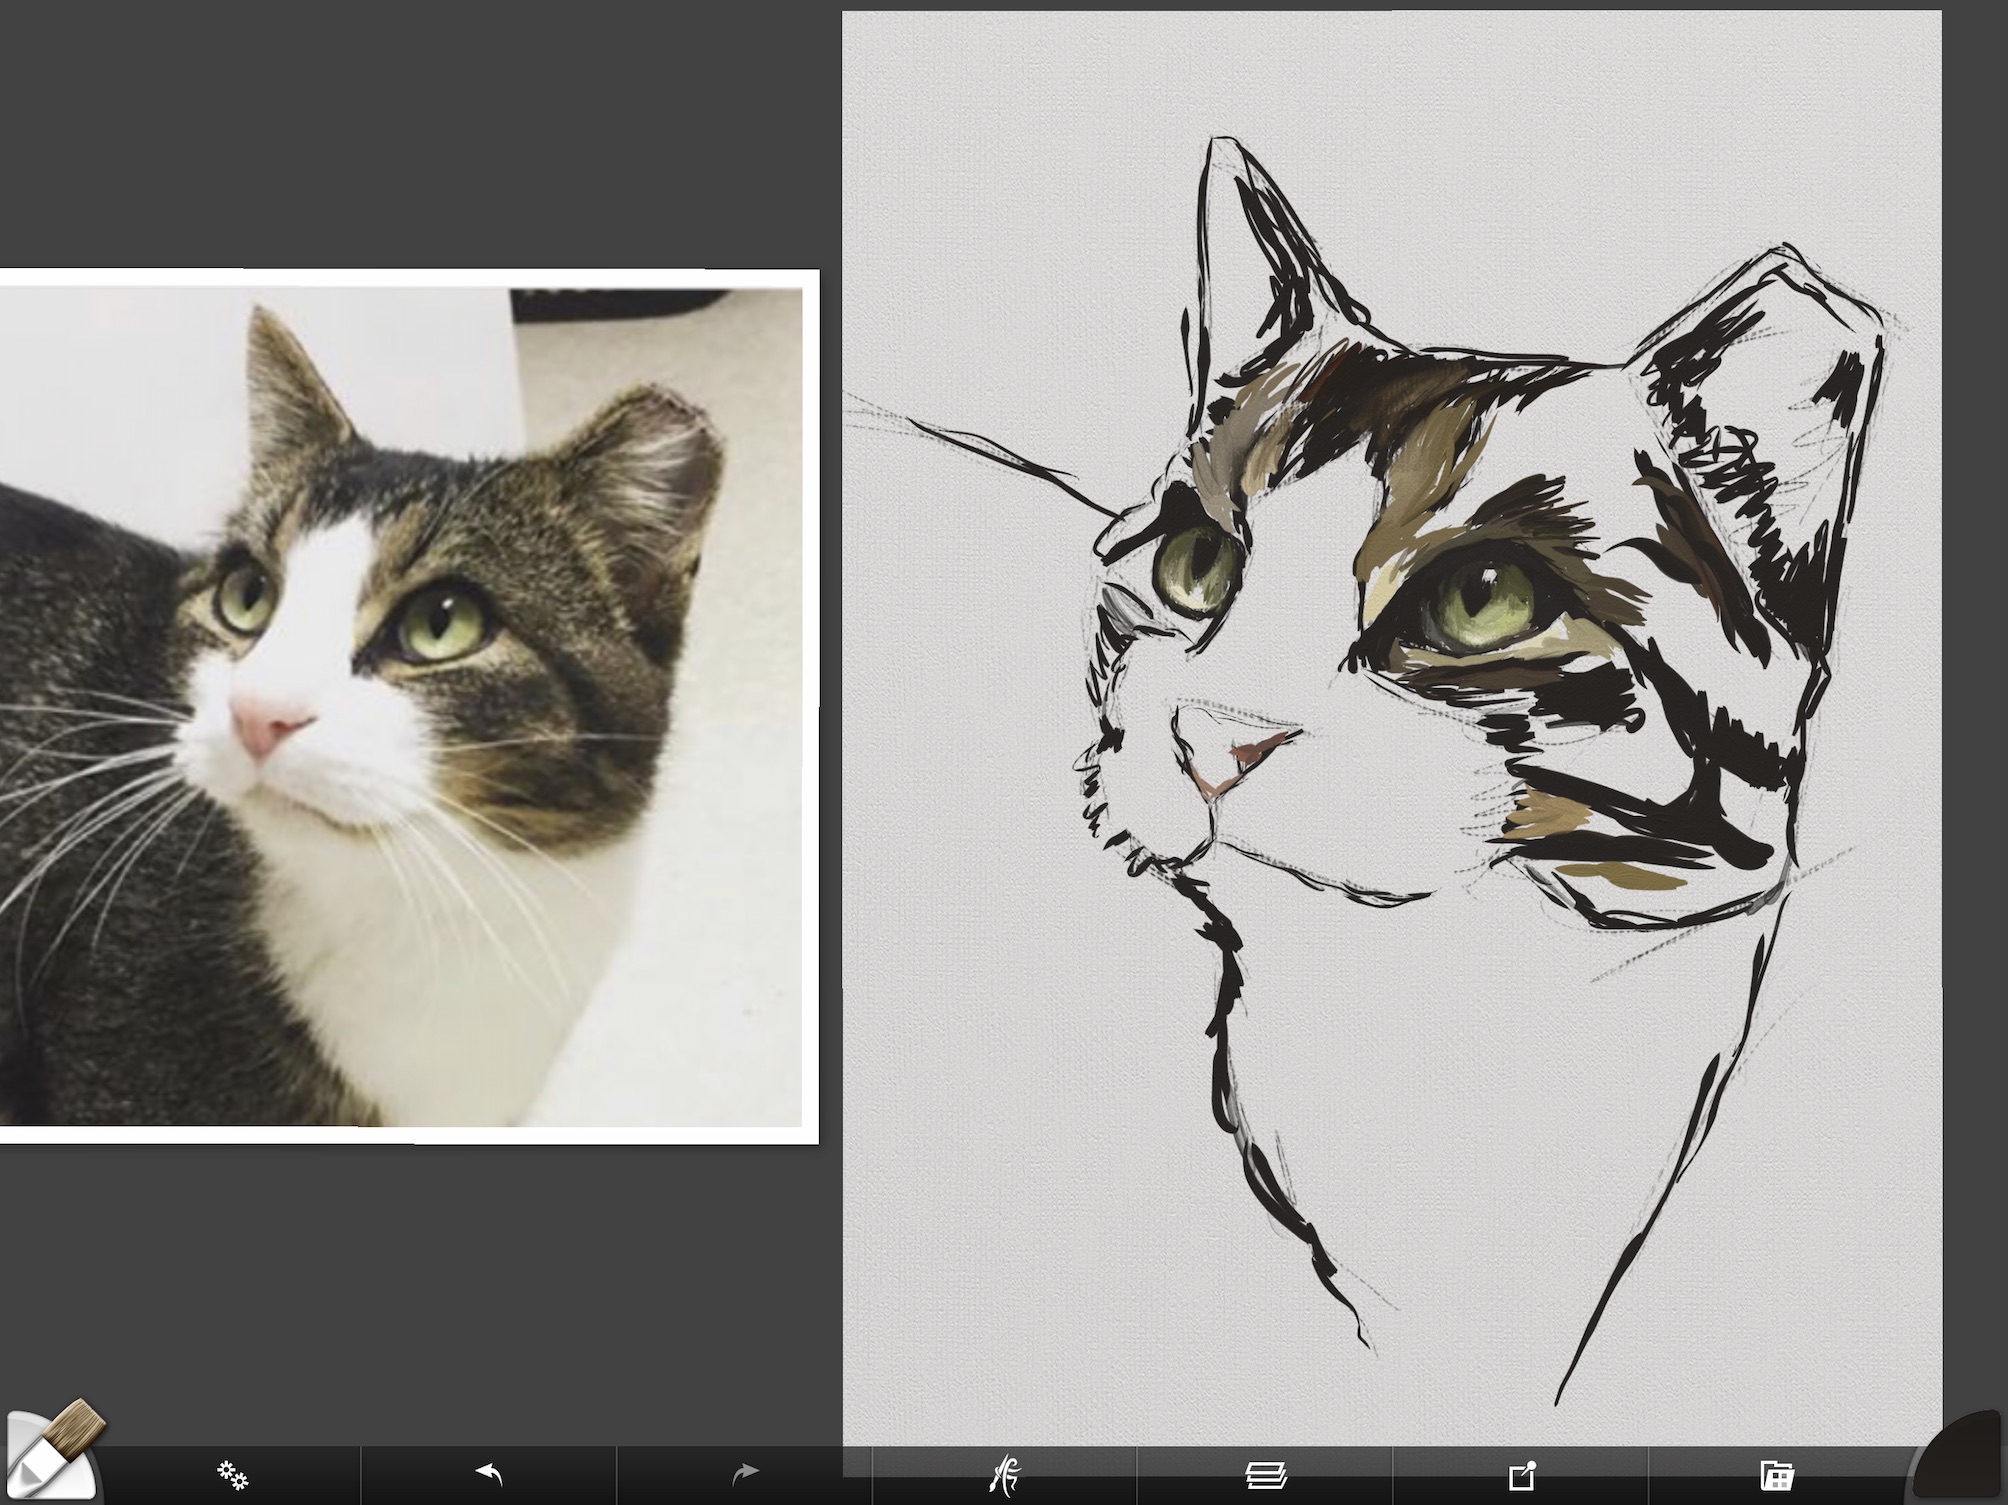
I don’t like to go as far as photo-realism, so keeping things loose and sketchy at this point helps me move a little faster. This is called painting “ugly” and every time I’m in this stage I worry if the painting will turn out or not. I have trust issues with my art!
Step 4: Lay in dark values when painting fur
The ugly stage keeps getting uglier, but if you squint your eyes at the painting the overall values are in line with the photo. Squinting is the best way I know how to see values quickly. When you squint, all the detail falls away from your vision so you see the main colors.
Step 5: Establish values for white fur
To get a gauge on the values of Tippy’s white fur, I had to block in the dark fur of his body. Any time you are painting something light, it’s best to get all your background in first. If you don’t do that it can change your perception of the color.
Blocking in adjacent or surrounding background color-matched to the value of your reference can help you to accurately determine your light colors. It takes a lot of painting to see value correctly, but if you get it wrong you can scrape paint off a canvas, paint over it or erase it on the iPad. It’s all a part of the process.
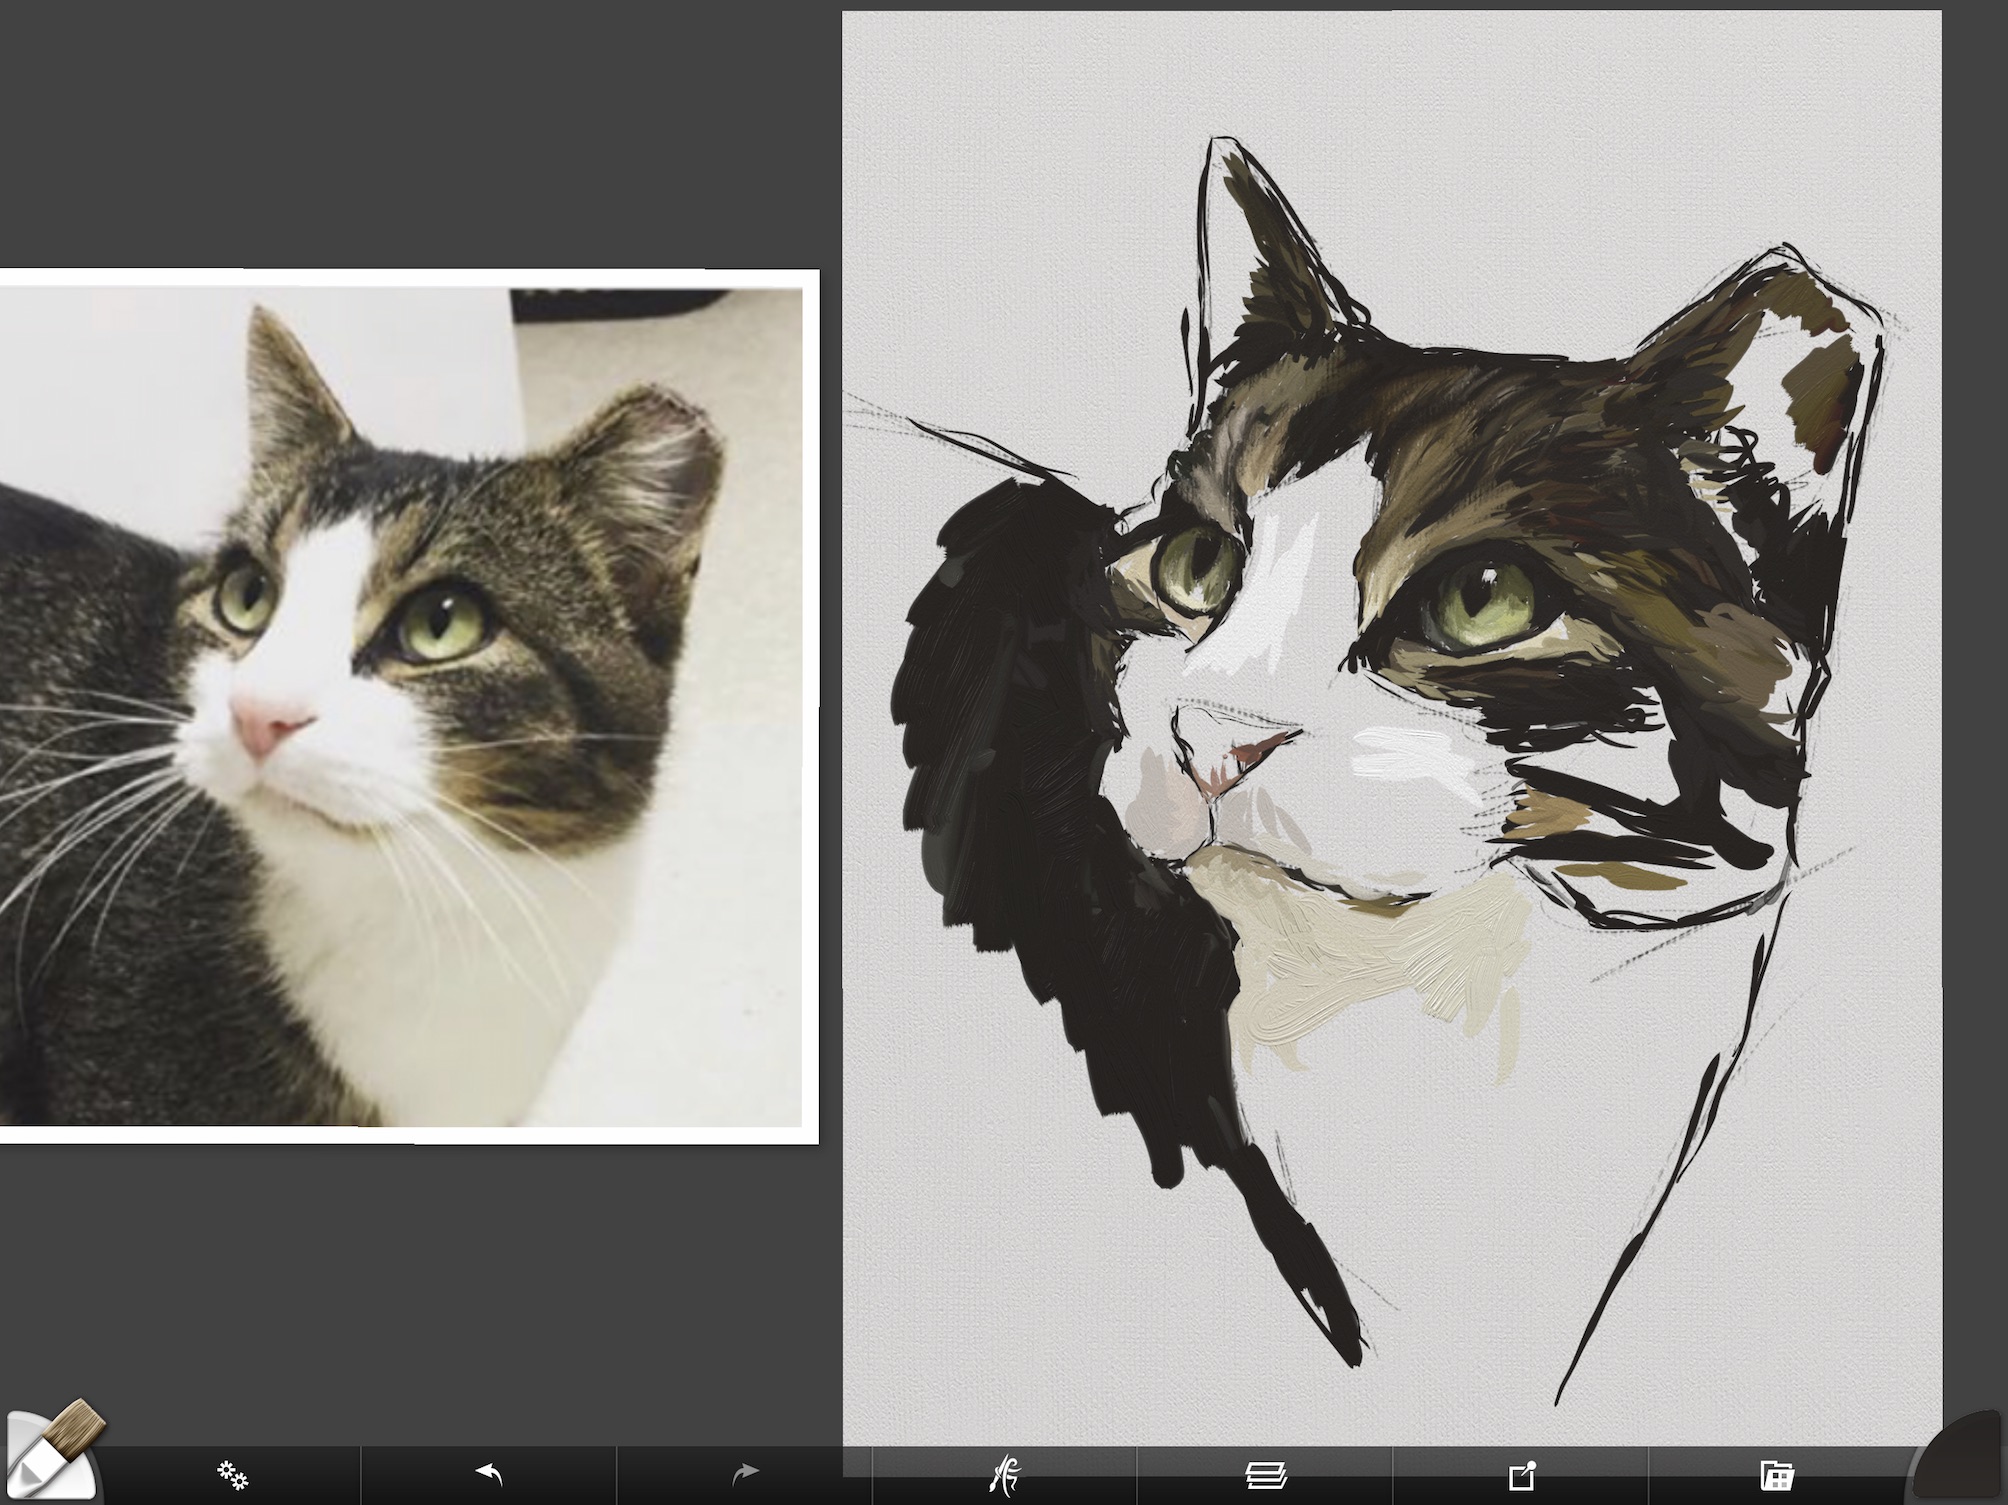
Above you can see that I started to swatch in the lighter colors on Tippy’s fur after painting some of the body colors in. It’s a mess but we’re making progress.
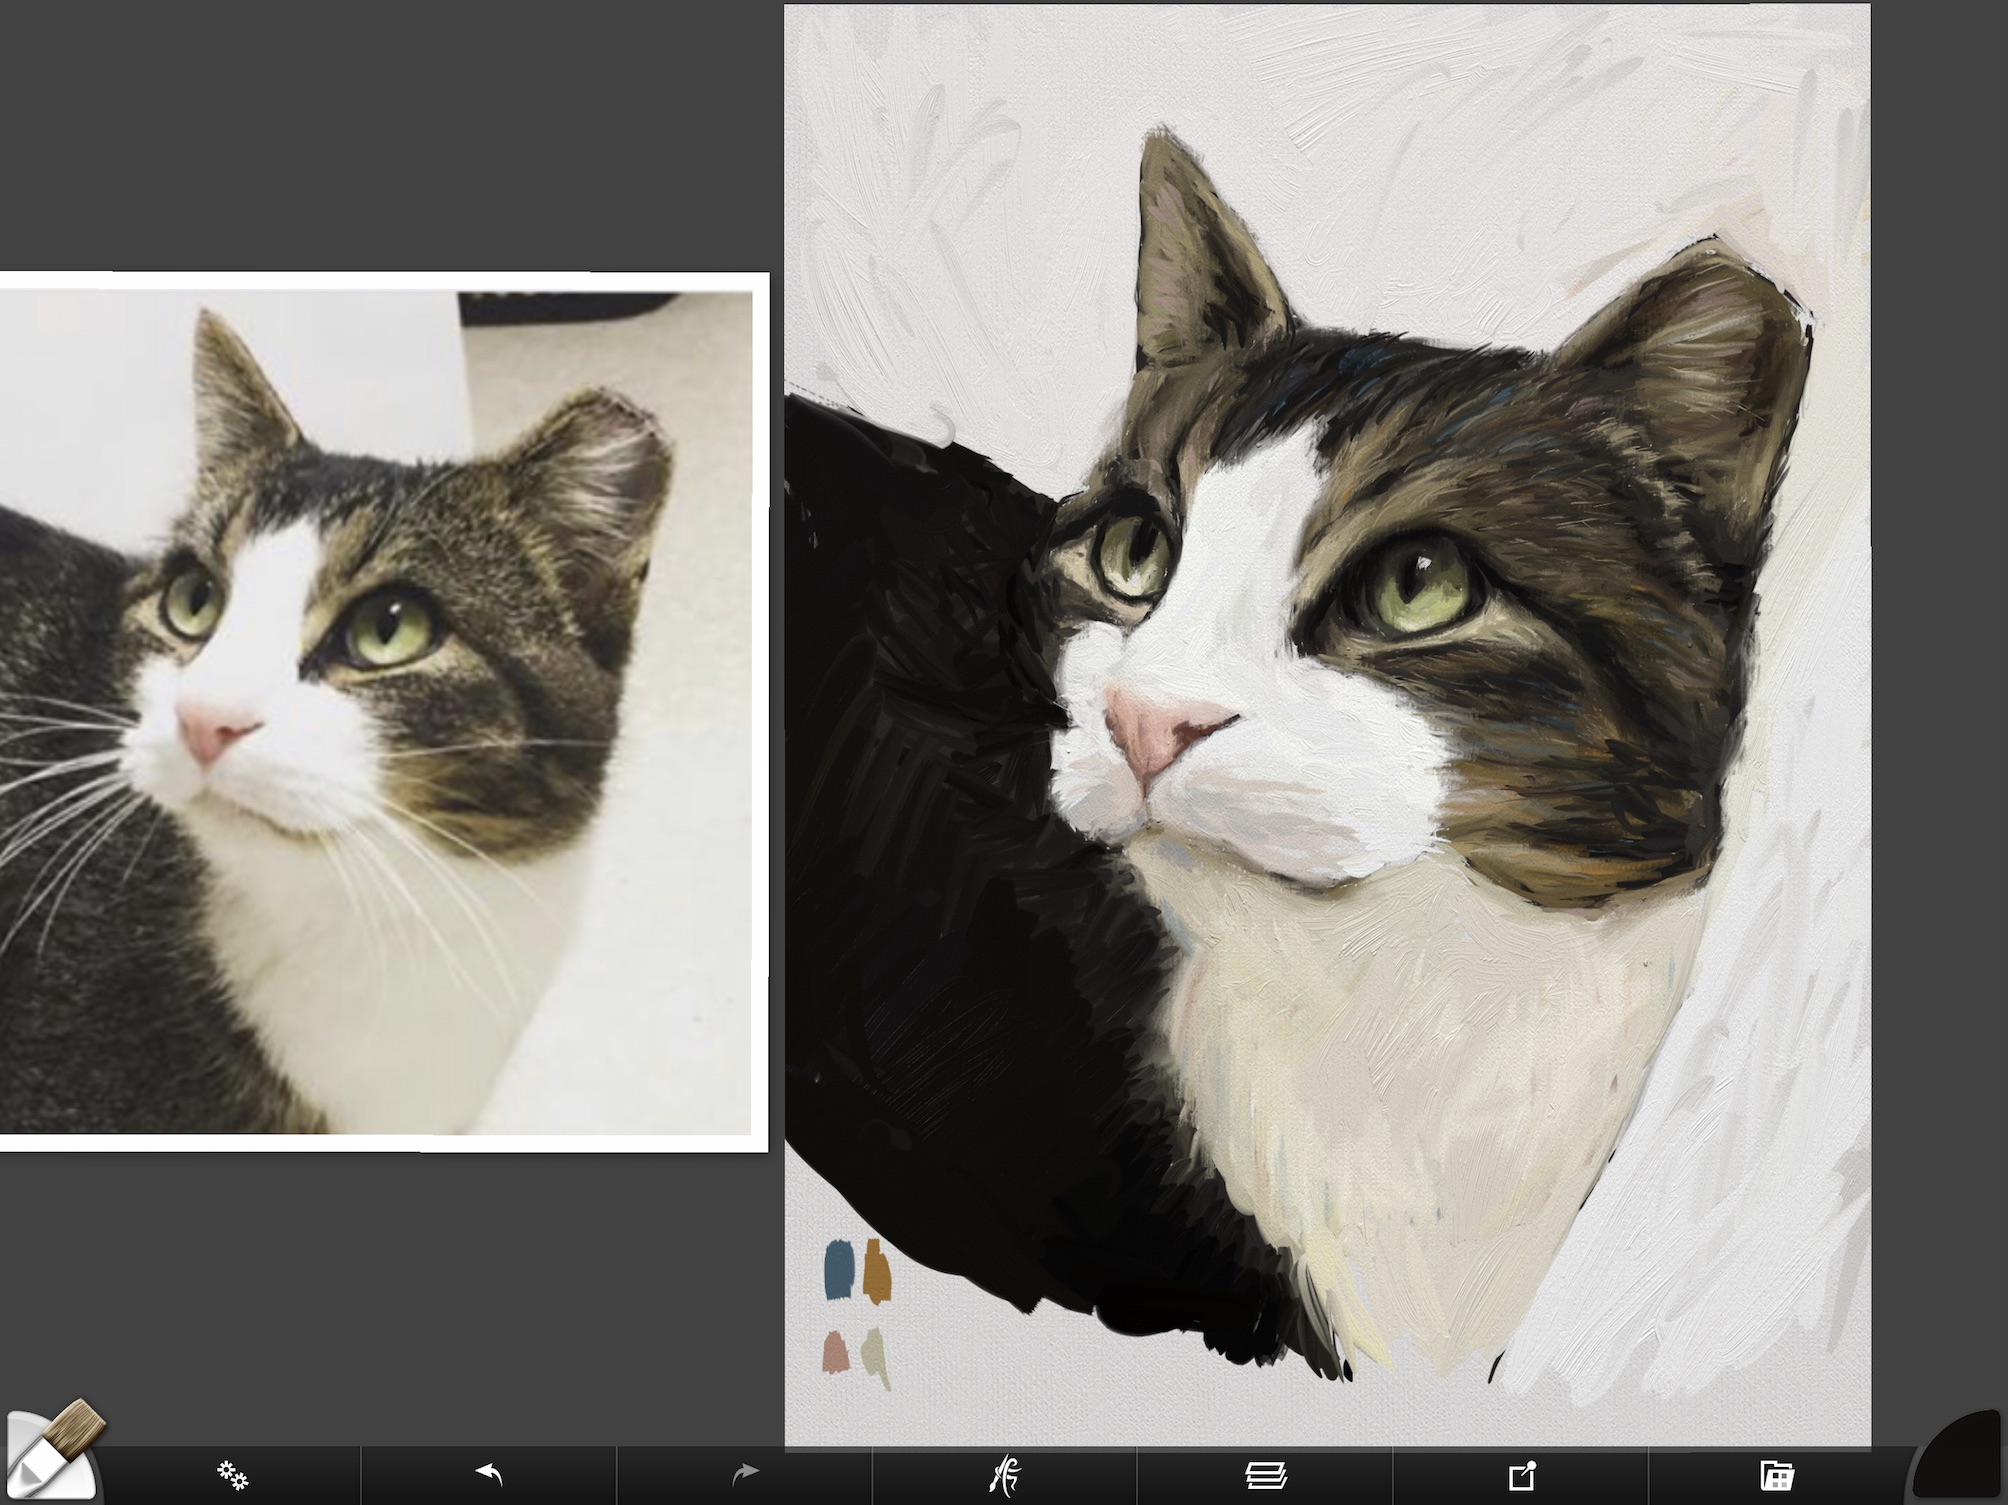
Step 6: Paint a cat’s soft pink nose
When you paint a cat with a pink nose, it will always have a dark blood red tone near the nostril. In this tutorial, I could have used a stronger red to outline the nose but was trying not to over-saturate my colors. The eyes are the focal point of the painting, so I consciously work to keep colors from competing with each other. The hint of red and pink on the nose are nice complementary colors to the green eyes without being distracting.
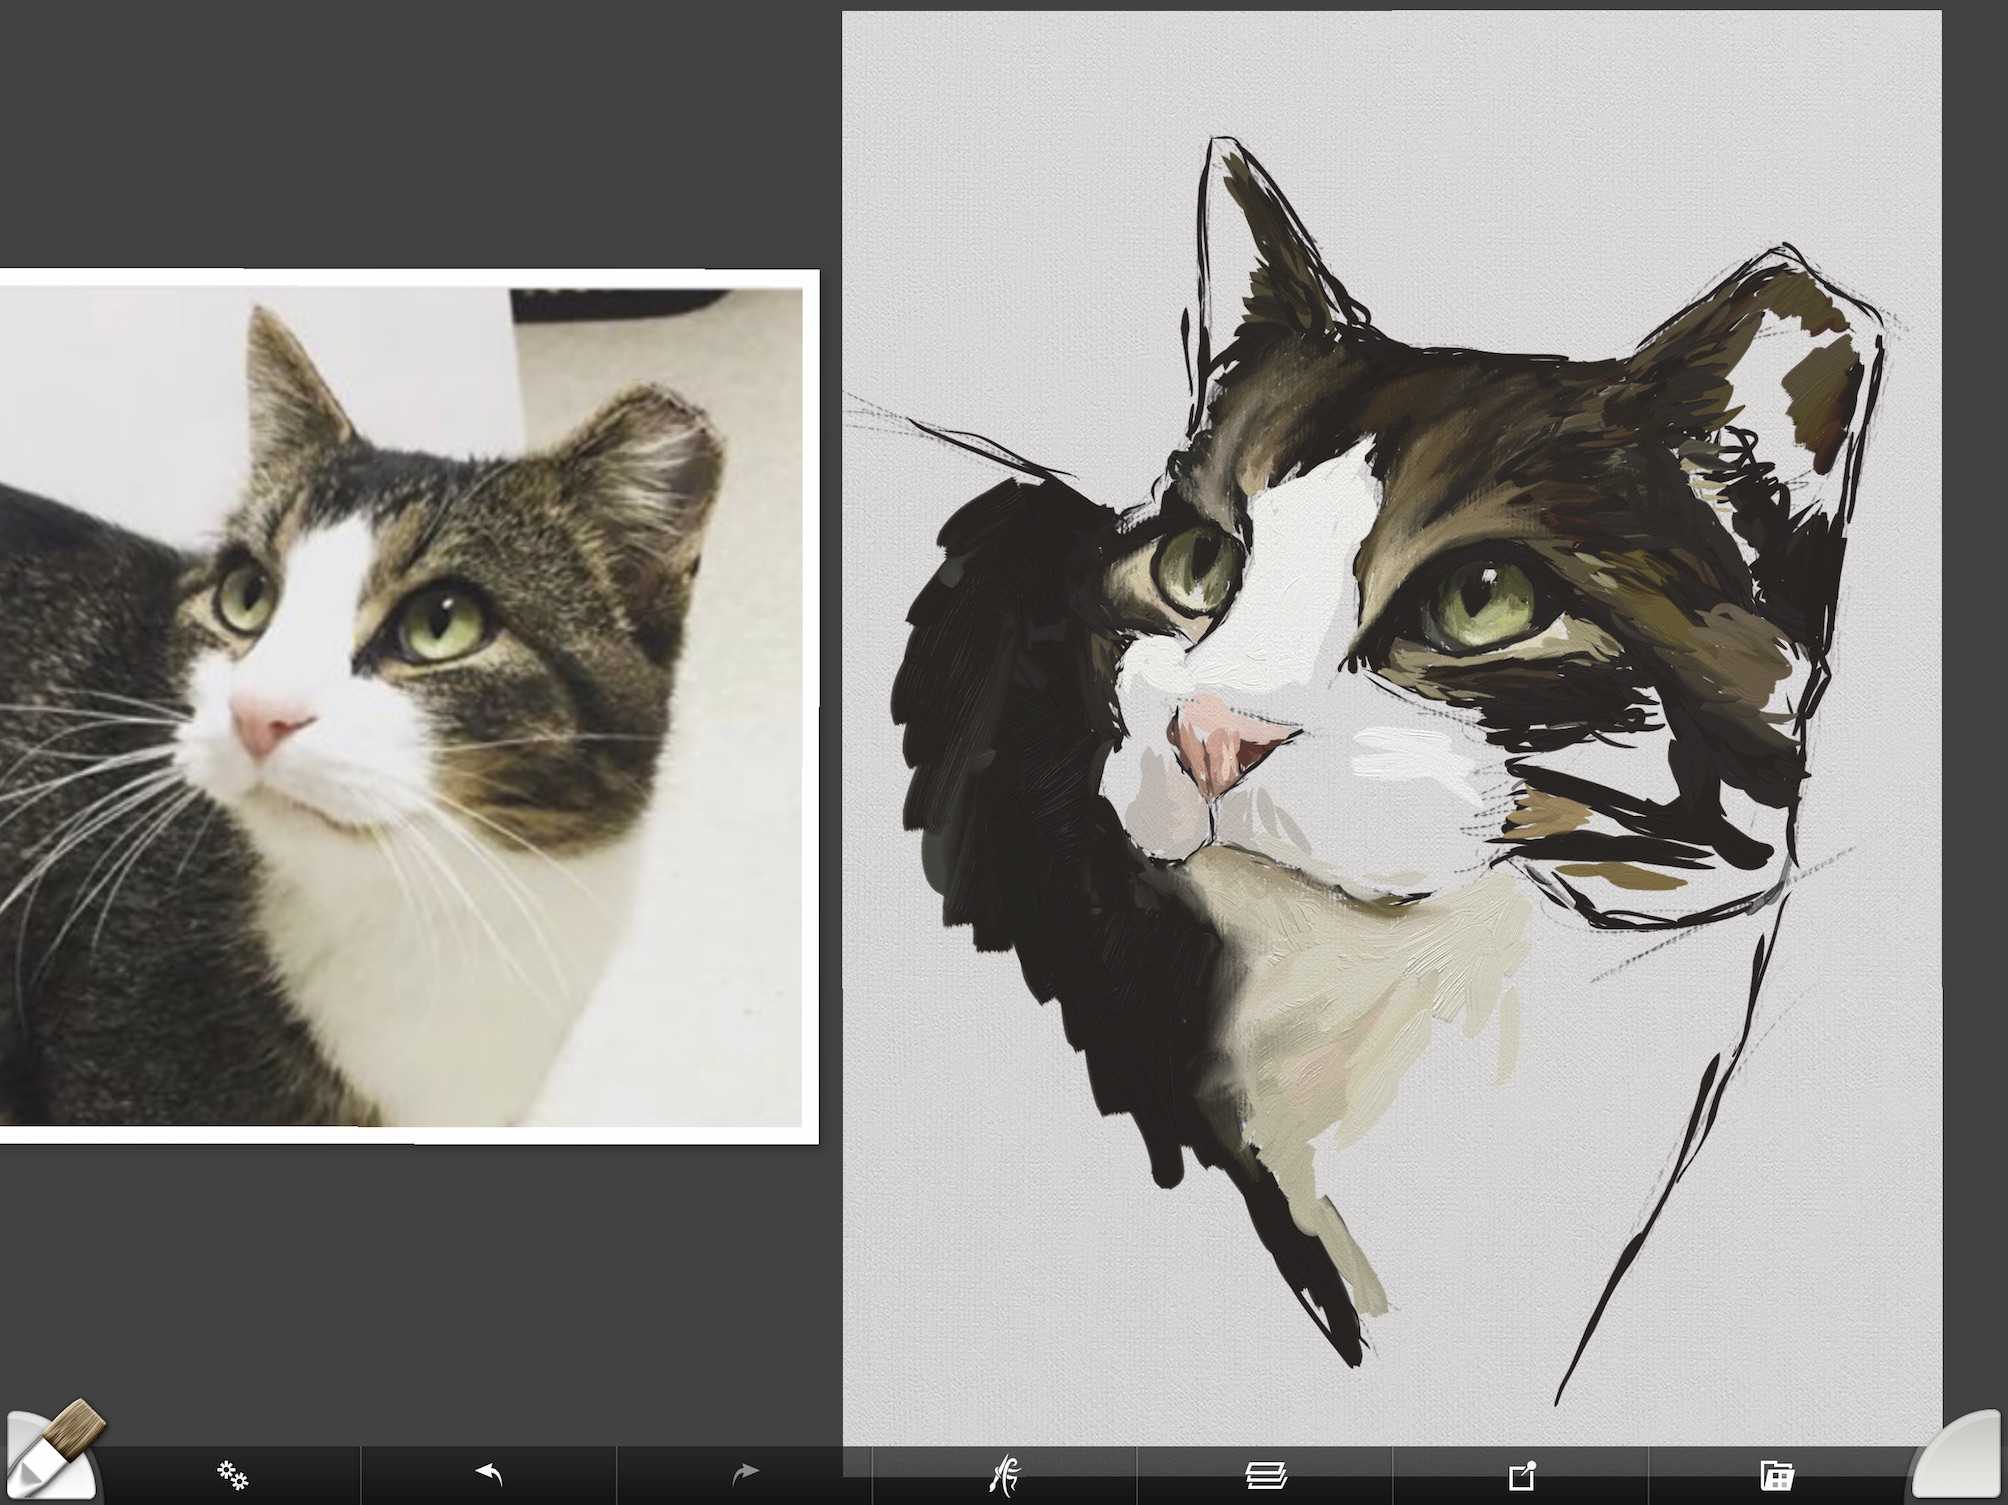
The nose was three colors. A dark red outline, a medium pale pink on the front of the nose and then a light pale pink on the top. Highlights will be blended later.
Step 7: Testing darker fur highlights and blending
As you can see below, things sort of look like a blobby mess. If I hadn’t gotten the eyes looking good I’d probably have given up on this painting. For me having that small success early on is important and keeps me motivated.
Now that I have most of the dark fur blocked in I’m starting to test out highlights in the dark fur area. I went a little lighter than I should have above the eye, but it can be blended in. When working in oil, I’m really careful not to get too light too fast because if you add in too much white paint the whole painting can get foggy or milky. It’s hard to reverse that. You either have to wipe off the paint or wait until it dries and repaint the fog out.
Working digitally is less of a problem, however, I still like to paint “alla prima” style so things can get foggy there too. I do have an “out” in with the erase or undo tools, but try not to use it if I don’t have to.
Working in ArtRage, I blend out using the knife. If I were doing this in oil I’d be allowing my brush to blend the colors together along the edges. If I were going for a more realistic effect, I’d get out a soft brush and blend out lightly. It all depends on the look you want.
Step 8: Adding detail to mid-tones when painting a cat
At this stage of the digital oil painting tutorial, I’m getting into a much more finished look. The knife tool has allowed me to smooth out some of the blobby areas. Sometimes it’s best to just slap all the color down and get all the values in the right place fast first. After that, you can take a little more time to shape things up.
I’ve done paintings where I start in one place, get close to finish and then move on to the next area and complete that. I’ve also done paintings where I’m all over the canvas. There is no right or wrong way. Only the way that works best for you. For me, it depends on how I’m feeling that day. I like to mix it up.
Above you can see that I filled in the ears and the side of the face and then started in with a smaller size brush with a lighter paint color. I’m being more careful with my strokes and at the same time am trying to figure out how to do the “ticking” on the fur without getting too detailed.
After I put my finer strokes down I continue to smooth some of those strokes out with the knife tool. I switch back and forth quite a bit at this stage.
Step 9: Adding subtle complementary colors
Most of the time when I paint in ArtRage, I put a series of color swatches to work from along the side of the canvas. Since Tippy was basically black, brown and white with a little pink and green I didn’t do that this time. But after he was getting more finished I felt the need to add in hints of complementary colors.
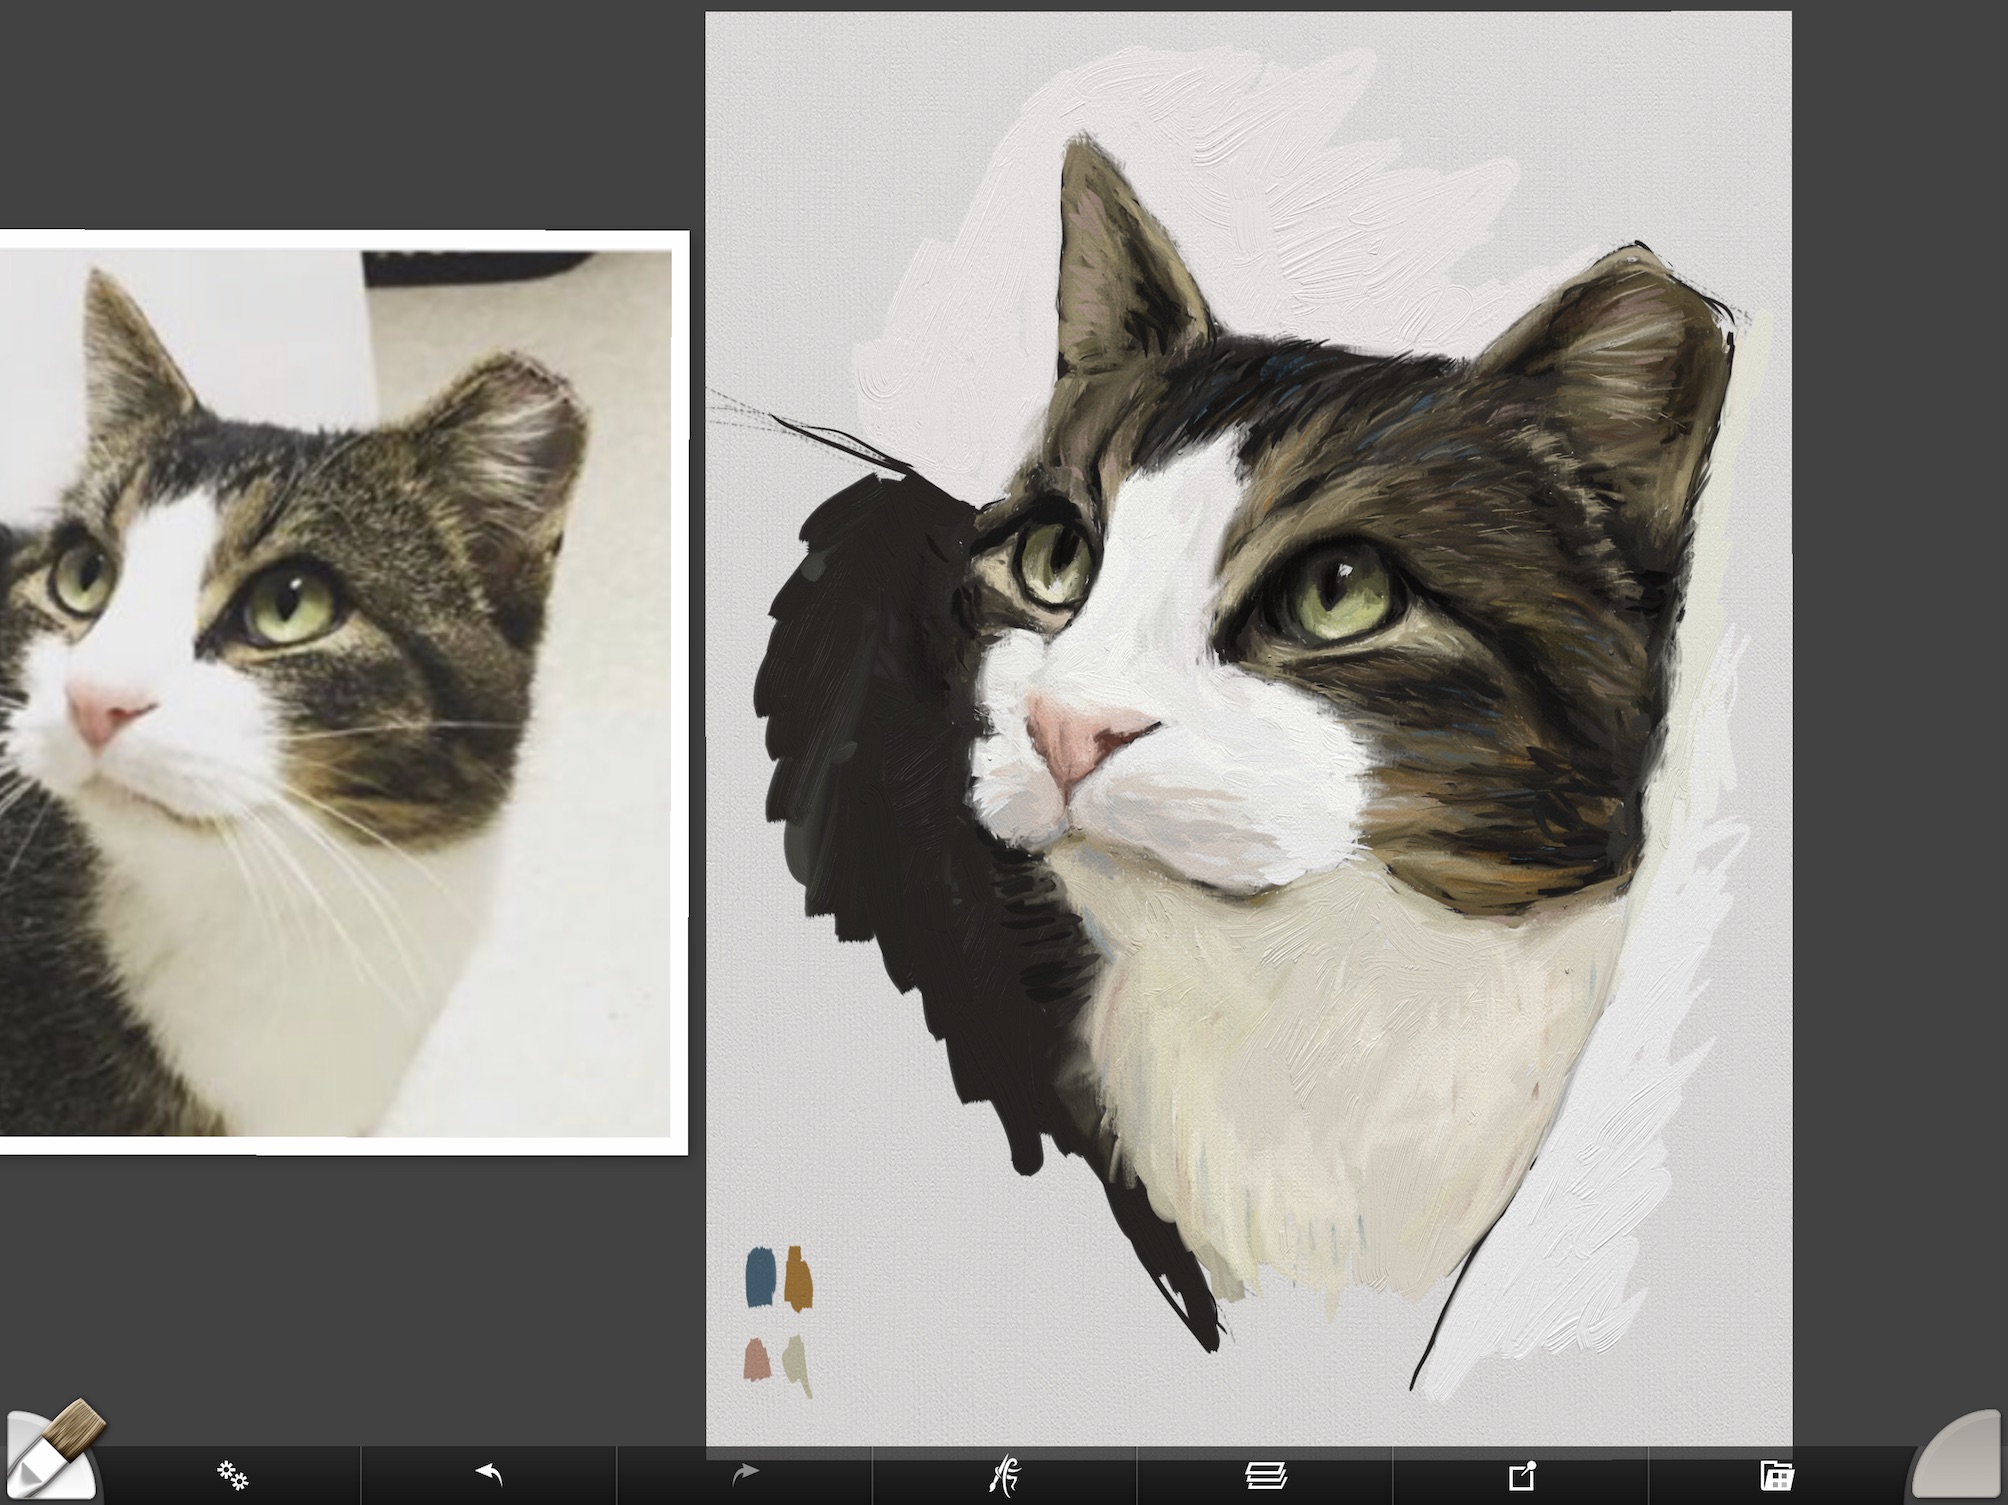
Above you can see I have a blue and gold swatch. What I did was take the blue paint with a small brush and added blue tones throughout the dark fur. It’s barely noticeable unless you look closely. I then added the gold near the blue areas. What this does it create a slight vibration in the eye which livens the piece up a bit and gives a sense of energy or movement. It’s easy to overdo this, so I kept it on the subtle side.
I started painting in the lighter background color so I could blend out my edges a bit on the fur around the portrait.
Step 10: Welcome to the monotonous middle of this cat painting
When you paint a cat or any animal, after the major parts are done there is a lot of work that is refining, redrawing and reshaping. Artists make thousands of adjustments along the way in their artwork. When I watch speed paintings on YouTube I feel like I’m the slowest artist on the planet. Those videos also give the illusion that art is quick and easy. But most of the time it’s really slow and sometimes frustrating if you can’t figure out how to do something.
This painting was done digitally, but it took me at least eight hours to do. Probably longer. I usually work on these in the evening while the TV is on so I lose track of time. Digital paintings can take me much longer than paintings on canvas because the paint isn’t going to dry on me so I have no sense of urgency. It’s also easier to see because I’m not dependent on a light source. Getting the lighting right in my studio has been a huge challenge. Still working on that.
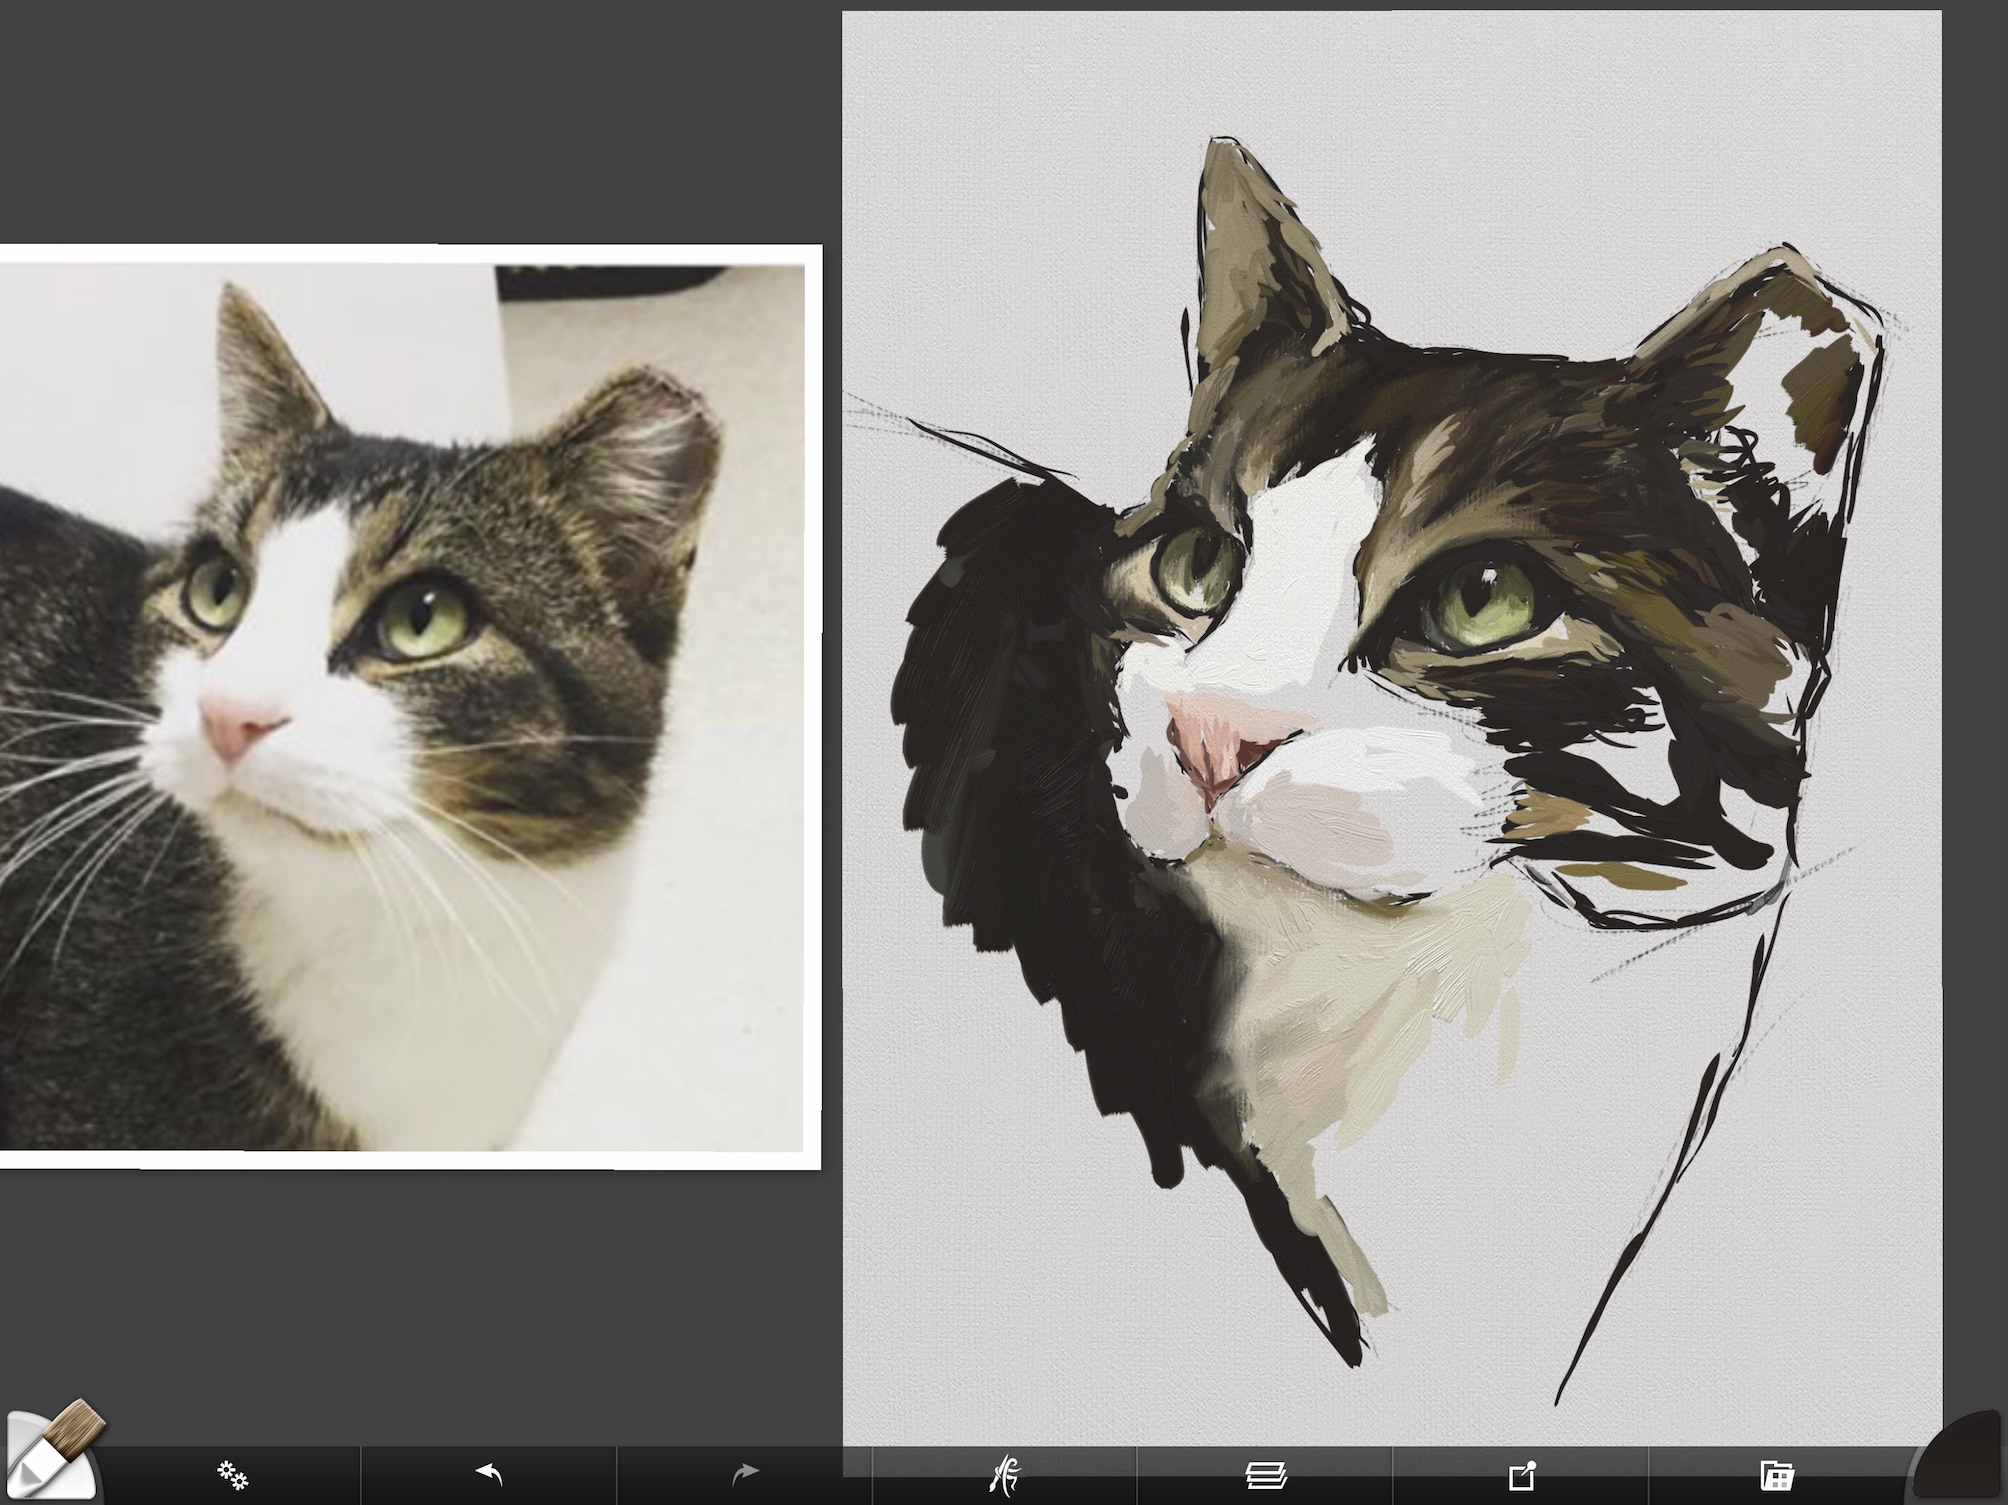
Step 11: Adding highlights on dark fur
Didn’t we already do this a few steps back? Yes, and now we are going even lighter. You can see the fur in the ears has much more depth and the highlights on the fur above the eye on the left are much more pronounced. I won’t be going as light as the fur on the photo as it is overexposed.
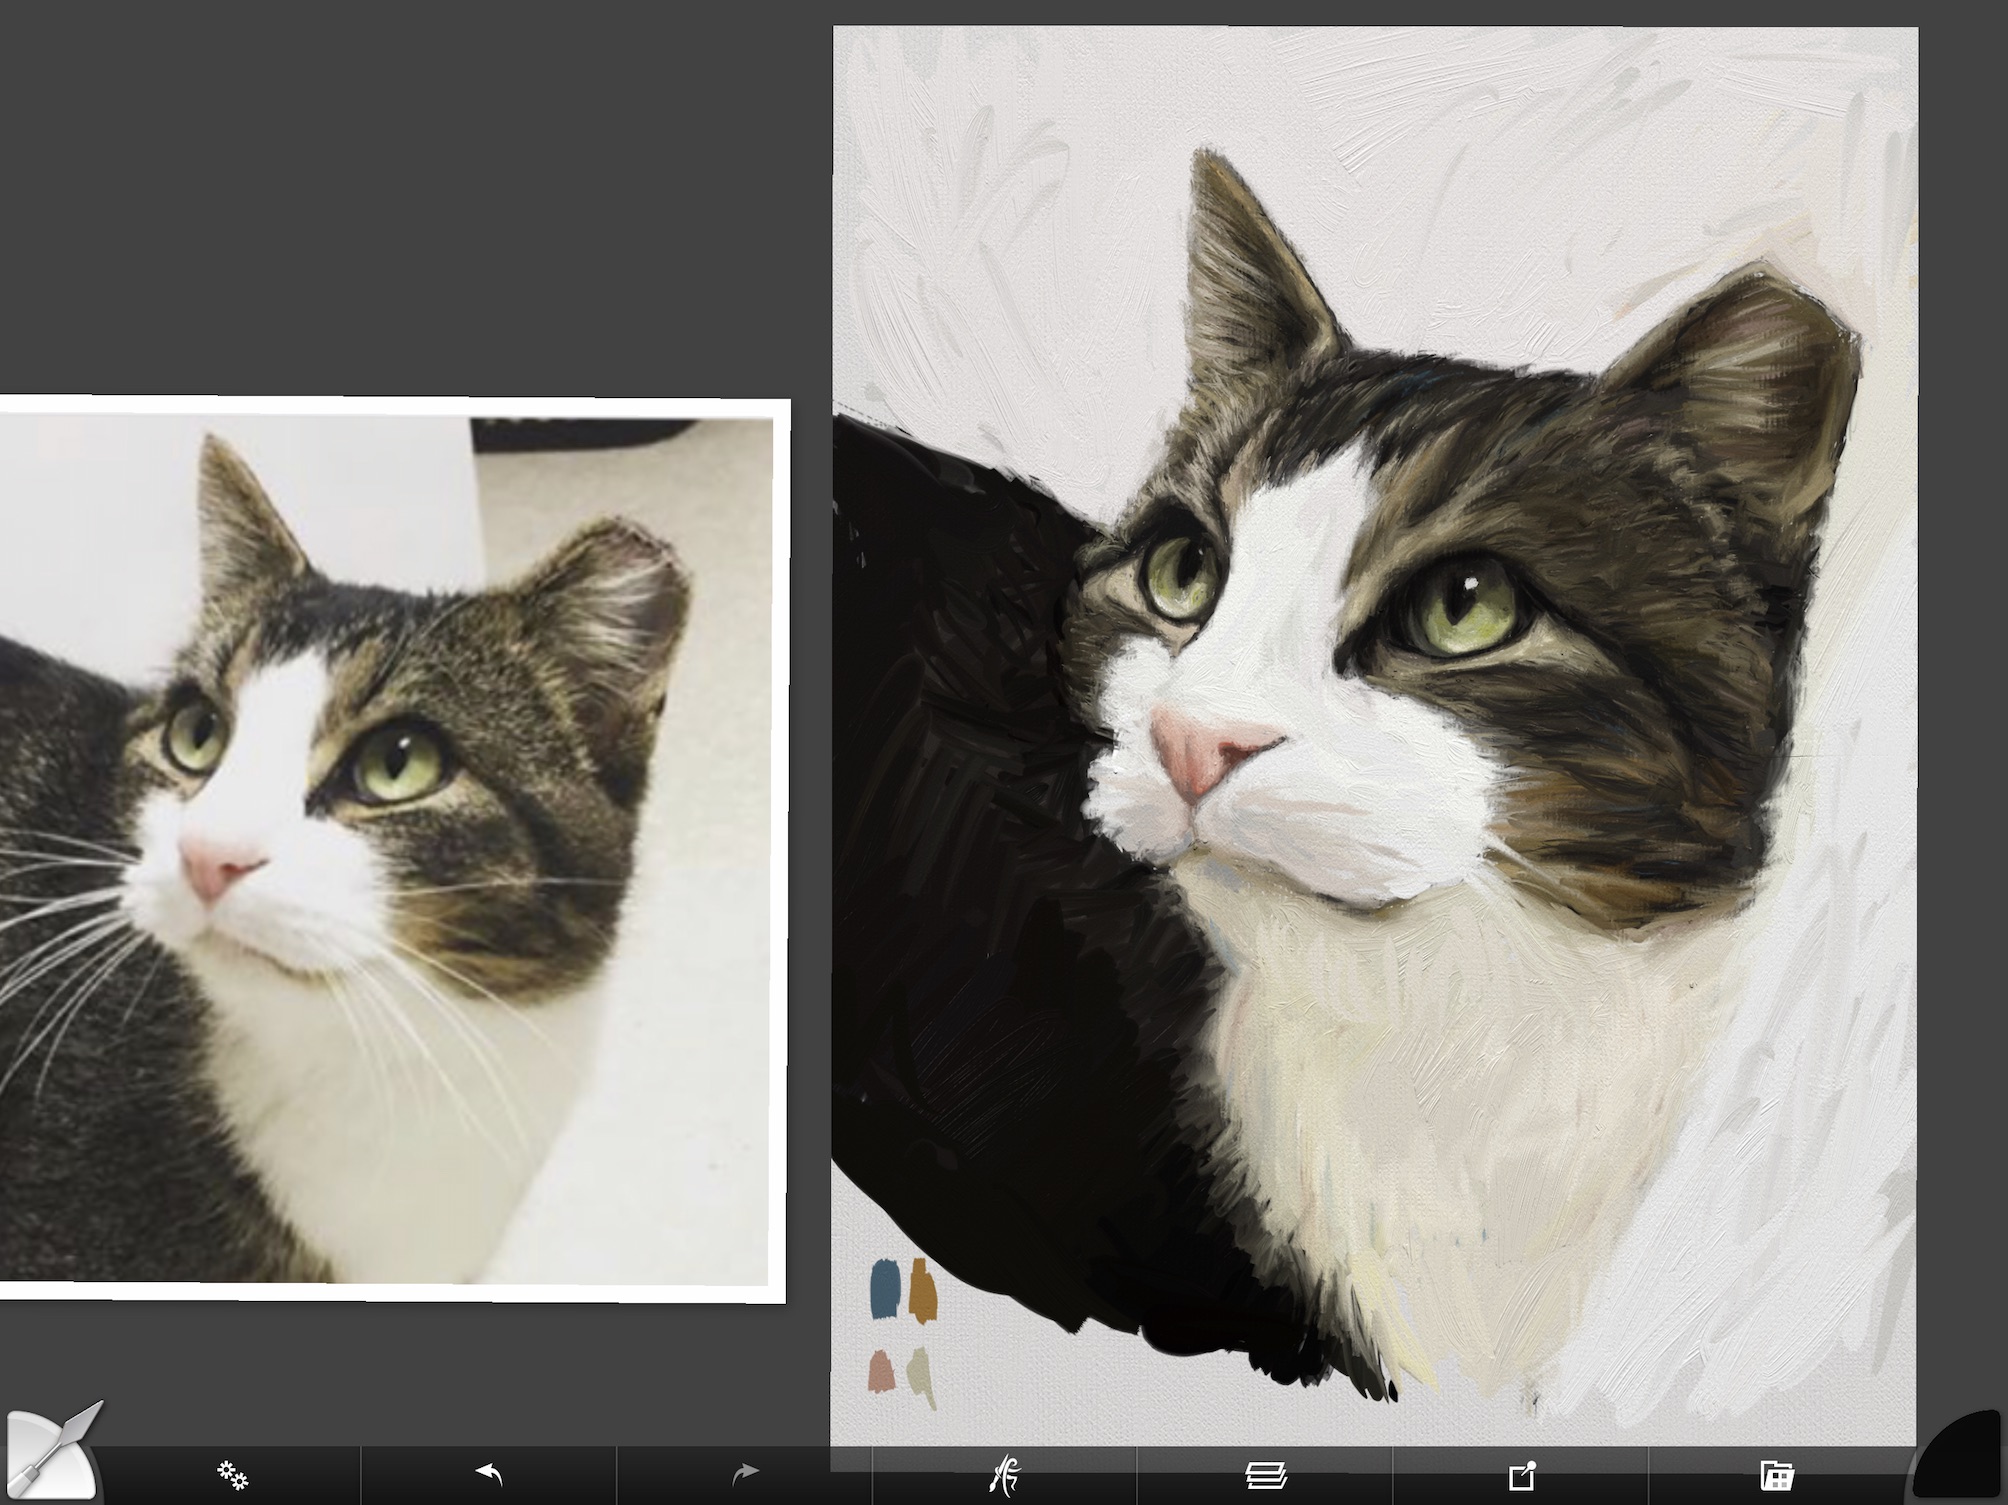
Step 12: Painting ticking on fur and whiskers on a cat
I procrastinated finishing this “Paint A Cat” tutorial because of the ticking on the fur. I didn’t want to go too detailed on the portrait but at the same time, the ticking on Tippy was gorgeous. What I ended up doing was suggest the ticking, but not go crazy with it.
As you can see above the eye on the right, I added in a lot of lighter strokes into the dark fur and then blended them very lightly with the knife tool. I started to get into the danger zone of overworking the piece, so I stopped myself before things got too out of hand.
With the whiskers, I took advantage of the layers in ArtRage. Normally I paint all in one layer mostly because I’m too lazy to bother. Also, I can’t blend colors between layers. Maybe there is a way to merge the layers and then blend, but I’ve not figured that out yet. So for the whiskers, they went on a separate layer and I played around with different size brushes.
Adding whiskers while you paint a cat takes a bit of confidence. If you are doing this on canvas, you may have to turn your painting to get the right angle. I practice my strokes on a separate canvas until I get the whisker motion down. If you make a mistake in ArtRage, you can erase or undo. On canvas, you have to paint it out. Either way, the whiskers will happen. If you paint on a panel and your paint is wet, you can use a knife and scrape the whiskers out or add a little white to the edge of the knife and swipe. I’ve never done that but it’s a clever solution.
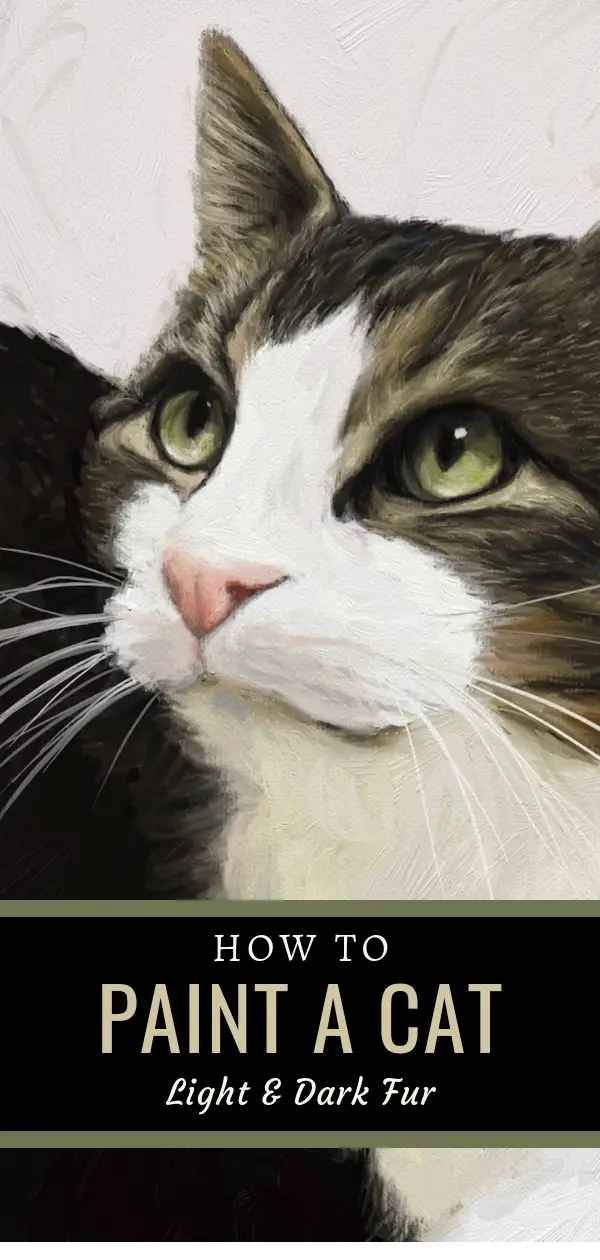
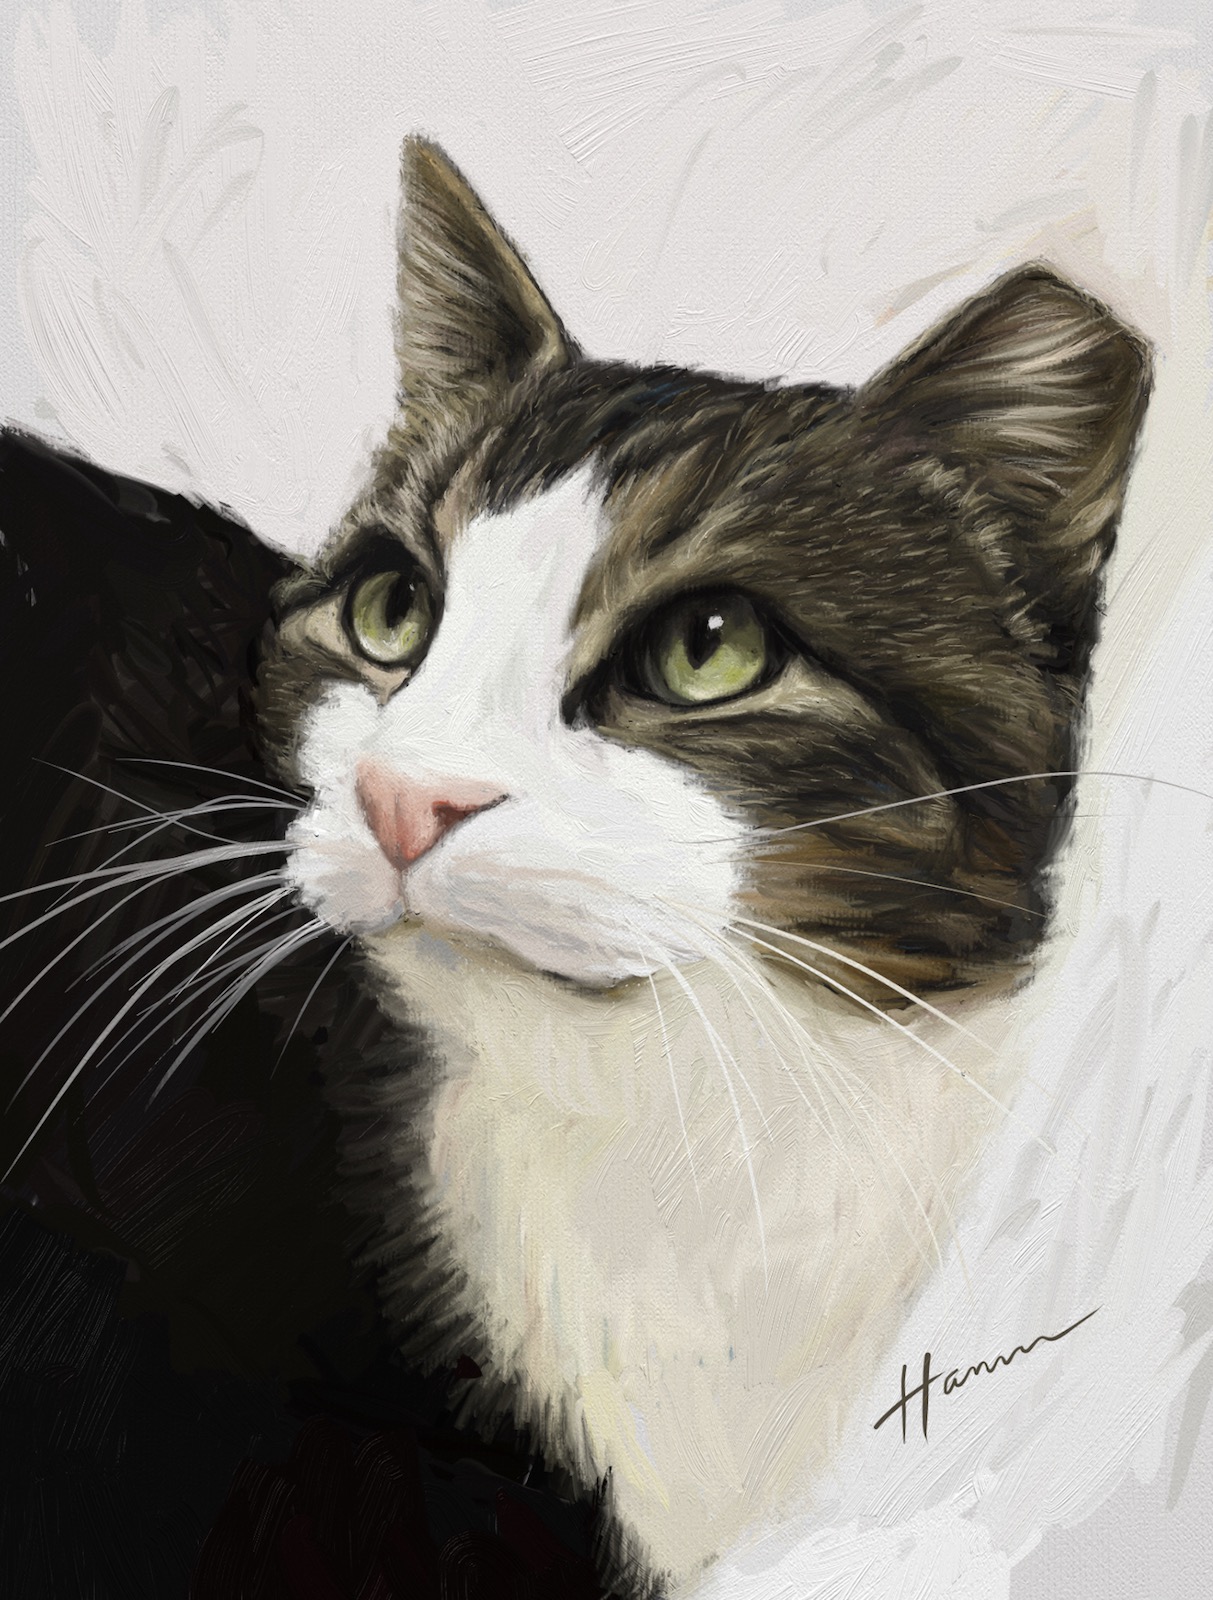
The final result of this “paint a cat” tutorial
Tippy was a fun kitty to paint. Because his coloring is a limited color palette, I made sure to leave some visible brush strokes to keep a sense of movement and energy. His light and dark coloring add a lot of drama as do the angles of his body and his upward gaze.
I’m still learning how to paint cats. For some reason, they seem different from dog portraits. I’m still striving to simplify my brush strokes, but that is a painting by painting challenge and part of the fun of making art. Once you have the basics down, you are free to choose how you want your work to look.
I hope you enjoyed learning how to paint a cat.
Other Popular Digital & Oil Painting Tutorials:

See how I paint on the iPad in this tutorial using traditional techniques.

Whether you paint in oil, acrylic or digitally, you will learn my secrets to painting silver by clicking the image above.

Click the image above for portrait painting tips.

Black fur can be tricky to paint. Click the image above to see the step-by-step tutorial.

Learn how to create a digital portrait on the iPad in this step-by-step tutorial.
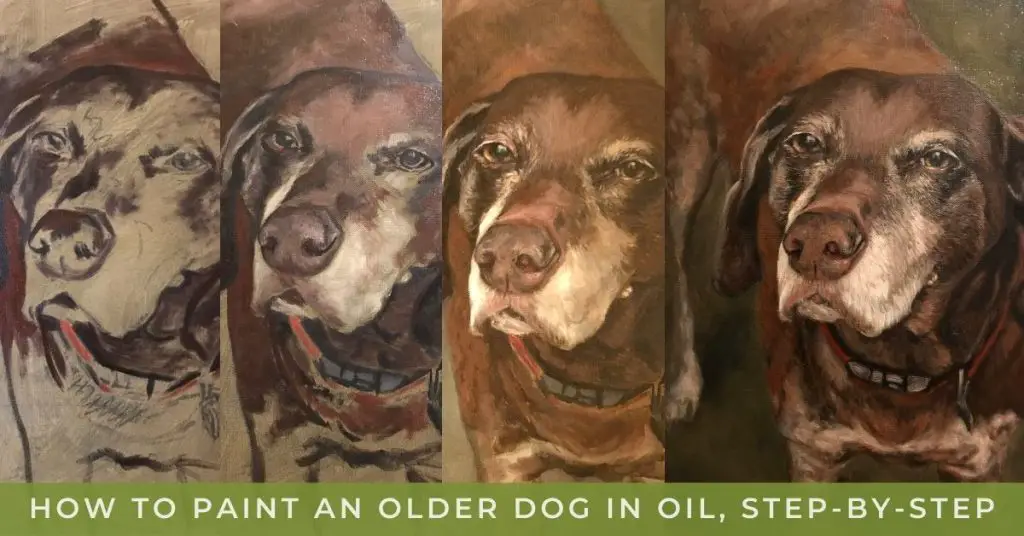
Senior dog faces have unique features. Click above to see the tutorial.
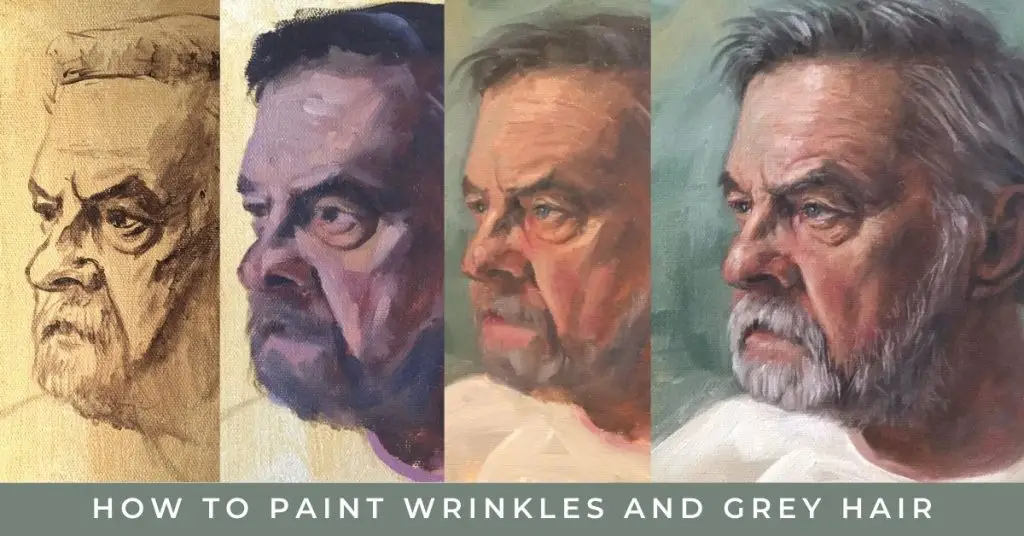
If you are unsure about how to paint wrinkles & grey hair, click the image above for 12 tips & tricks.

Learn how to paint a puppy portrait from a reference photo. Click the image above for a puppy portrait tutorial.
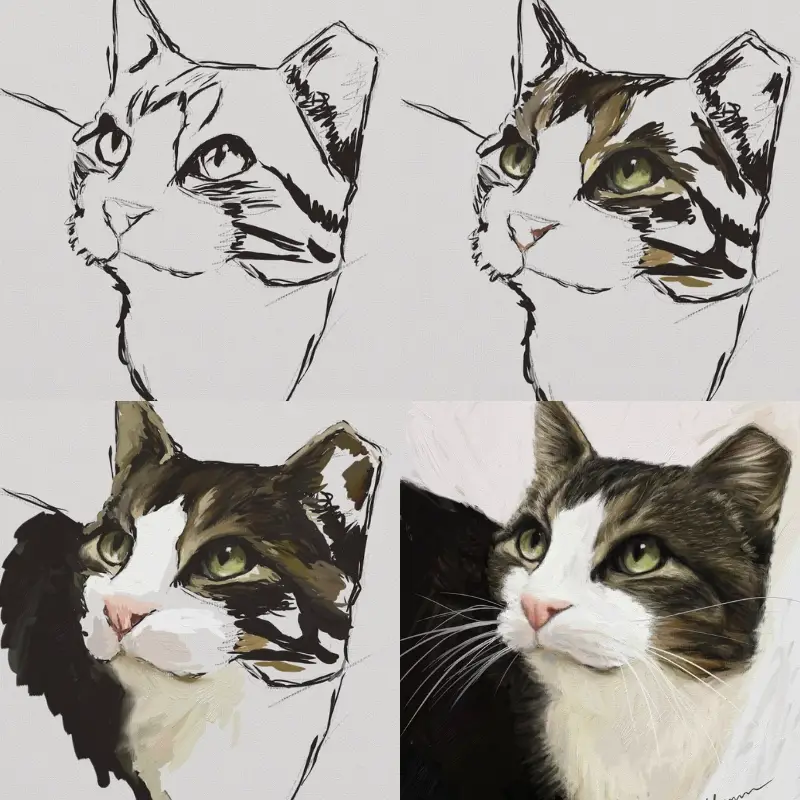
The Tippy progression: