
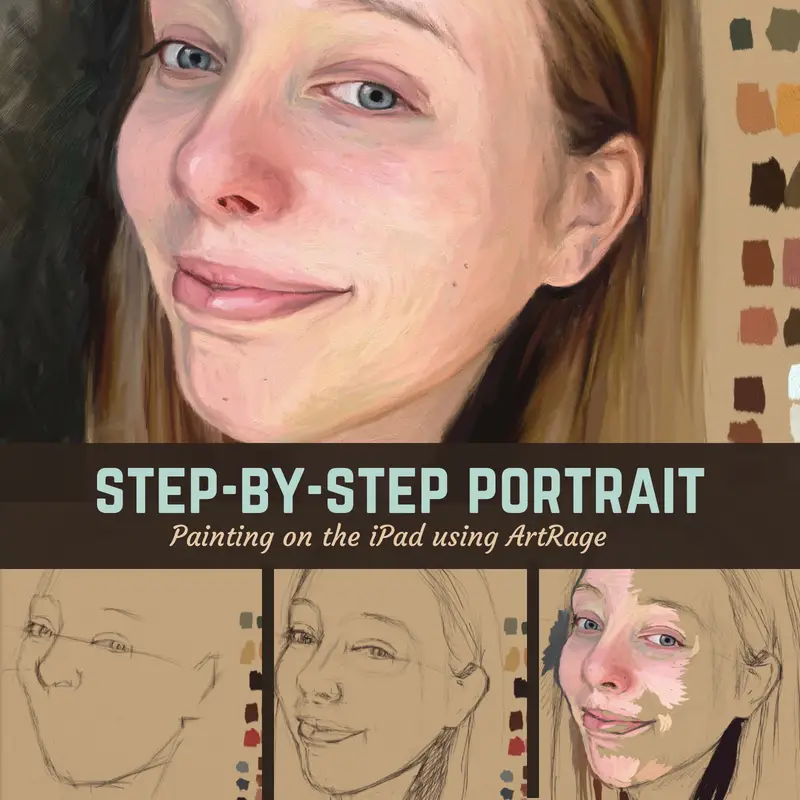
Today I will show you how I paint on the iPad, creating a step-by-step portrait in ArtRage. This program is an inexpensive drawing and painting app for the iPad that allows you to create realistic oil paintings that feels intuitive and natural. Plus, it’s a blast to play with.
The final painting was inspired by a photo I found on the Sktchy app. Sktchy is a great resource for artists looking for inspiration images and connects them to a global artist community.
Note: some of the links below are affiliate links. As an Amazon Associate I earn from qualifying purchases.
Drawing Step 1 – Paint On The iPad Using ArtRage, The Drawing Stage
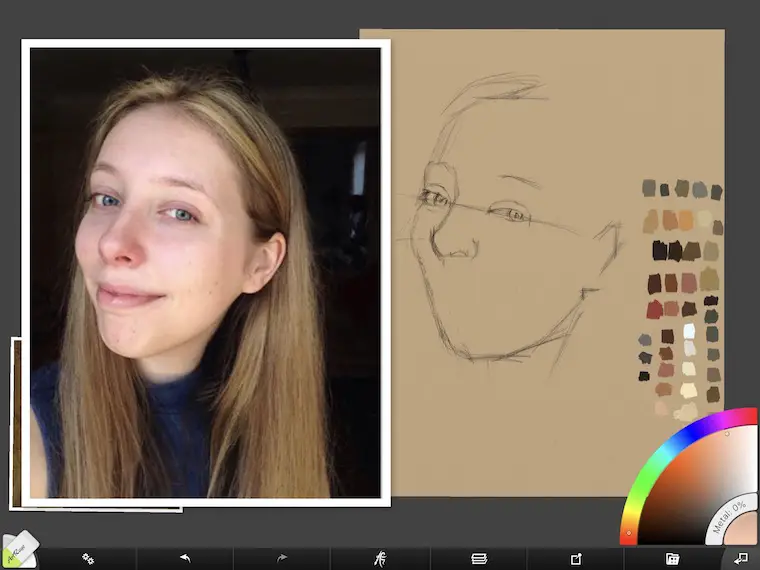
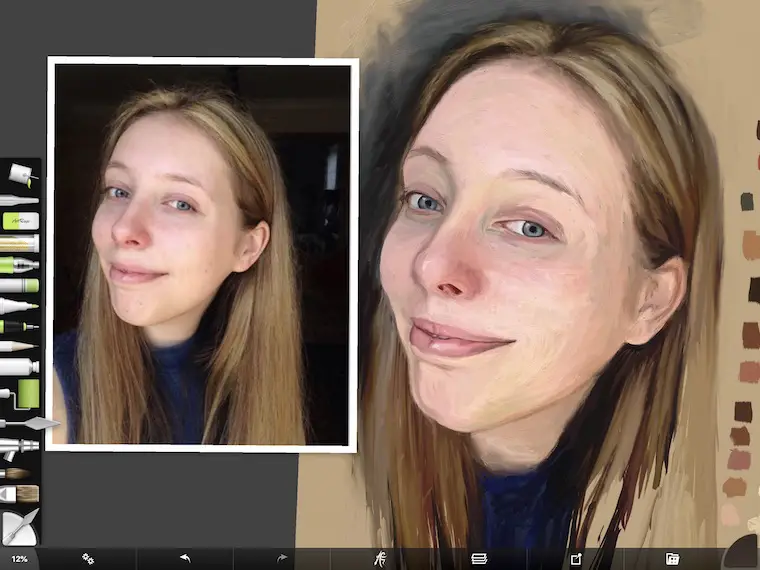
For the first step below, I loaded my inspiration photo in ArtRage, positioned it to the left and made it as large as possible. Then I positioned a toned canvas to the right. The swatches on the canvas are from a previous painting I had done in the 30 Faces 30 Days challenge. I like having swatches on my canvas when painting so they are easy to sample.
If you like painting on your computer, ArtRage has desktop versions of the program where you can bring in grids and guides to help with your drawing. The full version is ArtRage 5 and is a very robust program packed with features. There is also a Lite version of the program that is very feature rich, but at a lower cost. If you love the look of oil painting and like digital art, this program has you covered.

Drawing step-by-step in ArtRage step 1
For the drawing, I used the pencil tool and started with drawing simple shapes and angles. Last year in a painting class I learned the envelope method for drawing. I never really got the hang of it, but keep trying it as I think it has value in helping to see overall shapes. In the image above I started the envelope on the left side and then sort of switched to using the sight-size method.
Drawing Step 2 – Measuring
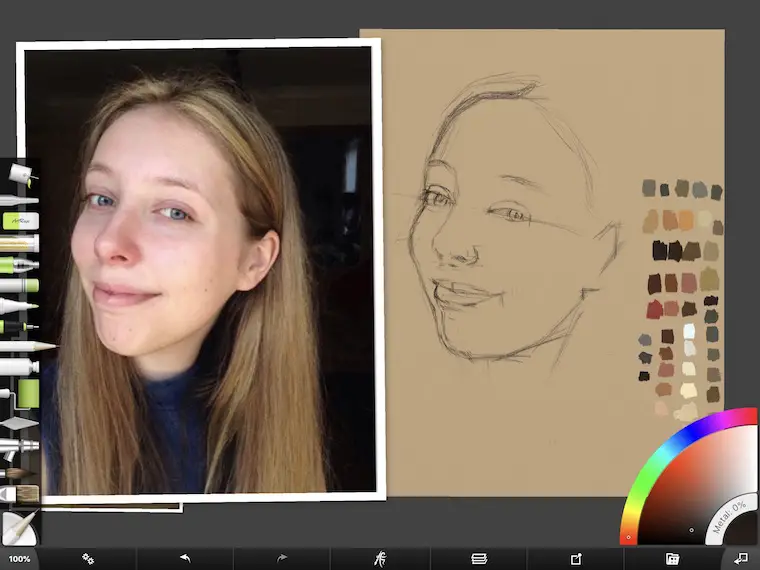
Sight-sizing is a little difficult to do on the iPad Pro, but will help to get fairly accurate measurements. I did this by taking my Apple Pencil and holding it horizontally over the photo. For example, I lined up the tip of the pencil on the left cheek, then measured the distance from the edge of the cheek to the edge of the nose. Then I placed my thumb on the pencil where the edge of the nose was positioned and moved the pencil over to my drawing.
On the drawing, I lined up the tip of my pencil to the edge of the cheek and made a mark in the location where my thumb was on the pencil. The trick is to keep your arm stretched the same length and head in the same position. For traditional drawing, you’d be standing holding your arm out straight. Not as easy to do with short distances since you most likely will have a bent elbow. It can be done! It may be easier to use a proportional divider and transfer measurements.

Drawing step-by-step in ArtRage step 2
Normally I would just start loosely sketching in a gestural drawing and then go in and check my measurements, but I’m trying out different techniques and working on increasing my skills. There are many ways to approach a drawing and no one way is the ultimate right way.
Drawing Step 3 – Ummm, Something Is Very Wrong Here
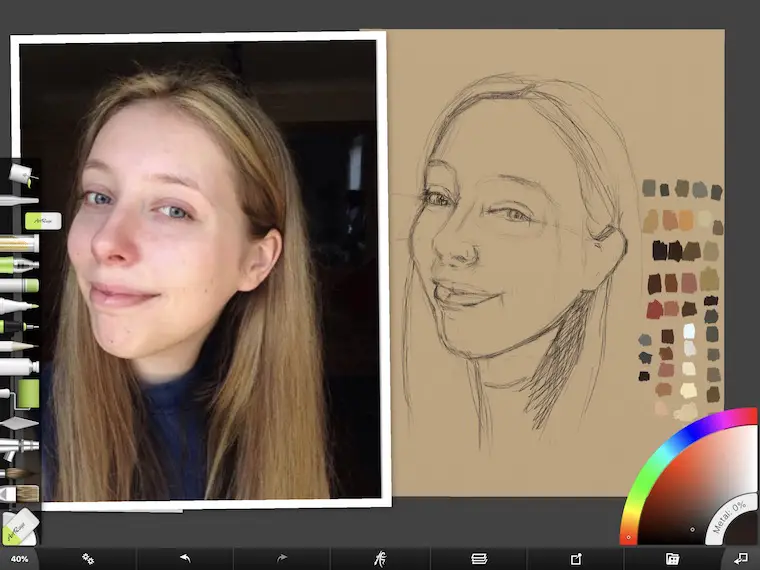
In my attempt to be accurate in measuring, I lost sight of the overall picture and completely got the angle of the cheek on the left side wrong. This is where having the photo the same size of the image you work on comes in handy. You can quickly look back and forth to see the differences from the reference image to your artwork. Clearly the angle on her face needed adjusting!

Drawing step-by-step in ArtRage step 3
Drawing Step 4 – Making Corrections
In the image below, you can see that I corrected the angle. This is important to correct, otherwise all the other measurements I would make on the lower part of the face would be completely off. Correcting mistakes is all a part of the process. The more you draw, the better you get. No matter how much you draw, there are always corrections to be made.
When I do traditional paintings, I start out with vine charcoal or a charcoal pencil so it’s easy to rub out misplaced marks.
Drawing step-by-step in ArtRage step 4
Drawing Step 5 – Starting To Get A Likeness
While in the image below there are still corrections in measurement to be made on the lower face, it is clear that I’m starting to get a likeness. Normally when I paint on the iPad, I wouldn’t go to such lengths to get the drawing really accurate since the corrections can be made with paint, but for the purposes of this article I thought I’d take it a little further and practice my drawing skills.
Drawing step-by-step in ArtRage step 5
Drawing Step 6 – Refining, Measuring, Further Adjustments
Below, I’m working on getting the ear and jaw positioning accurate. When looking back and forth on the drawing, something seems off and I double-check my measurements again. I realize at this point that the ear needs to be re-positioned further to the right.

Drawing step-by-step in ArtRage step 6
Drawing Step 7 – Roughing In The Hair, Determining Shadows
Once I placed the ear correctly, I was able to move on to sketching her hair in loosely and started blocking in some shadows. There is a little trouble with the placement of the eye on the left side, but that will be corrected later when I get to the painting stage.
Drawing step-by-step in ArtRage step 7
Drawing Step 8 – Lightly Shading In Values
Getting the values right is key to any representational art. If you don’t take care to study and understand values, it will be very difficult to get the form to look right. Squinting your eyes is a very helpful trick to seeing values. Below, I’ve lightly shaded in a few areas to establish form that will help me to see the overall portrait come together.
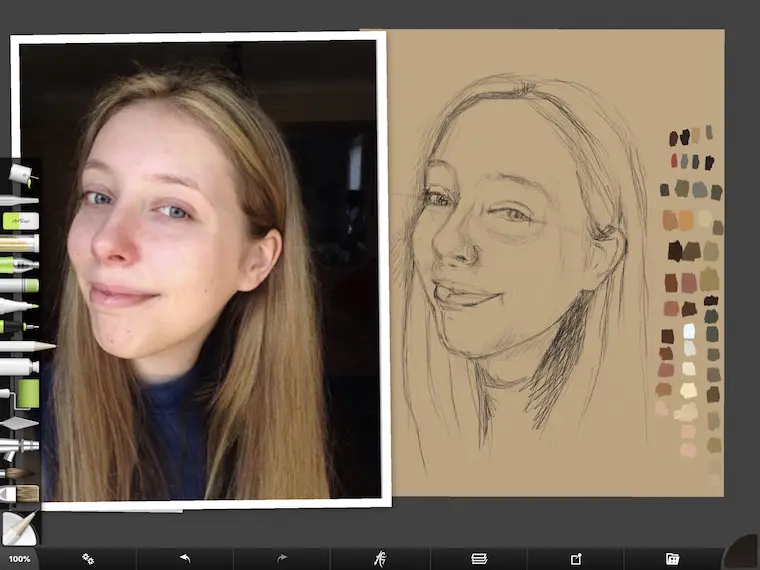
Drawing step-by-step in ArtRage step 8
Painting Step 1 – Let The Painting Begin!
It took a lot of restraint to keep me from selecting the oil brush tool about five steps ago. In a real life painting, I would paint in the values more with a burnt umber underpainting. This can be done in ArtRage as well, but since I did more drawing and shading than I normally would, I decided to get started with the paint.
When I paint on the iPad, I like to start with the eyes. For some reason if I don’t get at least one eye in, I have a little anxiety as to whether the painting will turn out. This is irrational, but it’s what happens to me.
Painting step-by-step portrait in ArtRage step 1
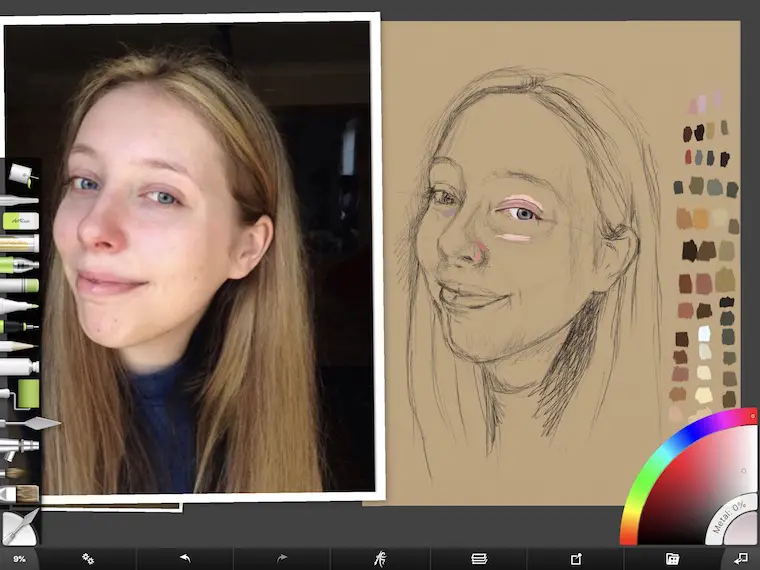
Painting Step 2 – Noticing The Variety Of Colors In Skin
I’ve been trying a lot of different methods for painting portraits and one of my favorites has been to lay down blobs of paint with the oil brush tool and then go back in and lightly blend areas together with the knife tool. In the image below, you can see where I’m starting to establish some of the coloring in her skin tones. I’ve also worked on positioning the eye on the left a little more.
There are a lot of blues, purples and reds around the eyes and nose, so I’m taking care to notice these colors and mark those areas.
Painting step-by-step in ArtRage step 2
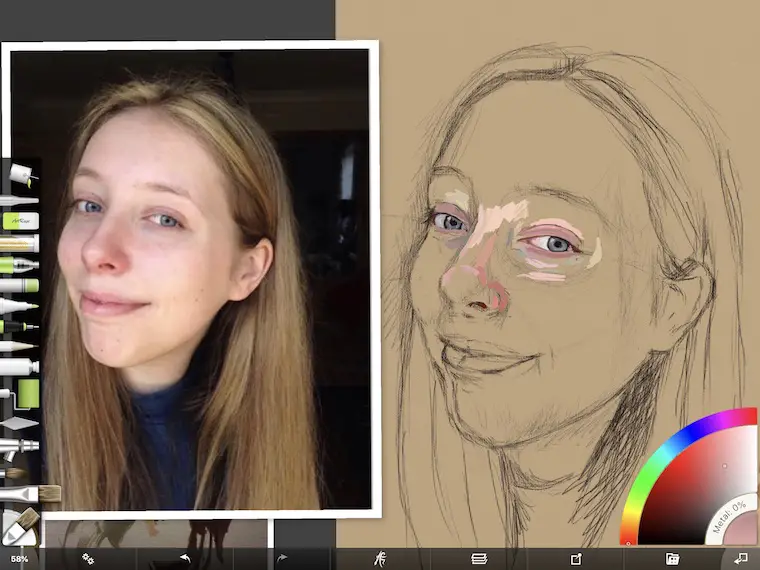
Painting Step 3 – Coloring In Larger Areas
By step three I wanted to start covering the canvas a little more. For a traditional painting, I would block in the medium value of the skin all at once after establishing the dark areas. This is easy to do with large brushes. With ArtRage in the iPad app, the brush size is limited so I find I don’t do that as much in the program. This is not an issue with ArtRage 5 for the desktop.
The reference photo doesn’t have a single light source to establish dramatic light and dark areas. This makes it more difficult to get the subtle areas of form correct. (Note to self, pick reference photos with higher contrast.)
Painting step-by-step in ArtRage step 3
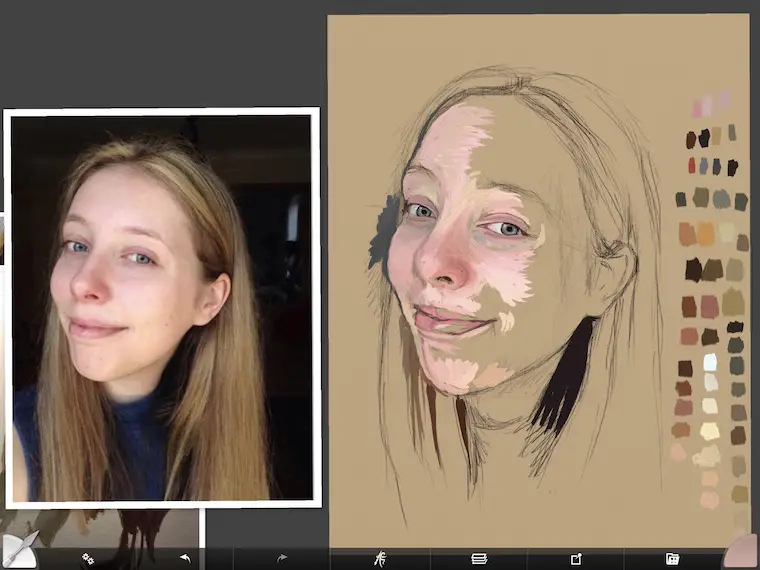
Painting Step 4 – Large Areas Blocked In
With step four, I got swept away in the painting and didn’t take as many progress photos as I would have liked. I got on a roll laying down the paint! As you can see, I haven’t done much blending. What I’m doing when I get to this stage is a lot of squinting and comparing back and forth between the reference photo and the painting.
As I mentioned above, because there isn’t strong contrast it is more difficult to capture the subtle values that create form. I needed to darken areas on the right side near her temple to get more contouring in the cheek area.
Painting step-by-step in ArtRage step 4
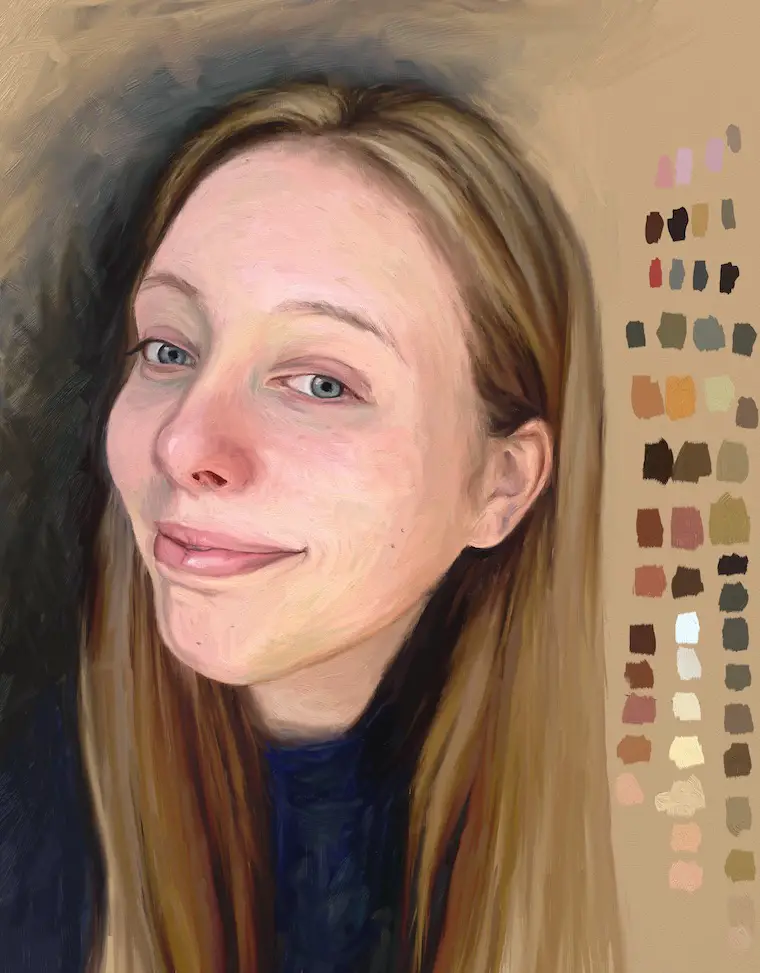
Painting Step 5 – The Final Painting
I consider this portrait to be a study, so I didn’t finish the background of the painting. I like to leave my swatches on the studies so I can pick them up for future paintings.
Overall, I’m happy with how this turned out. I made an effort to not go too crazy blending everything together so the painting had a little energy and movement. I could go in and add more highlights, contrast and complimentary colors if I wanted to amp up the drama in the portrait, but it’s better to start with an image that has more drama to it via lighting rather than making it up on your own. You run the risk of the portrait not looking realistic when you stray too far from the original.
Painting step-by-step in ArtRage final painting
Other Popular Digital & Oil Painting Tutorials:
iPad Painting Tutorial – How to Paint A Cat
https://shelleyhannafineart.com/paint-a-cat/
Tips For Painting Silver Objects
https://shelleyhannafineart.com/painting-silver-objects/
8 Tips for Painting Black Fur
https://shelleyhannafineart.com/8-tips-for-painting-black-fur-traditional-digital/
7 Portrait Painting Tips For Traditional And Digital Painters
https://shelleyhannafineart.com/portrait-painting-tips/
How To Paint A Dog Portrait Step-By-Step In Oil
https://shelleyhannafineart.com/how-to-paint-a-dog-portrait/
Painting A Cat In Oil Featuring Prescott, A Gorgeous Maine Coon Cat
https://shelleyhannafineart.com/painting-a-cat-in-oil/
Final Thoughts
I’m still learning to paint on the iPad using ArtRage, have tried ProCreate and am noodling around with Sketchbook Pro (which I just downloaded for free!). For traditional painters, painting digitally will never be as satisfying as laying paint down on canvas and having a finished painting you can hang on the wall when you’re done. Although you can print it out on canvas and it looks pretty darn good.
It has been a lot of fun learning new ways to create art and I think it’s helping me to practice my craft more. I’ve downloaded the full ArtRage program and am learning how to navigate the program when time allows. The other weird thing is that when I paint digitally, it gives me a strong desire to get back on the easel. As a matter of fact, that’s where I’m heading right now. Stay tuned!