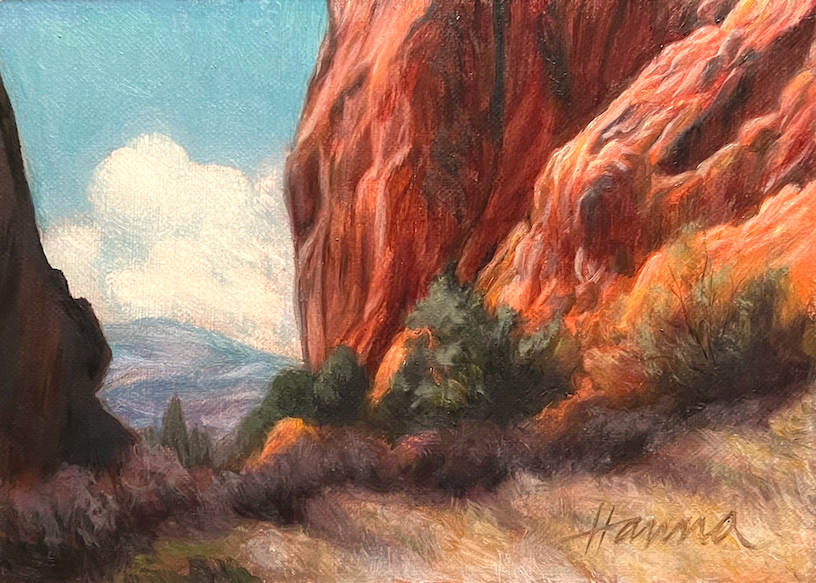
Are you ready to take your landscape painting skills to the next level? In this tutorial, you’ll discover essential techniques and tips that both beginner and experienced artists can use for creating stunning landscape paintings.
In this tutorial, I will go through my 10 step process of painting a landscape in oils, from prepping the canvas to sketching out the composition and adding the finishing touches. So get out your paints and brushes, because we’re about to get creative.
Note: some of the links on this supply list are affiliate links to Amazon, which means if you use the link I will get a small commission. This, of course, is at no additional cost to you. Using these links allows me to keep this website running. Thank you so much for supporting a fellow artist.
Step 1 – Prepare The Canvas
Start off on the right foot by priming your canvas before you start painting. I had a 5″x7″ oil primed linen panel ready to go before I started (I like the acrylic primed linen canvases as well). I love working on linen canvases as they have a smoother surface than the cotton canvases you would buy at places like Michaels.
If you only have a cotton canvas, no worries. I would suggest adding another layer or two of gesso and lightly sand between coats to get a smoother surface. Make sure your canvas is fully dry before you start painting.
Step 2 – Plan Out A Composition For Painting A Landscape
Ideally, you have a landscape subject for your painting already in mind. For the painting I did, I had the reference photo below I was working from.
What I chose to do was take the image into Photoshop and do a little “tweaking”.
The first thing I did was increase the saturation of the photo. I was looking at some paintings done by Edgar Payne and used one of his color schemes for inspiration. I would encourage you to look at a lot of landscape paintings done by people you admire so you can get an idea of where you want to go with your work.
After changing the saturation of the photo, I moved some elements around to create a composition that felt more dramatic. In the image below, I increased the size of the rock formation on the left side. This created a “window” for the viewer to look through between the two rock formations.
Make The Golden Ratio Part Of The Plan
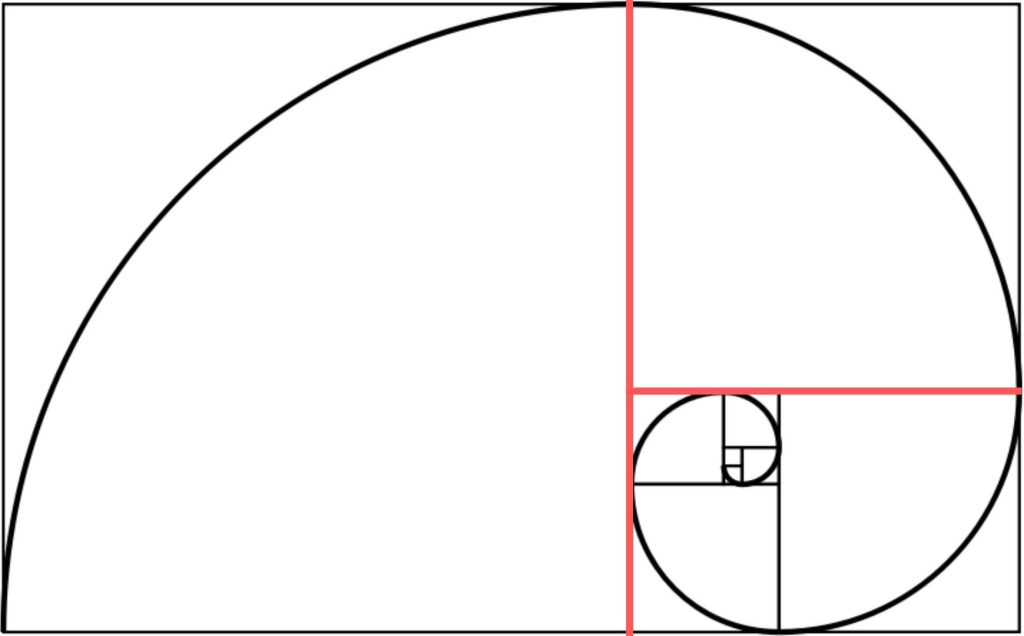
The golden ratio, also called the golden mean or the golden section, is a mathematical concept that shows how two numbers relate to each other when the ratio of the sum of the numbers to the bigger number is the same as the ratio of the bigger number to the smaller number. I know, a little hard to explain in words, which is why I’ve added the graphic below.
The golden ratio has a value of about 1.61803398875. If you would like a deeper dive with detail, visit the golden ratio page on Wikipedia.
Used in art, architecture, and design, the golden ratio has an aesthetically pleasing quality. It is used by artists to make compositions that are harmonious and balanced.
The golden ratio is also found in nature, such as in how leaves are arranged on a stem or how the spiral in seashells are formed.
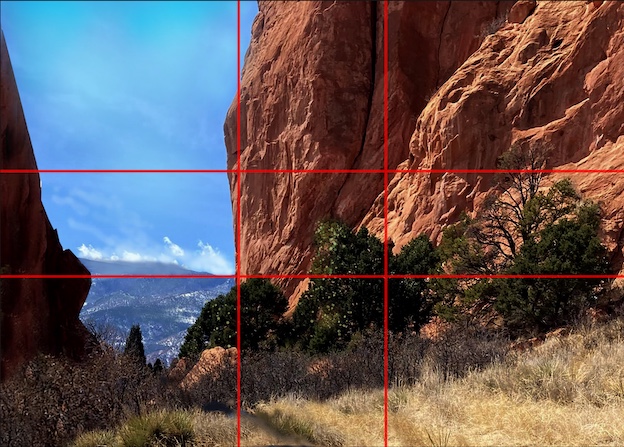
Below you can see how I applied the golden ratio grid to my reference image.
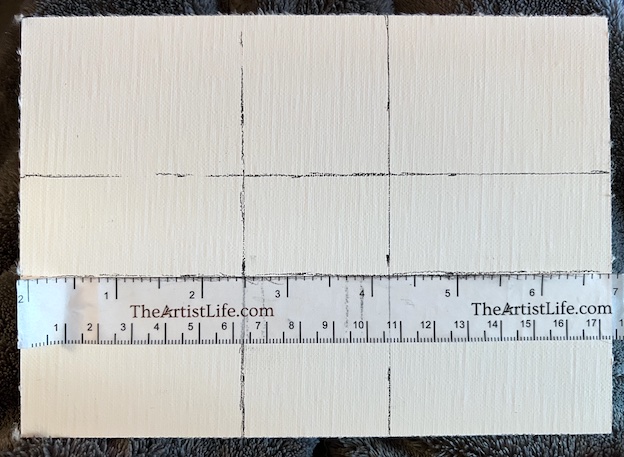
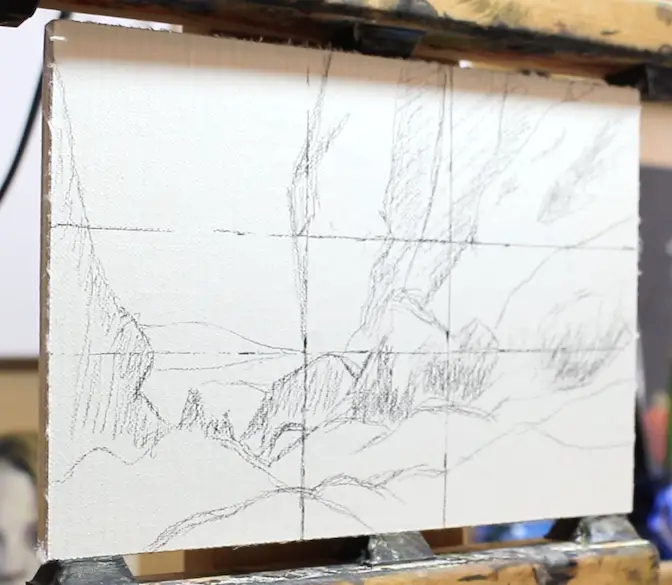
I drew the same grid onto my canvas to help me sketch out the image in charcoal. You must make sure the image you are working from is the same proportion to your canvas in order for your drawing to be accurate. I made my image in Photoshop the same size as my canvas panel.
Step 3 – Establish Values Early On
Once you have your composition laid out, you can begin to establish a value structure. Working out your lightest and darkest values helps to give your painting depth and perspective. A grey scale and value finder is an inexpensive and handy tool that really helps when mixing correct values.
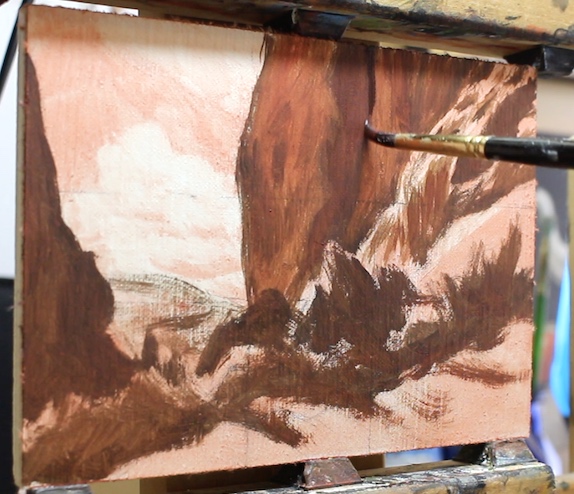
In the photo above, I used burnt umber thinned with a little Gamsol to reinforce my drawing. After that dried, I made a thin red mixture and washed it over the canvas to tone everything with the lighter red color.
You can see where I went back in with a rag and wiped out the area for a cloud. You have a little time to play with the thin layers of the paint and can get a good indication of values this way.
If you’d like more information on mediums to use in oil painting, check out this article.
Step 4 – Begin Blocking In Color
After the values are defined, you can begin blocking in the primary colors of the landscape. There are many ways to approach painting and I like to try different methods when I paint.
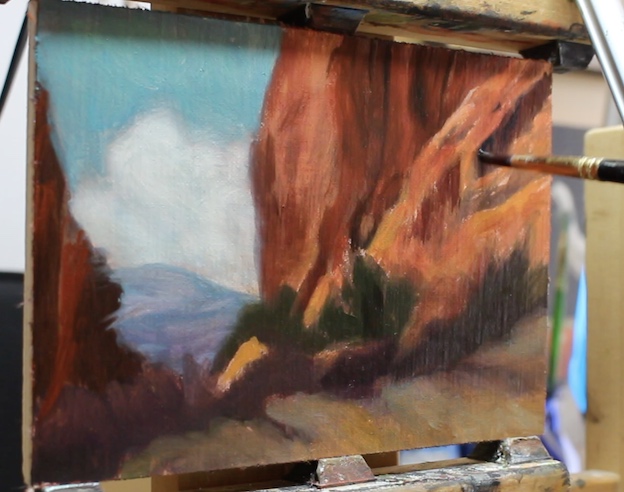
For this landscape painting, I started with red tones of paint thinned with solvent. I then started adding, more opaque layers of paint to further define basic shapes. It is best to keep your first layers rather thin using a solvent such as Gamsol and then build up to layers containing more oil to follow the fat over lean principle.
“Fat Over Lean” means putting a layer of paint with more oil on top of a layer with less oil. It has nothing to do with how thick the paint is. If this principle is not followed, you could end up with paint that is cracking or not adhering well.
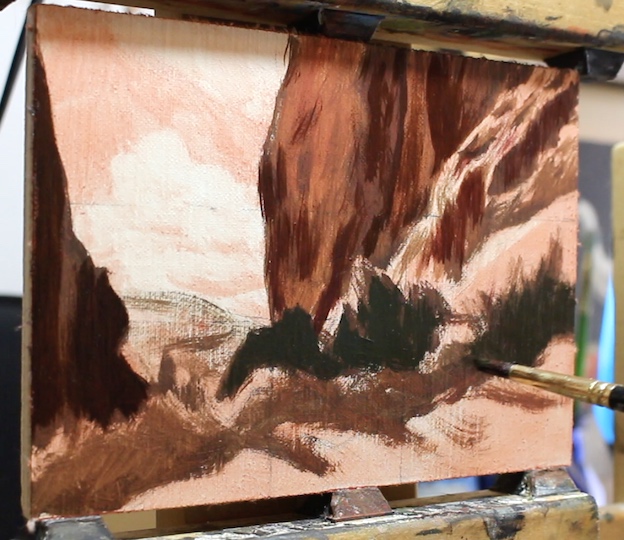
Above, I am roughly blocking in the shapes of the trees using a larger brush. Detail work and highlights will be added in toward the end of the process.
Step 5 – Use Color To Create Distance In Landscape Paintings
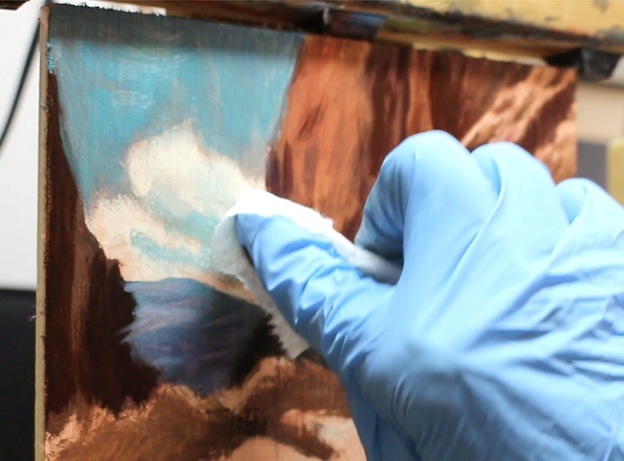
Part of my plan for this painting was to make use of complementary colors not only for visual appeal, but to create atmosphere. The orange/red hues of the rocks in the foreground of the landscape painting perfectly complement the turquoise blue sky and blue/violet mountains in the background.
Cobalt teal by Gamblin has been one of my favorite colors for adding complements to warm tones in both landscape paintings and portrait paintings. It is a “warmer” blue and is gorgeous when mixed with other colors.
Due to the effects of atmosphere, anything in the distance of a landscape painting will take on blue or violet tones. As you move forward in the landscape, warmer tones will become more saturated.
If you keep this in mind when you do landscapes, you will create a sense of distance or atmospheric perspective. Just remember, cooler blue tones push back and warmer yellow/orange tones move forward.
Since I’ve started to incorporate lead white paint into my palette, I’ve been using nitrile gloves for safety reasons. It’s also great for not having to constantly clean paint off my hands.
Since lead white is more transparent, I will mix the lead white 50/50 with titanium white to increase the opacity. There are no words to describe how beautiful lead white can make a painting. I highly recommend it, but use caution while handling. Lead white is quite an investment, but if you’ve been painting for awhile, it is worth the extra money.
Avoid any titanium white that includes PW4 on the label. The PW4 means it contains zinc, which is not archival. Lead white should be marked on the back with a PW1 while titanium white should have a PW6 on the back of the tube. Lead white, PW1, is the most durable white over time. If you are wondering what the PW’s stand for, it simply means Pigment White.
Step 6 – Use Complementary Colors In Foreground For Visual Interest
In the image below, you will see that I’m adding in a deep plum color which would appear opposite the color wheel from a dark green. While these tones are not highly saturated, they do create a sense of balance and harmony.
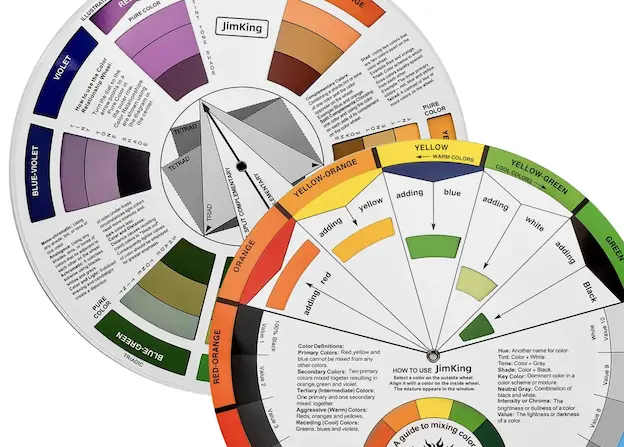
Having a color wheel nearby when you paint can help you to make decision on what color can be used to create visual interest in your work. Color wheels specifically for artists will also show what color you will get when adding different colors.
If you want in-depth information about all aspects of color for oil painting, I would encourage you to check out The Oil Painter’s Color Handbook by Todd M. Casey. It’s a must have for any artist.
Step 7 – Carve Out Shapes By Reinforcing The Dark Colors
After I’ve blocked in all my basic colors, it’s time to go back in and reestablish dark areas. I usually begin with larger dark shapes and then work my way down to smaller shapes. A focus on detail will come in a later pass, although it is tempting to start adding details at this stage.
I squint my eyes a lot while I paint, always looking to match values as I carve out the variety of shapes with color.
Step 8 – Pay Attention To Edges
Edges are important in oil painting because they help define the shapes and forms in a painting. They also create a sense of depth in how the different shapes in the composition relate to each other in space.
You can use hard edges to give the impression of clarity and definition, and soft edges to blend and integrate a subject which creates depth. The human brain is excellent at completing the shape of an object that isn’t fully outlined. I think the use of soft or lost edges in a painting can add a lot of interest and intrigue for the viewer.
By using different kinds of edges in paintings, artists create compositions with a sense of spatial complexity and visual interest. Additionally, edges can also be used to guide the viewer’s eye around the painting and draw their attention to certain parts.
I’m using a combination of soft and hard edges in this landscape painting to create atmosphere and interest.
Step 9 – Take A Break And Then Add Details
One reason to take a break is that it allows you step back and look at your work from a distance. This can help you spot mistakes or areas that need more work.
If you’ve been working on the painting for a long time and are too close to it, this can be hard to do.
Leaving the room completely gives your mind and body a break, which can help you come back to your work with fresh eyes. It’s easy to lose track of time when you’re busy working, but it’s important to give yourself time to rest and refuel. I like to set a timer to remind me walk away for a bit. Check out this article for more of my painting tips and tricks.
Oil paints usually take a long time to dry, so taking breaks of a couple days or more allows the paint dry between sessions. This is great for working in layers. If you need your paint to dry faster so you can continue painting the next day, using Liquin as a medium can really speed up drying time.
Step 10 – Add Glazes To Darken Areas And Add Harmony
To give the landscape more depth and richness, I used glazes which are thin layers of translucent paint layered over opaque paint. You can create depth and a sensation of light by applying multiple layers of glazes to the painting.
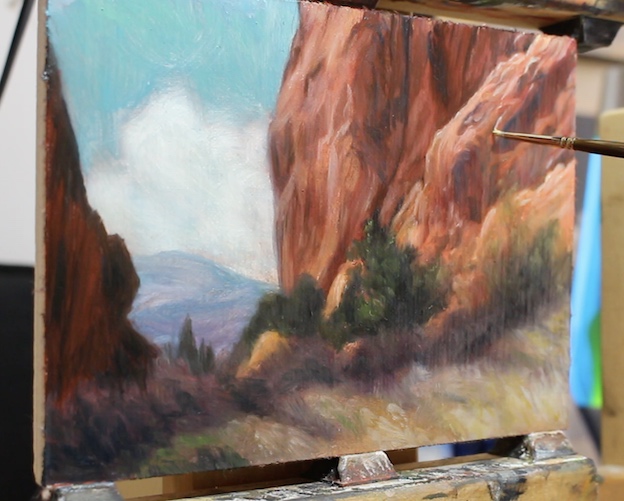
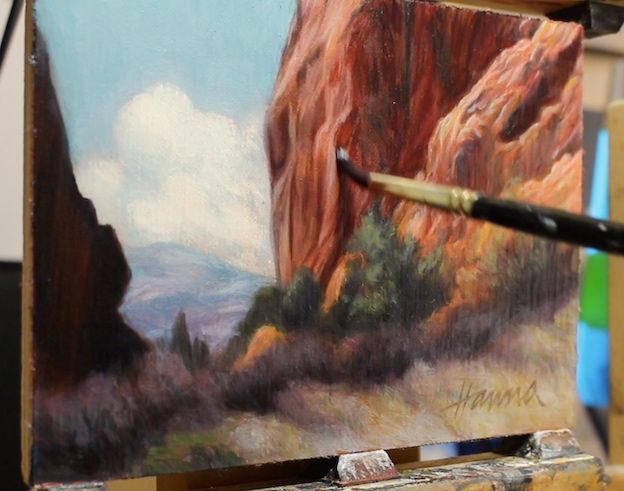
If you look at the image above and then the image below, you will see I’m adding glazes to deepen the shadow area of the rock formations. I used a mixture of quinacridone red and trans red oxide to add transparent layers.
Other transparent paints to use for glazing include transparent orange, phthalo green, pthalo blue, and diaoxazine purple among many others. You can always add more oil to any paint to create glazes. It’s just really fun to play with the more transparent colors straight from the tube. You will find more information about a color’s transparency on the tube or the paint manufacturers website.
Finishing A Landscape Painting – How Do You Know When To Stop?
Knowing when a painting is finished is a matter of opinion. For this little landscape, I wanted to keep things very loose and expressive. I could have added a lot more details, but that wasn’t the goal for this work. I wanted a representational painting that was more on the side of impressionism rather than going for full on photo realism.
For many painters, a painting is complete after they have achieved their ideal composition, everything is in proportion and the colors are working harmoniously throughout.
Other painters will keep at a piece until they are certain that every last detail has been considered. I would suggest starting the painting with the end in mind so you have a good idea of when to put the brush down. Nothing is worse than putting in hours and hours on a painting only to step back and feel like it is overworked. Studying master works really help in understanding what is needed to make a painting complete. Sometimes less is more.
Thanks For Stopping By The Studio
If you liked this tutorial and want to learn more, check out the tutorials and articles listed below. Happy painting.
How To Paint White Fur – Painting A White German Shepherd Step-By-Step
How To Paint A Realistic Portrait – Avoid These 11 Mistakes!
How To Paint A Digital Portrait – Step-By-Step With Pictures

